Some good fortune on my part, the aligning of the planets, and tremendous generosity from the Comptroller of the Treasury (LOML) allowed me to purchase one of the most desired items for many woodworkers: a cabinet tablesaw. This type of tablesaw is so named for the steel cabinet that contains the saw parts and motor. The more common Contractor style tablesaw has its motor hanging out the back. The cabinet tablesaw is more expensive, but provides the benefits of more power, less vibration, and ease and stability of adjustments. There are many manufacturers of cabinet style tablesaws, but a number of factors (not least of all being a wickedly good sale by Woodworker's Supply) led to my decision to purchase the Delta Unisaw.
I chose the least expensive model available, in a left tilting version. This model tilts the blade toward the left as the saw operator stands at the front of the saw. The fence supplied with the saw was the 30" version of Delta's Unifence. I had the Incra TS-III aftermarket fence installed on my Contractor's saw, but I decided to give the Unifence some use to see if I wanted to keep it or install the Incra on the Unisaw.
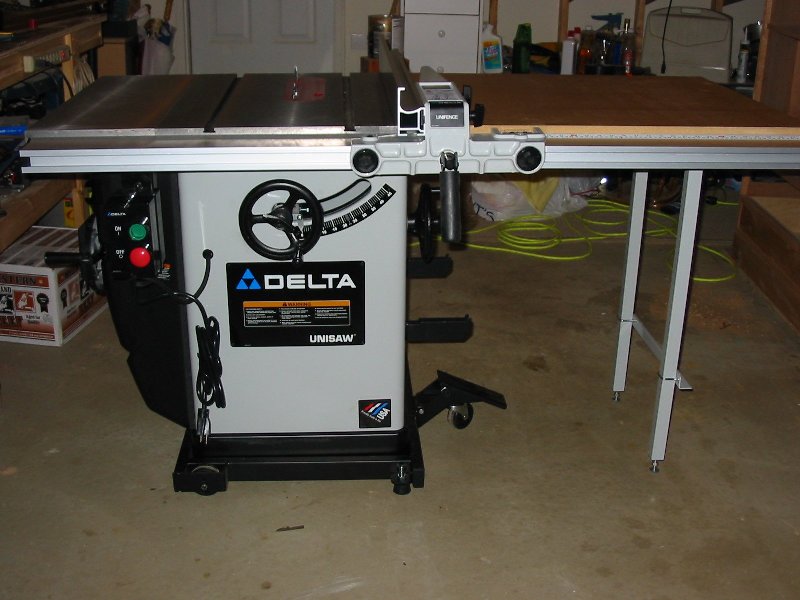
Here it is! It arrived by freight carrier on Wednesday March 26, 2003 at 1300. It took me about 6 hours total to uncrate the saw, slide it onto the mobile base, and get the fence installed. Yes, yes the shelf support bracket on the legs is installed backwards. What can I say, I was in a hurry :) The Unifence is a solid, well designed fence, but the accompanying table board was a simple piece of MDF sprayed with a protective finish. I guess my cost savings had to show up somewhere.

After putting the Unifence through its paces I decided that, although it is an excellent fence, I wanted to continue using the Incra TS-III. The Unifence is sturdy, simple to set up, and has very good accuracy and ease of use. The Incra provides all these things along with the ability to repeat cuts easily and the great feature of a moveable ruler which makes resetting the fence to zero a snap.
The last feature is what really sealed the deal for me with the Incra. My previous contractor's type saw was a right-tilt, meaning that the blade tilted to the right as the operator faced the infeed side of the saw. With the fence at its customary position to the right of the blade the fence scale needed to be set for zero only once, at the initial install of the fence. The reason for this is that the arbor flange, which provides a reference and a surface for clamping the blade in place, is on the same side as the fence. Thus, any blade, or even a dado stack, can be installed and the operator can still use the fence's ruler for setting cuts.
The Unisaw is a left-tilt, which puts its arbor flange on the opposite side of the fence, with the blade in between the flange and the fence. In this configuation, changing the thickness of blade installed requires the user to either reset the fence scale to zero, or wind up with inaccuracies when referencing a cut using the fence's ruler. The Incra solves this problem with a moveable ruler, an etched steel rule held in place with a magnet. To reset the fence to zero is a simple matter of setting the fence to just touch the blade teeth, and moving the rule so the "0" on the rule is under the fence cursor. Resetting for a thin kerf blade or dado stack of varying thickness takes less than a minute.
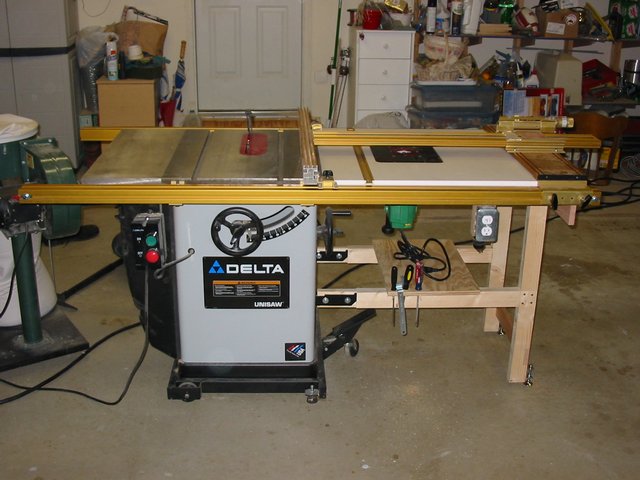
In addition to the fence, I also replaced the table board that came with the Unifence with an aftermarket router table top which has a Hitachi M12V router installed on the insert. The Incra fence rails are fairly sturdy aluminum extrusions of the same size front and back. The rails are strong enough to support the Incra fence bridge at the ends but the added weight of the table top and router caused the rails to deflect downward. I lived with the problem for some time by simply wedging a support "leg" under the fence bridge when in use. Invariably I would kick the leg out from under the fence while walking around or wind up losing or cutting the leg and having to find and cut another. While looking at the pictures of the standard commercial setup I cooked up an idea for making my own legs that would use the fence storage brackets on the side of the saw as support for the legs when moving the saw via the mobile base.
My new leg set consists of two T shaped support arms made from 2x lumber ripped to 2 1/2" and joined with half laps. I drilled the fence storage brackets to attach the arms with 2 bolts/bracket. I then aligned each arm so that it sat perpendicular to the saw cabinet. Once I had them square to the saw I attached two pieces of 1x stock to the ends of the arms opposite the saw, one to span the width of the fence rails in rabbets at the top, and one near the bottom in dados to add rigidity to the leg assembly. The legs themselves were cut shy of the floor so that threaded leg levellers could be installed to fine tune the height. Finally I attached a piece of plywood across the arms of the shelf to increase rigidity and act as a place to hold cutoffs and tools such as screwdrivers and the collet wrench for the M12V.
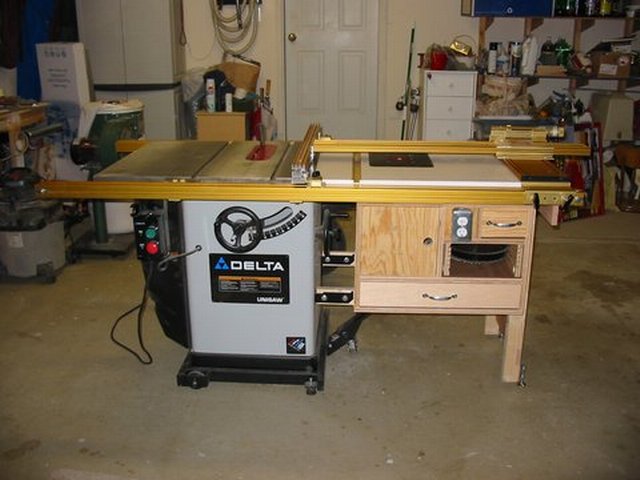
In order to make life a little easier I decided to use the area underneath the router wing for storage of table saw and router related items: blades, bits, push sticks, collet wrenches, etc. I built a cabinet that would slip underneath the extension wing and be attached to the legs. I divided the cabinet into several compartments, one dedicated to the router, another housing the electrical run for the router's power, and the others for storage.

I closed off the area surrounding the router to assist in dust collection. Inside there is a plug which is connected to the switch on the front of the cabinet. This allows the router to be turned on and off at that point. The outlet beneath the switch can be used to power an accessory like a shop vac.
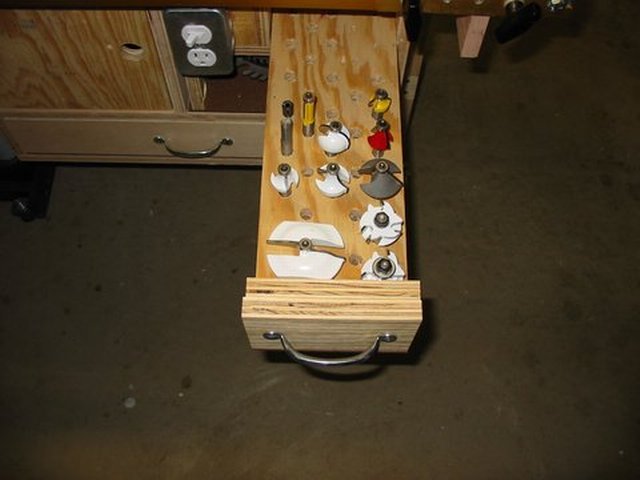
In the upper right hand side of the cabinet is a small router bit storage tray. It is simply holes drilled in a piece of 3/4" ply to hold the bits by their shanks. Most holes are sized for 1/2" shank bits with a few for 1/4" shank bits. One-off bits are stored here while bit sets that are packaged in their own boxes are stored in the bottom drawer.
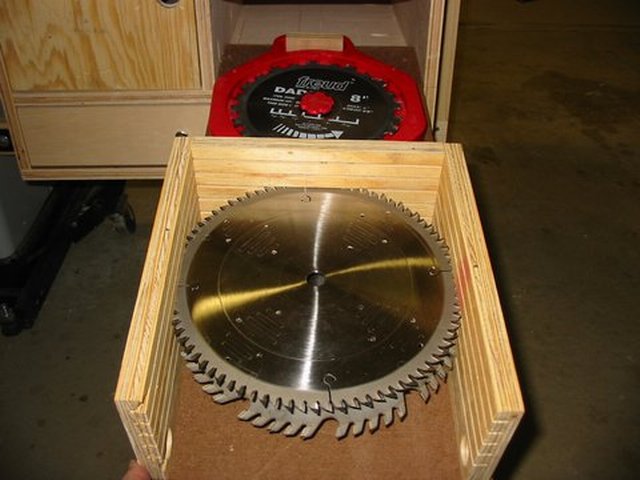
Below the power switch and bit tray is a storage area for saw blades. There is room for 5 blades in the rack at the front. Behind that is an area which holds a stacked dado set. This "drawer" does not have a front in order to allow blades to be exchanged more easily. Holes were drilled in either side to act as finger pulls to access the dado.
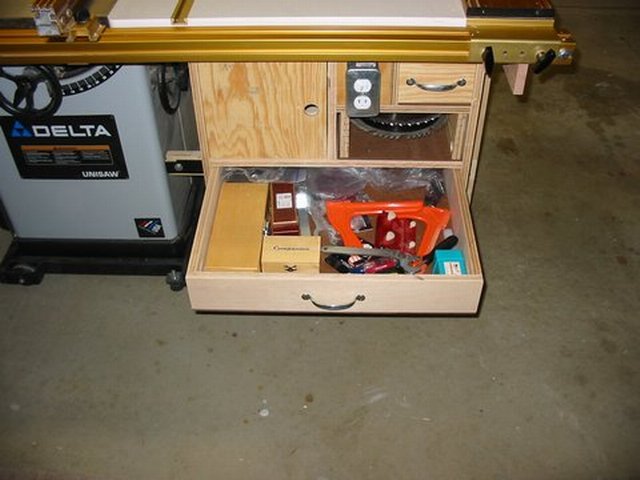
In the bottom of the cabinet there is a sort of "catch all" storage drawer. Inside are all other router and saw related items such as collet wrenches, push sticks, screwdrivers, extra base plates, etc. Right now the drawer is one big box with no specialized divisions, which is subject to change, of course.
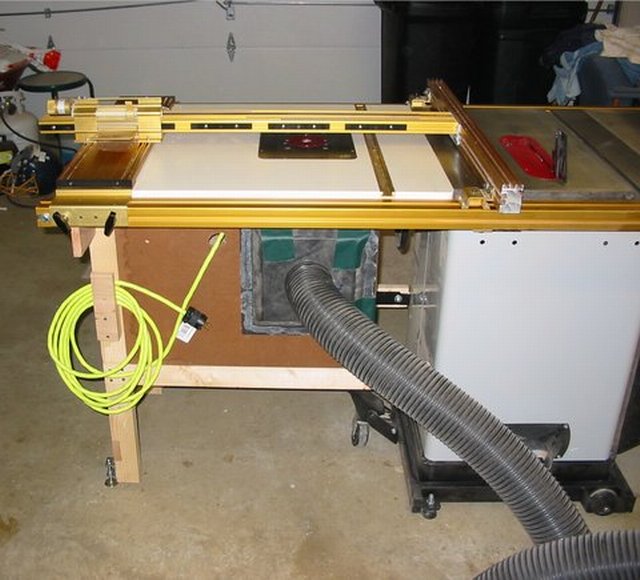
At the back of the cabinet is a dust hood attachment for capturing the dust from the router which falls beneath the table. Dust is already captured at the fence but a substantial amount still found its way to the floor under the table. The router compartment was intended to help alleviate that problem. Also note the pigtail cord which powers the switch/outlet at the front of the cabinet.