I picked up this planer at no cost from a fellow Woodnet Forum member. He had grown frustrated with the machine and decided that an investment in a new planer was more economical than spending time away from his work to fix this machine. The idle machine was taking up space and hence, for the purposes of quick removal, he decided to give it away with the only condition being the taker would get some actual use from the machine, rather than turning a profit by selling. My intention for this planer is to give it to my father, who has been laboring with S4S materials for as long as I can recall.
I was a little late in starting the picture taking, so I don't have a before shot of the planer before I began cleaning it up. Needless to say it was in pretty rough shape from sitting idly, but the motor ran strongly, which is always promising. The primary problem was an extreme difficulty in raising and lowering the cutterhead. Also, the cutterhead itself was quite a bit out of parallel. Finally, there were some parts missing or broken such as the knobs which engage the cutterhead lock (which are basically two metal clips, not unlike those for holding conduit in place, to clamp around the front posts). What follows won't be nearly as detailed as what you might find from John Lucas at his Woodshop Demos site. Then again, he has a helper to take pictures for him.
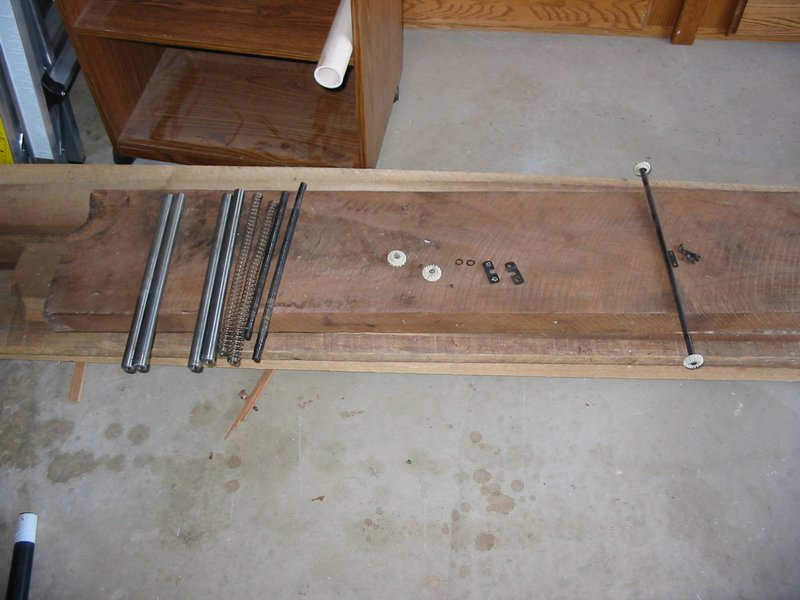
Here are the guideposts, leadscrews, and gears which control raising and lowering the cutterhead. The guideposts themselves had begun to develop some surface rust and tended to bind in the guides on the cutterhead. The leadscrews were beginning to show some rust and also had some accumulated sawdust in the threads. The gears were in good shape. Once I had the machine disassembled I gave the posts a good cleaning with WD-40 and steel wool. Once I had them smooth I cleaned them off with mineral spirits. I repeated the process with the leadscrews, this time using a toothbrush to get into the threads. I gave the gearshaft a wipedown with spirits to clean off some gunk I found.
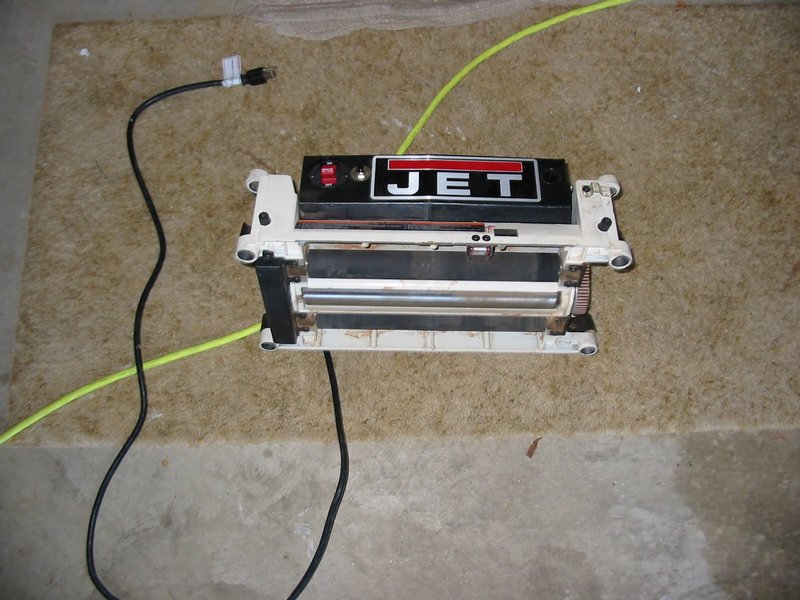
This is the cutterhead from the planer. Once off the posts I set it down and vacuumed out all the dust I could get to. After that I blew compressed air into all the cracks and crevaces the vacuum couldn't get to. Finally, I used the toothbrush to break up any dust that had mixed with lubricant and caked up (mostly around the belt and drive chains). Also, I cleaned the feed rollers up with mineral spirits and cleaned out the guide holes the guide posts ride in.
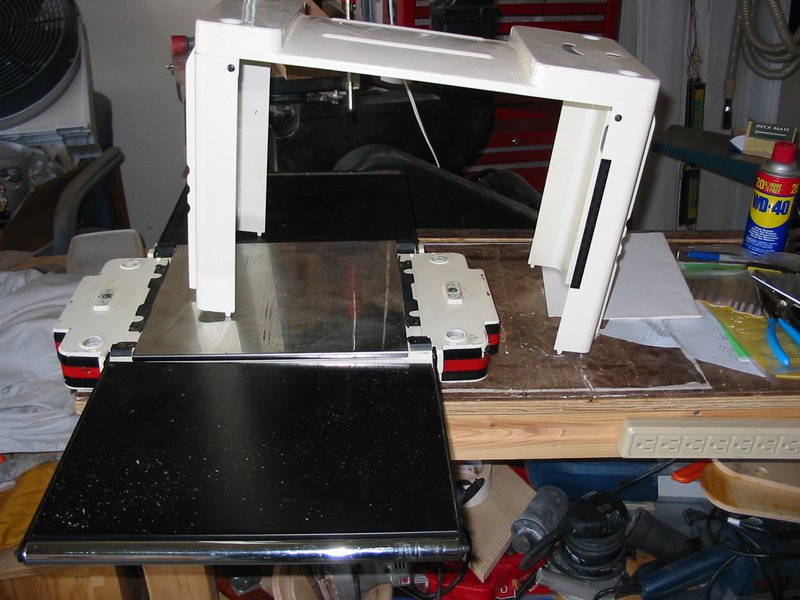
The planer base and cover are visible in this view. The cover itself had only cosmetic flaws and I paid them no mind. The base was missing a screw for the infeed table and also had some debris underneath the stainless steel platen. This caused the platen to not sit flat on the base. Also, the platen had some gouges in it which I sanded out with some wet/dry sandpaper. As a result, it's not as shiny as new, but still lets wood slide smoothly. I pulled up the brackets which held the platen in place and scrubbed the debris from underneath with steel wool and more spirits. I noticed a slight bend in the platen. A gentle bend in the opposite direction got it sitting flat on the base again.
My first attempt at reassembling the planer had me attach the leadscrews and guideposts to the base first. I gave them all a healthy shot of dry lubricant before attempting to re-install the planer head. This first attempt failed as I could not get the leadscrew started and the guideposts in correct alignment all at once. Off came the planer head and guideposts. Then I just started the planer head onto the leadscrews (The leadscrew with the height ajdustment crank is longer with more threads. This allows you to get the planer started on the longer screw first to make alignment with the other leadscrew easier). Once on the leadscrews I was able to slip the guideposts into position one at a time, working to diagonally opposite corners. This second attempt at reassembly went much more smoothly, but left me with the cutterhead out of parallel.
Adjusting the cutterhead for parallel is a fairly painless task. The leadscrews are connected via the gearshaft seen in the above pictures. The gearshaft has vertically mounted gears while each leadscrew has a horizontally mounted gear that meshes with the vertical gear on each side of the shaft. Thus, when you turn the height adjustment crank both leadscrews are turned. The planer head at the leadscrew opposide the crank adjuster was about 1/32" low according to my "feeler guage" - a small block of wood. To adjust the cutterhead I slipped off a metal clip holding the vertical gear against the horizontal gear then slid the vertical gear away so the teeth on the two gears no longer meshed. This then allowed me to turn the leadscrew on the low side to adjust cutterhead height. I adjusted the alignment until my block slid back and forth under the cutterhead with no discernable changes in pressure against it. Not the most scientific way of doing things but it should be sufficient for planing wood. It's definitely better than 1/32" out of parallel.
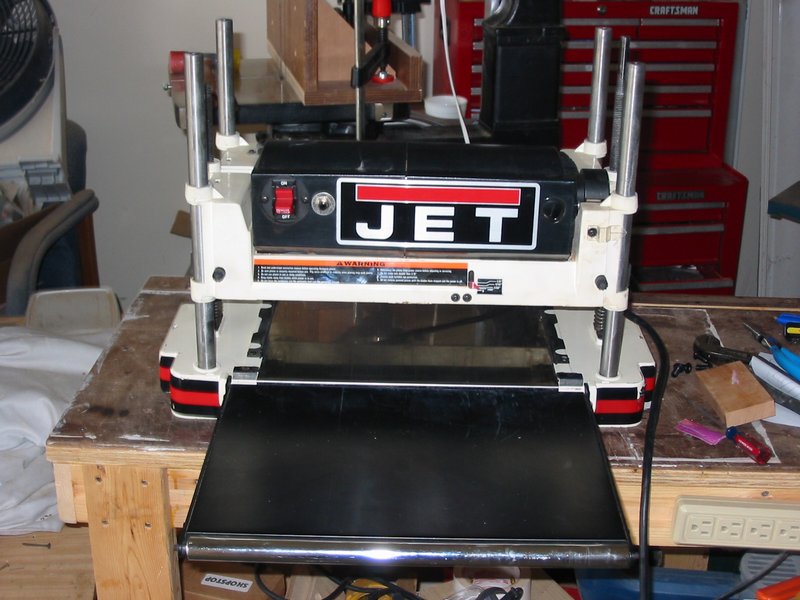
The planer was finally reassembled and it was time for a test. I turned it on, it purred like a kitten. Grabbed a wide piece of pine for the test. Cranked the head down until it grabbed the piece and fed it through - no cut. Cranked a little more, no cuts. Started to wonder. Cranked down a little more, still no cuts. Finally cranked down until the board would't go under the head, and no shavings to show for it. ???????? I looked at the knives and determined they had been set too low in the cutterhead. I reset the knives using the setting guage from my current planer, a Delta 22-540, a workhorse in its own right. But the cutterhead on the Delta is smaller in diameter than the one on the JET, as a result I got the knives set too high and my next test run resulted in a badly gouged board.
The third time turned out to be the charm. I simply set the knives by eye, splitting the difference between the original setting and the setting with the Delta jig. There is some slight rippling indicating one knife is set a bit higher than the other, but it turned out pretty well for just eyeballing it. After several passes, the test board measured 1/2" thickness on both sides according to my combination square, with there being perhaps a few thousandths difference between the two sides. It looked good on the ruler which works for wood.
This was a worthwhile endeavor. In total it took me about six hours on a Sunday in total working time. The head moves smoothly up and down now though I believe some white lithium grease would work a little better than the dry spray lubricant. Regardless, it now does what it was built to do. Plane a board to thickness while keeping both sides parallel. It does still need the snipe lock knobs replaced and a proper jig for setting the knives. I look forward to giving this to my father and think he'll be pleased with it (my brothers too since they like to come by and use his tools). I'll leave it up to him to order the remaining parts. He's retired now and has plenty of time to call JET customer service ;).