Currently our collection of CDs is kept on two store bought racks. You know the kind, two lightweight uprights connected with sets of dowel rods to act as the shelves. The racks work well enough, however we have them in the closet of one of the spare bedrooms. As we (she ;)) accumulate more stuff, we are forced to find that stuff a home. We got to the task of reorganizing our space for more efficient use - starting with the closets. As a result the CDs had to go. With a newly finished basement the LOML decided that a new CD cabinet placed down there would be just the thing to keep our CDs in. So off we go on our new project. I decided on poplar as the material of choice since I had picked up some pretty cheaply. Plus I knew if I needed more, for whatever reason, it was very reasonable at the local supply yard. Milk paint is the finish or first choice, though that is subject to change.
The cabinet design was "on-the-fly". The only thing that I had decided on was that I wanted the cabinet to have pull-out shelves/trays like my MIL has in her kitchen pantry. The trays would be closed up behind doors to make the cabinet look presentable when the music wasn't playing.
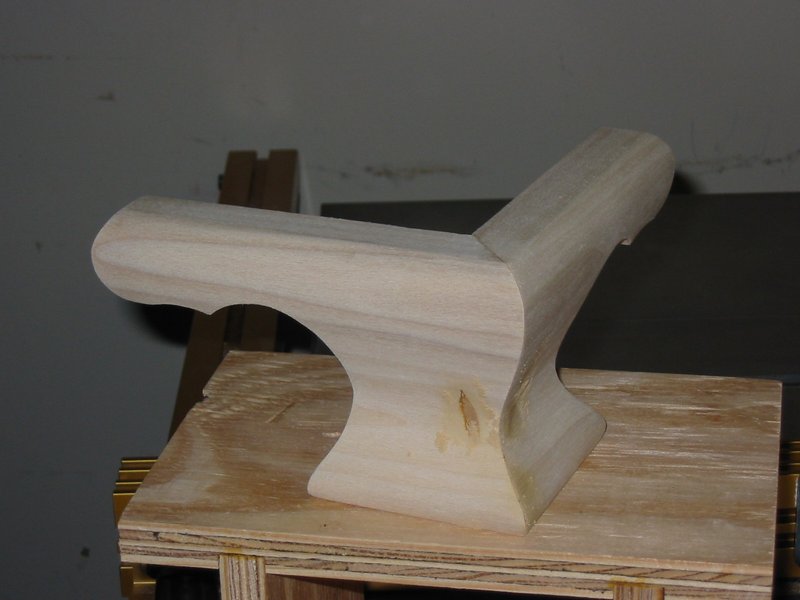
Thinking about the base of the cabinet presented several options. I finally settled on ogee bracket feet, even though the depth of the cabinet doesn't really lend itself to them since the feet will be very close together when viewed from the side. I wasn't really concerned with this since I wanted the opportunity to practice making the feet. All I can say is that it's a good thing I decided on a paint finish of some kind. As you can see in the picture, I used a biscuit as reinforcement for the miter joints in the feet. You can see this because I didn't place the biscuit far enough on the inside of the joint. Well, nothing hurt but my pride, and a lesson learned when there won't be paint involved.
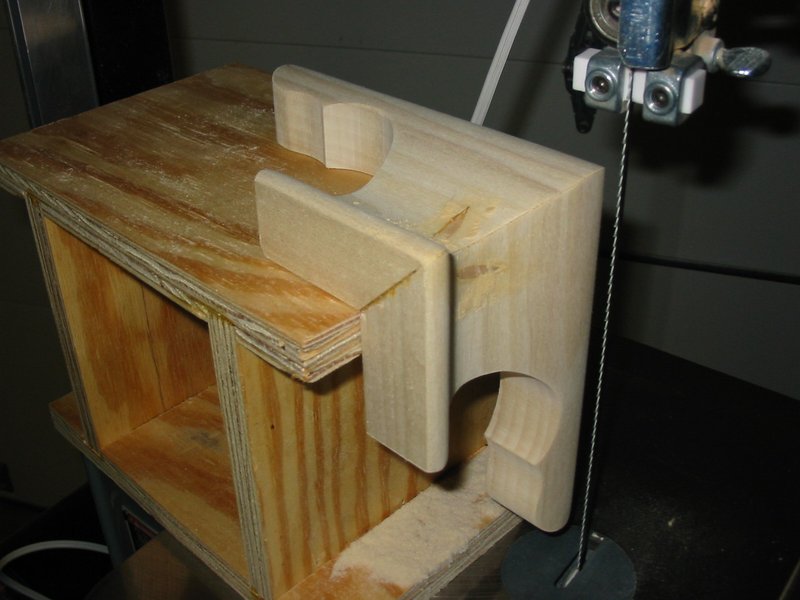
I used the method of foot construction outlined by Lonnie Bird in "The Bandsaw Book", but I took the pattern from a Woodsmith project. Here is the foot on the jig used to saw the ogee curve. I like this method far more than that described by Woodsmith, which had you waste away most of the material on the tablesaw using a variety of methods. The Woodsmith method also had you cut the miters for the pieces after they had been shaped, so the miters had to be dead on to avoid gaps. With Bird's method, you cut the decorative scroll pattern first, then cut and join the pieces while the sides are still flat. This gives you a slight margin for error in case your miter points aren't fully closed, since they will be sawn away in the ogee shaping process. It's still easiest if you fit your miters tightly though.

A look at the foot after smoothing the sawmarks with 100 grit paper. The dreaded filler has been applied to plug any gaps where the biscuits were exposed by the ogee cut.
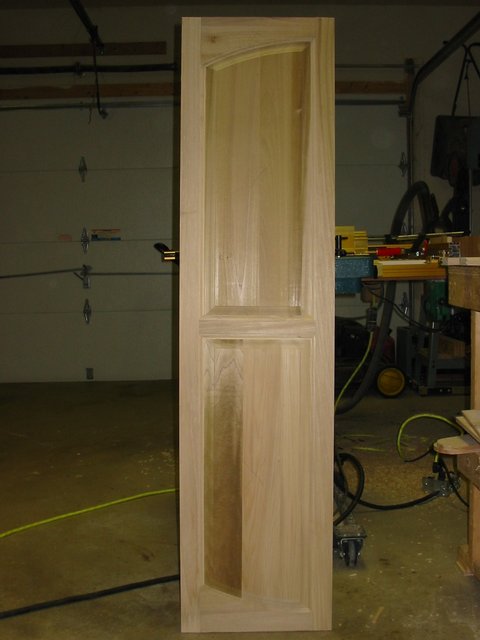
This is one of two mirror-imaged doors. I decided to go with raised panel doors inset in the carcass. For me, the inset doors look a little cleaner than full overlay doors and make the installation of crown molding that looks good a bit simpler. Partial or rabbeted overlay doors weren't really an option. Since I had full width pull out trays, I couldn't install a center member to catch rabbeted doors and I want to avoid the use of an astragal, if possible. How well I am able to fit the doors will be the ultimate deciding factor. For added visual interest, I elected to have both top and bottom rails arched, from a width of 4 3/4" on the outside to 2 1/4" on the inside. I added a center rail in order to utilize some shorter stock I had on hand. In hindsight, I don't think I would have liked the look of full length panels, and am happy with the results.
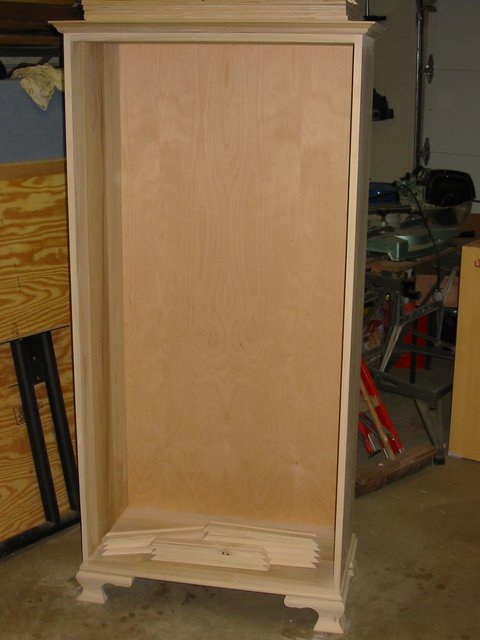
Here is the cabinet carcass the doors will close in with the feet and the top moldings installed. The inside dimesions of the carcass measure 58 3/4" x 29". This will allow me to install seven pullout trays 28" x 14". The 28" width allows for slides (I chose standard 3/4 extension slides). Each shelf will have 5 pairs of CD holders installed allowing each shelf to hold 120 CDs; a total of 840 in the entire cabinet. The shelf parts are visible on top of and inside the carcass. They are four sides mitered together with a width of 1 5/8". 1/2" Baltic Birch ply will be set in 1/4" deep grooves cut 1/4" up from the bottom.
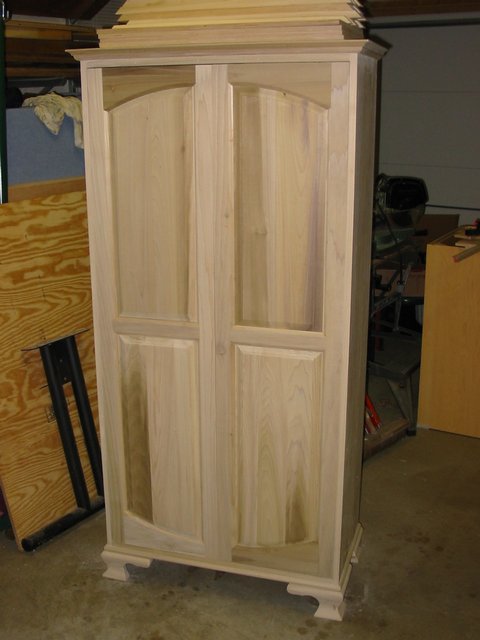
The two doors are just leaned into place. They fit snugly enough in the width that I will have to shave a little off them to allow them to swing freely. When I set the doors in place I noticed a slight bow in the sides of the cabinet. The top and bottom of the carcass both measure 29" wide on the inside, but the center measures slightly less. I also noticed that the front of the cabinet can be racked slightly with pressure on one of the front corners. I will add a stiffener in the center of the cabinet which will hopefully push the bow out of the sides to get a consistent 29" internal width from top to bottom and prevent the front from racking. I am unsure whether the bow is from a curve in the side panels themselves or was introduced by me during assembly.
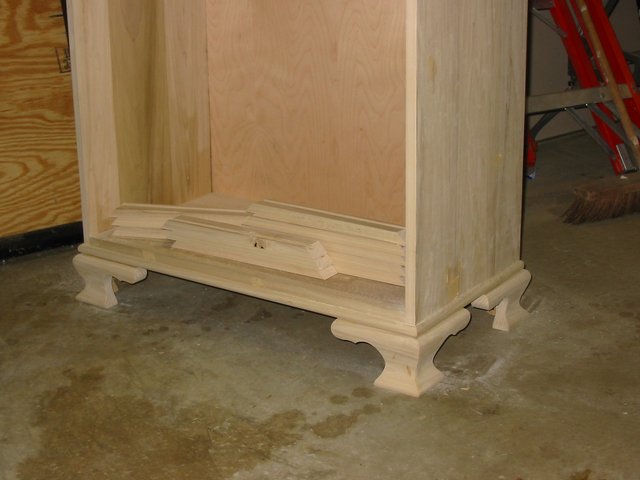
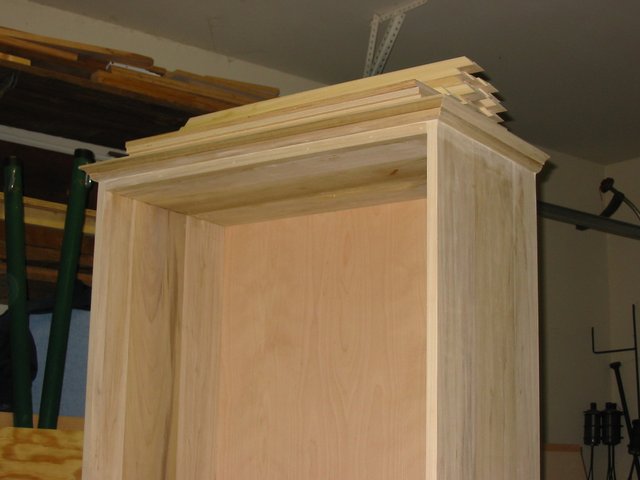
Here are closer shots of the cabinet feet and top moldings installed.

Here the doors are finally swinging from their hinges. The hinges I selected are Amerock partial wrap no mortise hinges, antique english color with miniret finials. Before hanging the doors I wanted to use the jointer to clean up some saw marks on the edges of the stiles. Also, with the thickness of the hinges added, the doors needed to be trimmed down a bit to fit into the opening. It was a fat pitch just waiting to be knocked out of the park - a pass on each stile on the jointer would take off the saw marks and trim the doors down just enough for a nice tight fit. Disaster struck in the form of taking the jointer for granted. Rather than confirming the amount of stock that was being taken off by the jointer on each pass I relied on the notoriously inaccurate depth setting scale on the infeed bed. The scale was correct from the factory but was no longer so once I had installed a fresh set of knives, so my passes were taking off more than I thought. As a result, I wound up with a gap much wider than I wanted between the two doors. I was then forced to resort to an astrigal to fill the gap, which I made from a piece of 3/4" thick stock with a 1/4" bead on each edge. It looks nice but is not the clean flat front I wanted to wind up with. Notice the wooden latch above the right door.
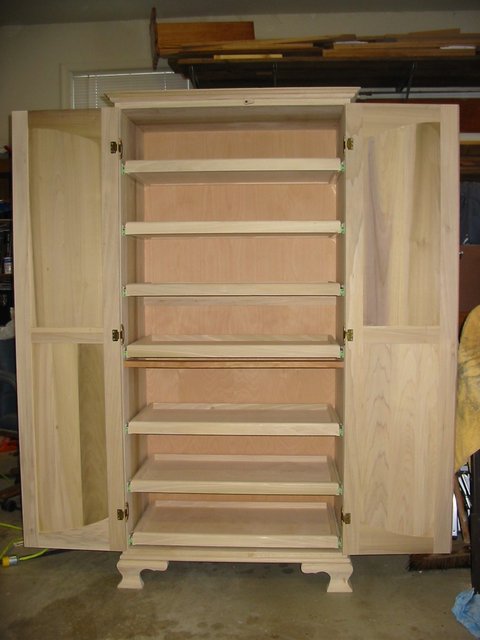
The pullout CD trays were installed after the doors were hung. About 1/3 of the way up from the bottom you'll notice a horizontal member which divides the cabinet. This was installed to help stiffen the front of the cabinet and to straighten a slight bow I noticed in the sides. It was not centered in the cabinet because there is an odd number of trays in the case, so installing in the center would have interfered with one of the trays. In this arrangement there are four trays on top and three below. There is roughly 8" of vertical space between tray bottoms (or a tray bottom and case member). The tray sides themselves are 1 5/8" wide, with a 3/8" radius roundover on each outside edge. CDs should be able to sit in the trays and have about 1 3/4" headroom to spare.
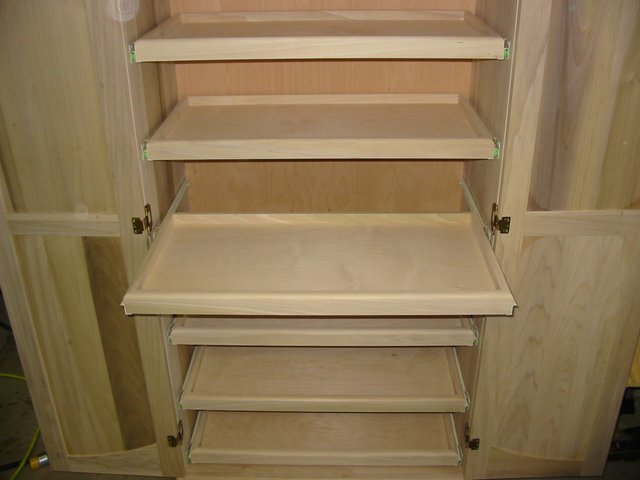
The center tray is pulled out. Each tray rides on standard 14" 3/4 extension slides. The back of each tray isn't quite fully exposed as they would be had I used full extension slides. My main motivation in choosing the 3/4 extension slides was cost, as I was able to get each pair of slides for about a dollar each. Full extension slides would have cost much more. Also, I have plenty of CDs that don't see much time in the player, so it won't be much of a hardship having these discs stored in the backs of the trays. I didn't apply false fronts to the trays to hide the slides since they aren't too obtrusive as installed. Plus, I wanted to keep the cabinet depth as small as possible.

The cabinet has finally been finished. I originally was leaning toward a milk paint finish but in the end decided on a standard oil based paint finish. The exterior color is called "Baby Turtle" from Benjamin Moore. It didn't turn out as dark as I had hoped it would, but it's growing on me. I had considered painting the crown molding, feet, and knobs in the interior color to set things off a bit, but in the end decided to stick to monotone.
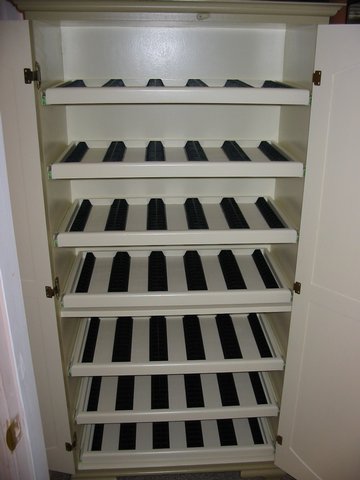
Inside the cabinet is painted "Monarch White" from Martin Senour. I bought this paint from my local hardware store. I would have bought the exterior color there as well except their selection is pretty limited since they still use a formula matching book and do not have computer color matching like the big boxes and specialty paint stores have. The trays have the plastic CD racks installed. All I have to do now is carry them down and put them in.
Overall I'm pleased with how the cabinet turned out. Hindsight is always 20/20 however, and looking back there are a few things I would do differently.