Specialty Brake Light
This is a detailed write up of how to make a custom brake light. This isn�t a very difficult process, so it should be decently short.
The supplies you need will be a neon tube, size is your preference, a custom sticker ordered, 18 gauge wire, �� wood, screws, paint, epoxy, and some of the textured clear plastic over florescent light fixtures. If you work on your car and do custom stuff frequently, you should be able to find most of the stuff you need laying around from left overs from other projects.
If you are good at fiberglassing, then that method may be much easier and look better in some cases. In most trunk and even hatch back cars, the most appropriate way of doing this would be to make and set the enclosure on the back window ledge. With an SUV or minivan it will be a little bit more difficult.
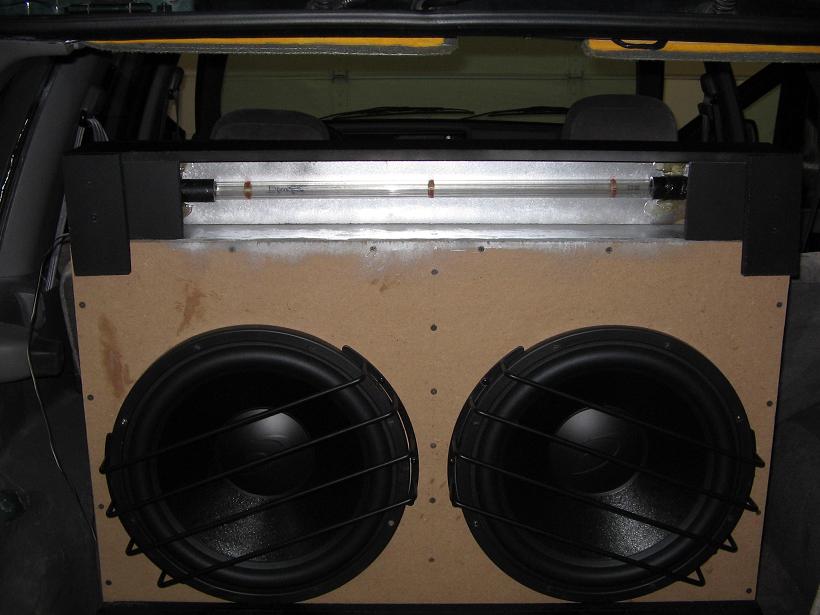
My vehicle is a Grand Cherokee, but I had a way of getting around the difficult part. I had a subwoofer enclosure that sat high enough that I was able to build the enclosure right to the top of it, and have it visible out the rear window. Without anything of this sort, there isn�t many possibilities for placement, which is where fiberglass would come in handy. Even in a sedan, the fiberglass would be handy to form fit across the shape of the window and ledge inside the vehicle.
What you need to do first is decide where you�re going to want it to go. Try and pick a space where it�s not going to look weird, interfere with anything such as moving parts, or be placed on top of the points the rear speakers come through the rear deck. After you�ve decided on placement, you need to decide how large of a tube you�re going to use. Measure the total width of the space you�re going to use, and then shave off 2 inches to account for wood thickness and ease of install.
I recommend using red for the neon tube. Any other color can be used on the rear of the vehicle, but in my opinion anything else would look out of place. Colors other than red may also be illegal depending on your local laws, so take that into account. I had a 32� tube laying around from an underbody kit I had on a previous car, so I used that. Check eBay and other online retailers for the size and color you want.
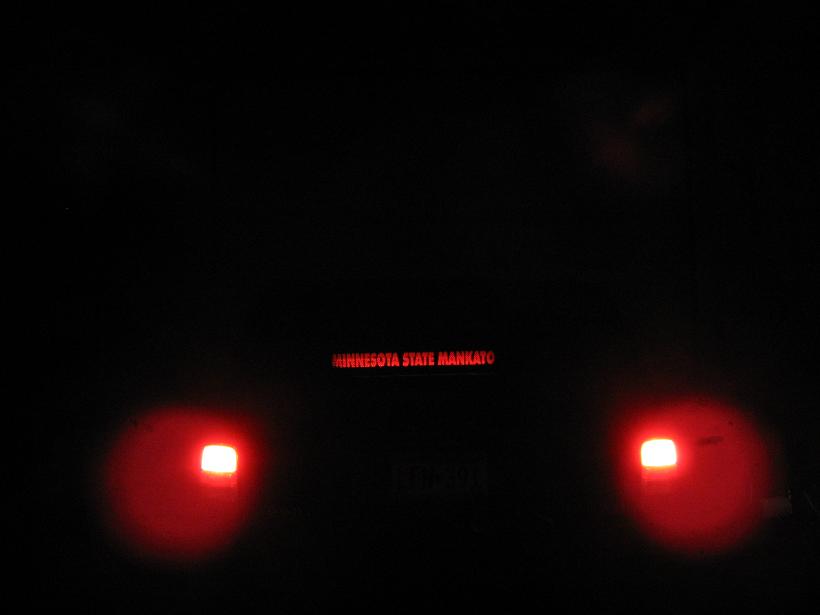
The next thing you need to do is decide on what you want your brake light to say or spell. Since I am a student at Minnesota State Mankato, I chose to put exactly that. I got in contact with the guys at www.aPlusPerformance.com They made a custom banner for me, black (lettering cut out) total 4� tall and 26� long, 2� high and 24� long lettering, and charged me 13 dollars after shipping costs. I highly recommend doing this instead of any other method. You�ll need to order your sticker to be exactly the same length and height as your enclosure, leaving the lettering not quite as large so there�s some space around the outside to be blacked out by the sticker. Also make sure that the glass part of your neon tube is at least as long as the lettering is going to be wide. If the tube isn't as long as the writing, then the ends of the writing will look dimmer than the rest.
The next thing you need to do is assemble an enclosure to house the neon tube. Let�s say for example the space you�re going to use is 20� long and 4 inches tall, 4 inches deep. Make all sides to the enclosure, glue and screw them together, but leave the face board off. This will be the side that�s facing out the rear window to be showing the text. You�ll want to paint the entire thing so it�s not a plain wood box sitting around in your rear window. The same color as your interior carpet would be appropriate. It�s also important to seal the cracks of the enclosure so light doesn�t shine out. Silicone will work just fine. I also recommend painting the inside of the enclosure with a chrome spray paint. It�ll help reflect as much light as possible to the lettering, it�s not required though.
At this point you�ll want to mount your neon tube to the inside of the enclosure. On the back wall, centered in height is where it�ll work best. You�ll also need to drill a small hole on one of the sides or bottom to run the wire through. Touch it to the battery to ensure it works properly and you know which wire is positive and which is negative. After this, the assembly is going to be sealed shut, so it�s important to get the light in there while it�s still open.
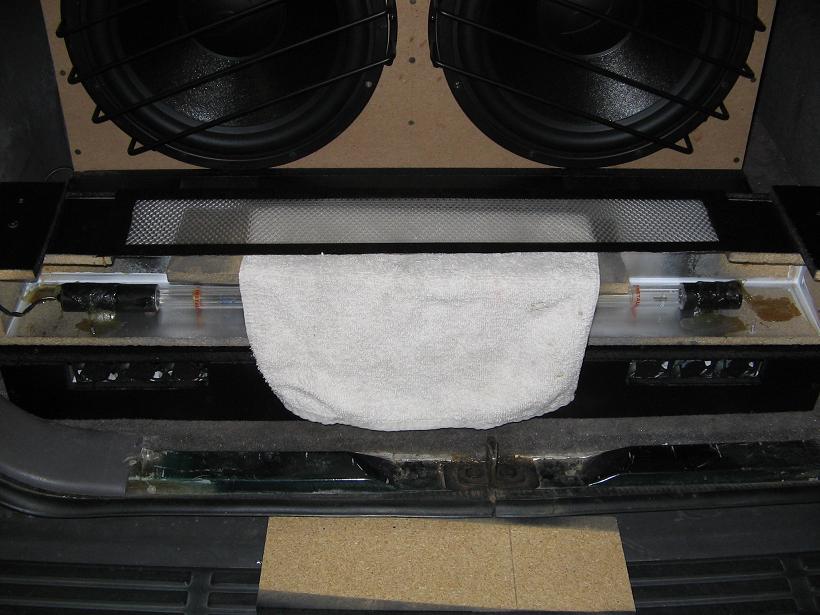
If you have any old florescent light fixtures laying around your house that you can take the plastic cover from, I suggest using that. If not, go to a hardware store and find a sheet of it. This stuff is very brittle, so be very careful with it. Measure the EXACT length and width of the face of your enclosure. Use a Dremel to make the cut, if you don�t have one, find a friend who does. If you don�t have a Dremel or something similar to your disposal, you�ll have to cut it some other way. Remember that this material is extremely brittle and cracks very easily.
After you have your shape cut out, epoxy the pointy side down to the wood. You want to epoxy the pointy side down so you�ll have your flat smooth surface on the outside to put your sticker on, and so the pointy side of it disperses the light as much as possible.
Now comes the wiring. You need to find a brake light positive wire. The easiest way to do this is to cut off the insulation, and solder on your positive wire to the neon at that point. After it�s soldered on, tape it off with electrical tape. For the ground wire, find a bolt or screw that goes into any metal of the body. Grind off the paint, wrap the wire around the bolt or screw and screw it back in. Run your wires under the carpet and to where your light is going to be located, and connect it to the light�s wires.
Now all that�s left to do is to secure the enclosure to the vehicle so it�s not a potential projectile. A couple 90 degree mounting tabs will work, they have them at wal-mart for like 2 dollars for 4 of them.
Any questions or comments can be sent to me at [email protected]