Created by Joselito Kuizon Jr.
1-1. Starting UG NX 3
UG NX3 is accessed by selecting the NX 3.0 icon on the desktop or by "Start" Button > All Programs > NX 3.0 > NX 3.0.
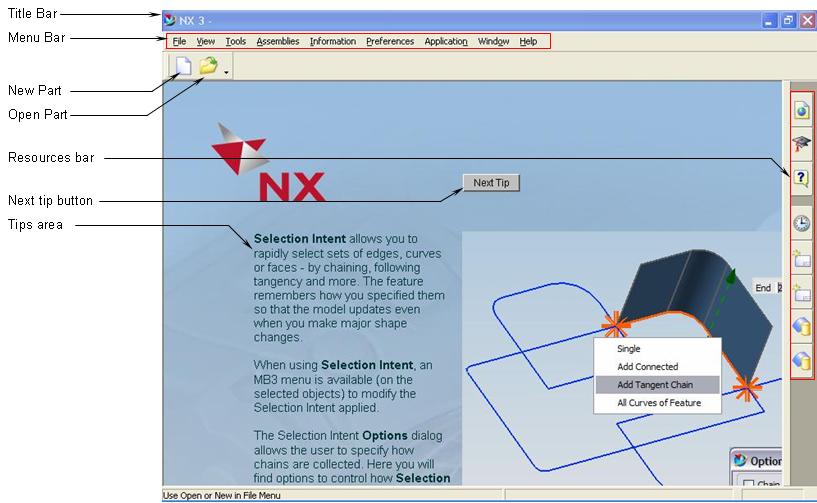
NX 3.0 starts with the screenshot
below:
You can either create a new file or open an existing file.
When creating a new file, be sure to choose the units.
After creating or opening a file, the Gateway is the first interface you encounter where you can choose the application to run. You must create or open a file before choosing an application.
The screenshot below shows the Gateway Interface:

1-2. UG Applications
You can choose the application by pressing one of the icons on the Application Toolbar or from the applications listed on the Application Pull-Down Menu.
![]()
1-3. User Interface Layout
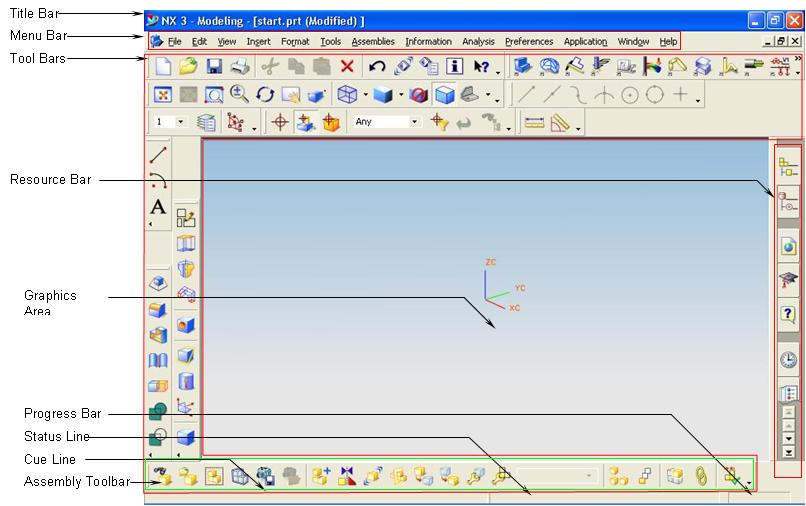
Once you choose the Modeling Application, NX 3 takes you to the Modeling Environment.
Assembly Mode is activated by clicking on "Assemblies" from the Application Pull-Down Menu. An additional toolbar is shown at the bottom of the graphics area.
You are then ready to start modeling.
1-4. Viewing Modes
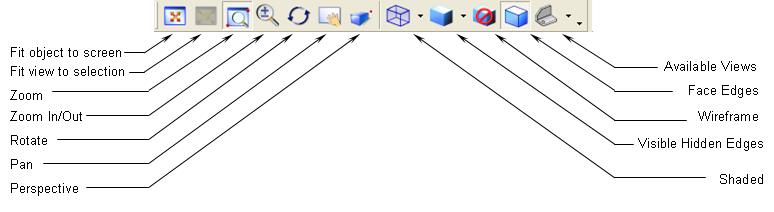
In UG NX 3, you can pan, rotate and zoom on an area or object. You can also show the object in wireframe, hidden lines, hidden lines removed and shaded.
Below are the icons for the view modes and control.
1-5. Object Selection
You can select a component, feature, or general objects depending on the mode/application which is active.
Below are the icons for object selection:

Selecting another object by clicking will add to the selected features.
To de-select, press on the <Shift> key and click on the selected feature. To de-select all selected objects, press the <ESC> key.