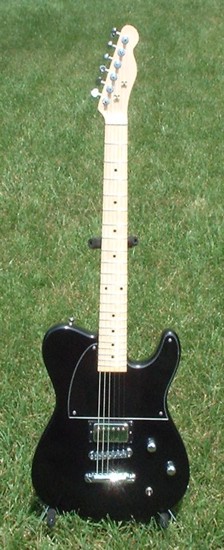
After seeing all the cool project guitars people were working on at TDPRI / Telecaster.com I got the itch to build one myself. It would be my 1st attempt and I wanted it to have the features I like most of various common models. I chose:
General Body Shape: Fender Telecaster
Body Contours: Fender Stratocaster
Bridge / Tail: Gibson Tune A Matic
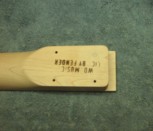
Neck: Maple Fender
Pickups:
Bridge Humbucker, possible future Neck pickup
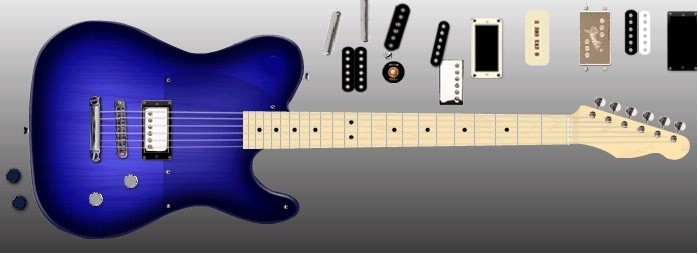
On usacustomguitars.com they have a "Virtual Guitar Builder." I had seen some see-thru blue bodies made on TDPRI and they looked very cool. I built the below virtual model on the site:
I asked for tips on suppliers for the body and the parts and Kevin, one of the fellow members from the TDPRI site, sent me a message. He gave me a detailed list of the services he could provide. He would custom cut the body and sell me most of the hardware, at my option, since he is a distributor for WD guitar parts. I wanted to do as much of the work myself and asked him to provide the following body:
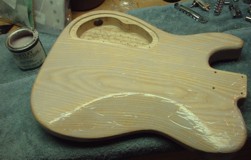
Tele shaped 2pc Ash
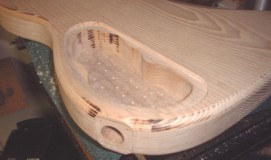
Front and Rear comfort contours
Neck pocket routed
He pointed out that the Gibson type bridge sits higher
than a fender so the neck pocket rout would need to be shallower than normal.
It would still be possible that I may need to shim the pocket later.
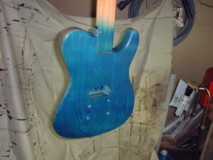
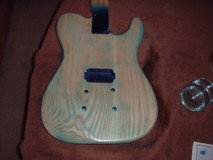
He sent me photos of some 2pc blanks for me to choose
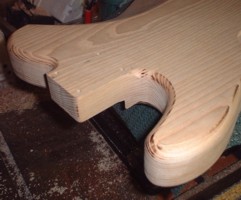
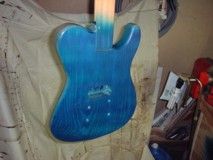
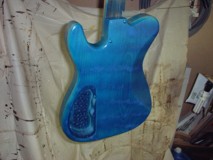
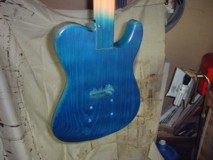
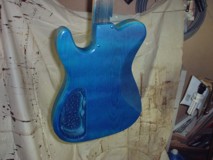
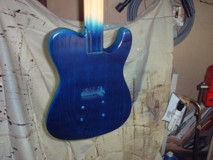
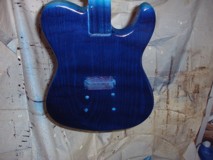
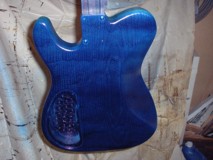
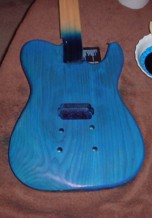
from. After the contours were done he sent photos:
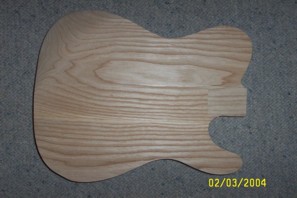
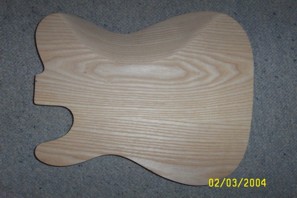
Front
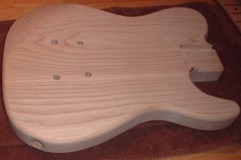
Back
Side
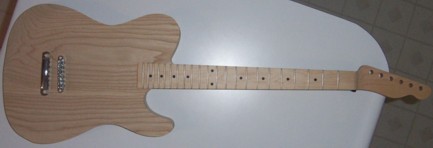
Before shipment
Note height of neck from shallow pocket
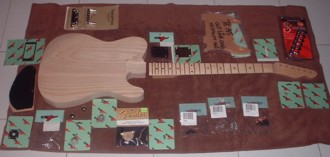
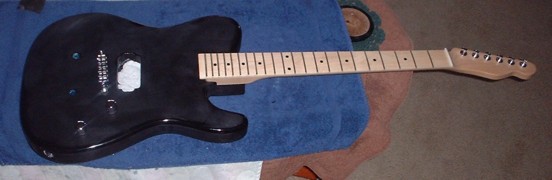
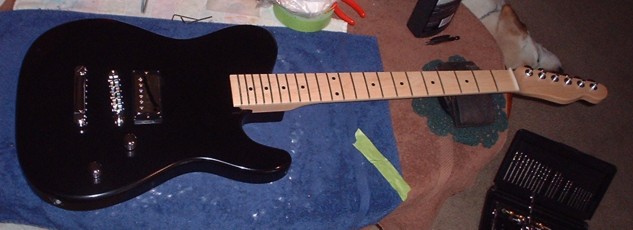
Shipment arrived:
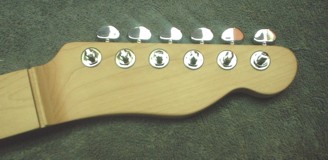
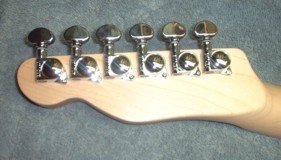
I figured I'd start with the easiest task so I installed the tuners. They are Grover Locking type. They squeeze the string before turning to tighten up. This prevents slippage so the strings stay in tune better:
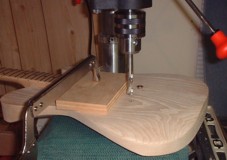
Next would be the drilling of the holes for the neck mounting screws. Knowing I would need one, I had recently purchased a drill press from Grizzly.com. Only $149+ shipping for "Big Bertha":
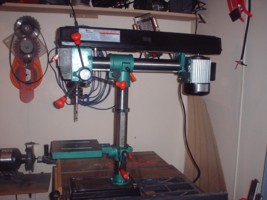 She
is mounted to the table saw since I have no room elsewhere.
She
is mounted to the table saw since I have no room elsewhere.
 Drilling
the holes in the body for the neck screws.
Drilling
the holes in the body for the neck screws.
 I
taped some fishing line to the tail to center it by lining up the fret
markers under the line. I then marked the holes for the bridge inserts.
I used measurements from my other Fender guitars for the distance between
the bridge and the nut.
I
taped some fishing line to the tail to center it by lining up the fret
markers under the line. I then marked the holes for the bridge inserts.
I used measurements from my other Fender guitars for the distance between
the bridge and the nut.
 Drilling
the holes for the bridge pin inserts.
Drilling
the holes for the bridge pin inserts.
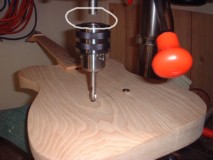 Mistake
#1. The drill bit was so old and dull that it got caught in the wood
and the spindle fell off Bertha. I may have been running the RPM's
too high also. It's a press fit so no damage occurred. Time
for a new bit!
Mistake
#1. The drill bit was so old and dull that it got caught in the wood
and the spindle fell off Bertha. I may have been running the RPM's
too high also. It's a press fit so no damage occurred. Time
for a new bit!
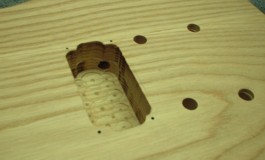
 New
bit procured and bridge insert holes complete. Inserts not in.
New
bit procured and bridge insert holes complete. Inserts not in.
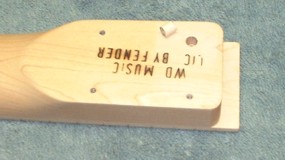
There was a factory hole in the neck that was too close
to one screw so I drilled it out, plugged it, and drilled the pilot for
the screw.
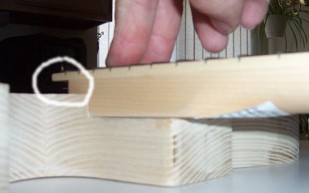
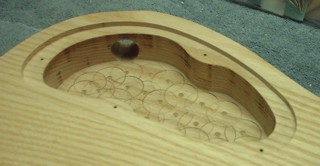
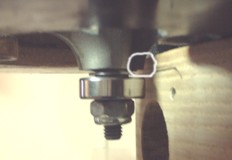
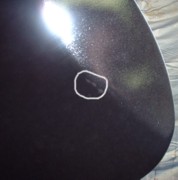
Now it was time to check the height of the neck.
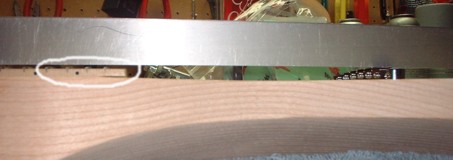 The circle
shows that the height looks nice and low but this is at the lowest possible
bridge setting. I may need to shim later.
The circle
shows that the height looks nice and low but this is at the lowest possible
bridge setting. I may need to shim later.
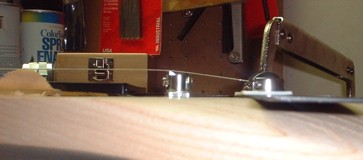
 Here
I'm checking the angle of the strings from the tail to the bridge.
I then marked the holes for the tail inserts and drilled them.
Here
I'm checking the angle of the strings from the tail to the bridge.
I then marked the holes for the tail inserts and drilled them.
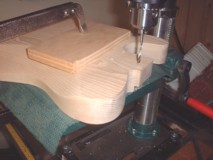
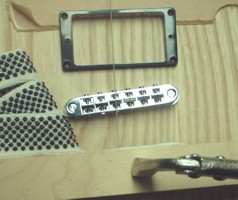
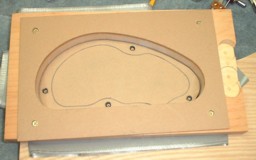
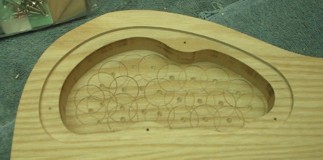
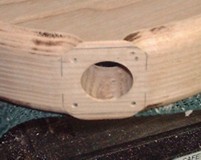
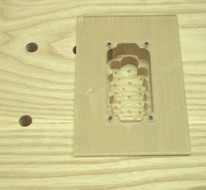
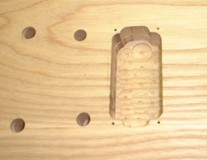
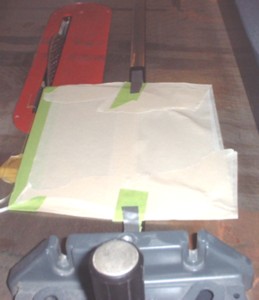
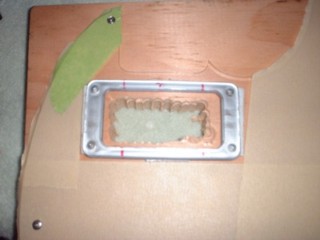
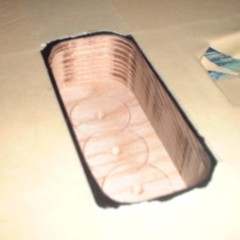
Below is the template and initial drilling for the routing of the control cavity. I used forstner bits at 1st to remove the majority of the wood. My router is not the strongest so this should be safer.
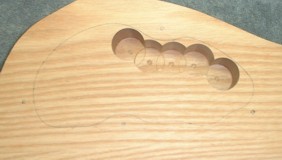
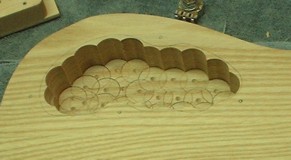
The routing went well. It's not easy to find the router bits with the required bearing on the "other" end of the cutting blade. The Stew Mac site sells a sleeve to hold a bearing in place by I opted for the grizzly set that uses collars with set screws to hold the bearings against the cutter.
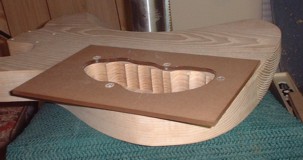
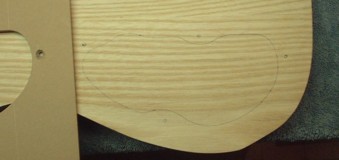
The template for the cavity cover needed to be mounted
to a scrap piece to get enough height to allow for a shallow cut.
I used duct tape to hold it during the routing. I could not find
non-HD double stick tape. The HD types all left too much behind when
removed so yet another use for duct tape has been discovered. :)
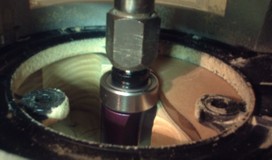
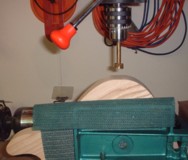
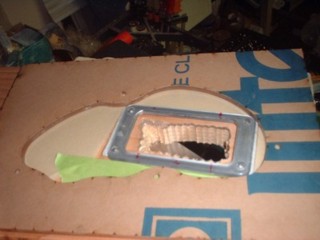
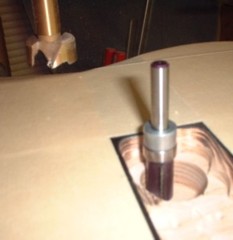
Big Bertha was again employed for the jack hole. Note the tilt action on Bertha's table.
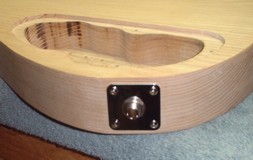
 To
avoid routing into the mount area of the jack plate, I set the router only
deep enough for a shallow cut. This resulted in almost no rounding
of the edges so I went to plan B.
To
avoid routing into the mount area of the jack plate, I set the router only
deep enough for a shallow cut. This resulted in almost no rounding
of the edges so I went to plan B.
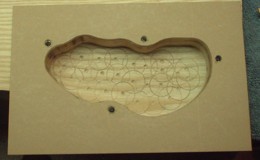
 I
set the router deep and stopped cutting at the jack area. I used
a hand file to smooth it out afterwards.
I
set the router deep and stopped cutting at the jack area. I used
a hand file to smooth it out afterwards.
 Some burn marks but sanding will take care of them.
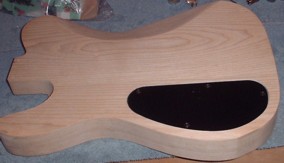
 After filing
and sanding.
After filing
and sanding.
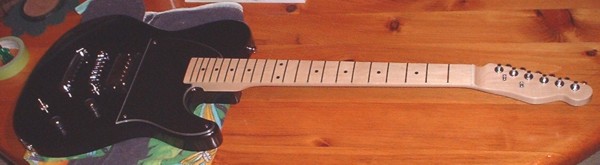
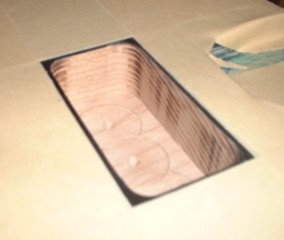
Drilling and routing of pickup cavity:
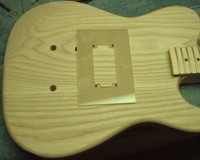
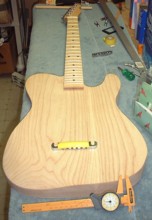
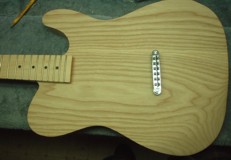
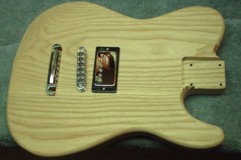 Test
fit. Starting to look like a guitar.
Test
fit. Starting to look like a guitar.
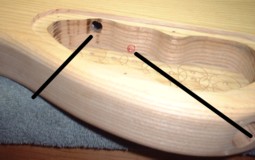
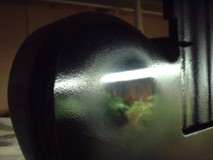
Time to drill the channel for the pickup wiring to the
control cavity. I planned on using a long drill bit to go from the
jack hole thru the red circle but it was not going to be easy. Instead
I drilled from above using the angle shown by the black line on the left.
It came thru nicely in the pup cavity as seen in the photo on the right.
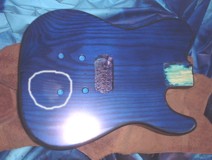
Since the wood is ash, it's necessary to use "grain filler"
to fill and seal the grain's pores. I used the stuff from "Re-Ranch"
which is grey/white. This will become mistake #2.
I sanded after the 1st application and re-applied and
sanded as instructed. It seemed that the sanding was removing too
much filler by the time the non-grain areas were sanded clean. The
idea is to leave the filler behind only in the grained areas using a flat
sanding block. The problem was that I wanted a see-thru blue finish
and I realized the filler was causing parts of the grain to be white instead
of the natural dark grain tone. This made me sand too much to reduce
the white areas.
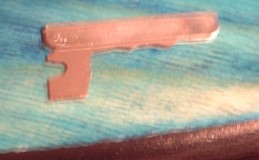
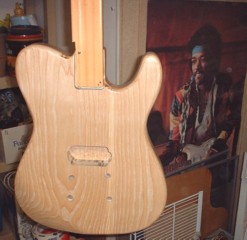 Here
you can see Jimi injecting some mojo into the sanded body.
Here
you can see Jimi injecting some mojo into the sanded body.
Since I sanded away much of the grain filler, I had sealing and sanding with lacquer based liquid several times then spray sealer.
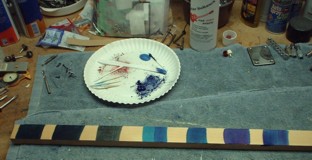
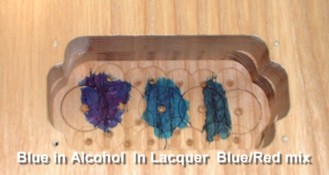
I mixed up some small batches of color using the "alcohol based" powder dyes from Re-Ranch. They state that you can use lacquer thinner as a solvent and they provide detailed instructions. I bought blue and red since I wanted a "royal blue" result. I assumed that would require blue with a little red to give it a slight purple tone. In the bottom of the left photo is the test stick and in the right pic is some testing I did in the pup cavity. Clearly the "blue in alcohol" was giving the closest result so I chose that route. (Mistake #3)
Using your own mix of the powder dyes means you need a
way to spray the solution. Re-Ranch recommended the "Preval" sprayer
which I was familiar with. It has a glass jar that screws onto the
pressurized sprayer canister. It was very hard to find and I had
to order one on the internet.
The Re-Ranch site mentioned that "streaking" may be a
problem and it was:
No problem, just wipe it all off with alcohol and start
again, right?:
 I
tried strategic spraying to eliminate the streaking that was still occurring
but I had to start again. Too bad since the color was looking very
nice. :(
I
tried strategic spraying to eliminate the streaking that was still occurring
but I had to start again. Too bad since the color was looking very
nice. :(
I figured I'd try using a brush instead. I'd 1st apply pure alcohol to "prime" the wood in an attempt to get even results:
The 1st coat went on nicely :)
Then horror struck (not for the squeamish!):

 A serious wardrobe malfunction!
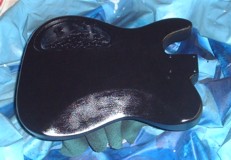
At this point I decided that, at least, the back and the sides would be black. I'd try the front again later in one last attempt at see-thru blue.
I cleaned and masked the front and sprayed the back and
sides with the ReRanch Black Lacquer:

After removing the masking tape, I needed a tool to scrape
the edges:
 I
broke a razor blade and used it to scrape where needed.
I
broke a razor blade and used it to scrape where needed.
Knowing that the alcohol was not going to work, I switched to lacquer thinner as the solvent for the blue powder. I also added a small amount of clear lacquer as recommended to "hold" the color down.
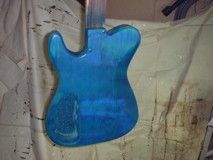
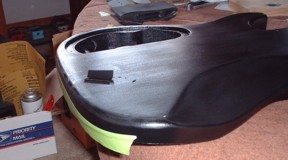
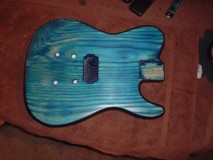
Here's the body before the lacquer based blue spray. You can see that much of the previous blue is still on there. Probably since I also sanded when removing the previous failures and went to deep. So now the sealer layer is compromised so I re-sealed at this point. I made another mistake by not using masking tape on the sides allowing some (brush on) sealer to drip over to the back. More later on that.
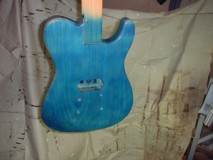
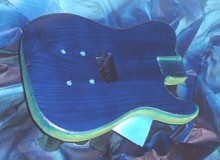
It's time for the final attempt at see-thru blue.
The lacquer based mixture sprayed on much better than the alcohol.
The color was not as deep but probably acceptable:
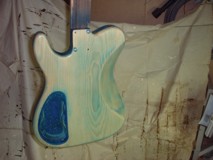
 Success?
..........Not quite.
Success?
..........Not quite.
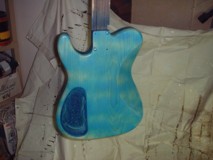
Problem was there were some areas that were not consistent.
Probably contamination of some sort:
I figured I'd move ahead since the clear coats might straighten
things out. No photos of what happened then. I sprayed the
1st coat of clear lacquer way to heavy causing the dye to splotch.
Out of frustration, I threw in the towel on see-thru blue for the front
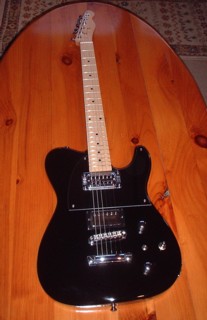
knowing that 100% black would look nice. 100% black was always
the backup plan. I had a friend who had a poster of Keith Richards
playing a black Tele with a maple neck, and I always thought it looked
very
cool.
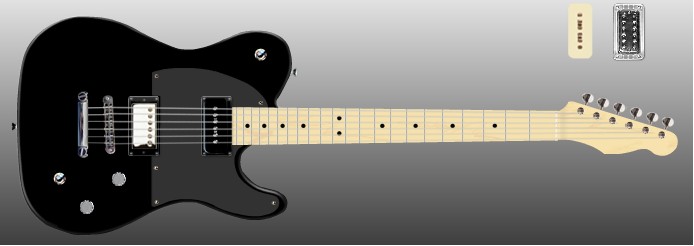
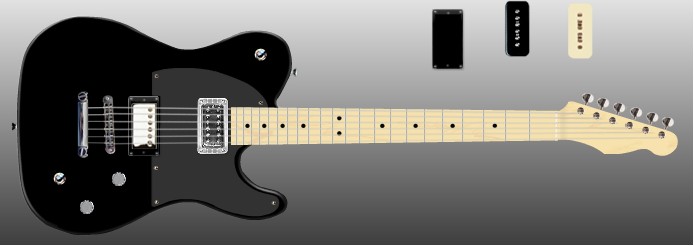
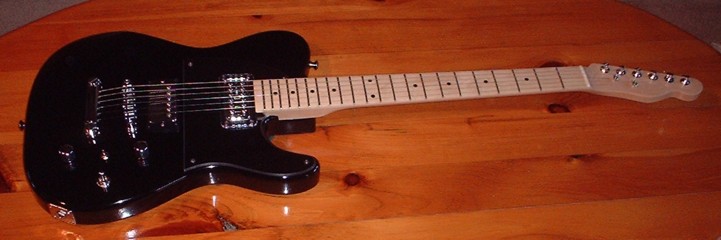
Back to the usacustomguitars.com site for a virtual black mockup.
![]()
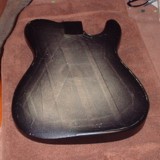
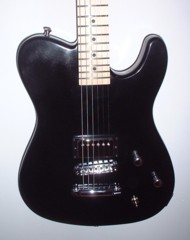
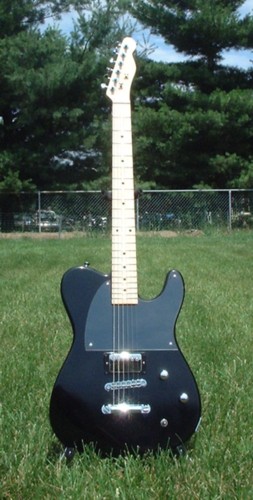
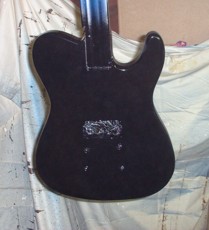 Here's
the front in after spraying the black.
Here's
the front in after spraying the black.
 After
the clear coats I wasn't sure if it was "blushing" so I sanded and polished
a spot. It shined up nicely.
After
the clear coats I wasn't sure if it was "blushing" so I sanded and polished
a spot. It shined up nicely.
When I forgot to mask the sides during the pre-blue sealing,
it dripped over the sides and went onto the back. This only mattered
where it also contacted the towel it was on. The sealer dried a little
and pulled some black off the back when I pulled the towel off. I
re-sprayed some black then clear but some deep contamination was left behind
on some of the affected areas. It looks grayish. Here's one:
 Post
2000grit sanding, pre polishing.
Post
2000grit sanding, pre polishing.
Although I had drilled for the tail and bridge inserts,
there was a problem. The Tone Pros brand setup did not come with
a recommended drill bit size in the instructions. My dial gauge said
that there was no drill bit that would work well. The web site said
that techs use size x, y, or z depending on which "works best." This
ambiguity on the drilling size for the inserts is the only drawback with
the Tone Pros set up (made by Gotoh) but it is a huge one in my
opinion. I think the inserts are probably made in various places
that do not keep strict dimensions. The Tone Pros site even has a
disclaimer about ruining your guitar during this step. The site recommended
calling the WD people and I did. They were nice but had no magic
solution. The problem was that size x was too small and size y would
be too loose. I didn't want to go too tight when pressing them in
since the ash wood is so hard. With my luck the wood would split
especially since one hole was on the main seam of the 2pc of body wood.
I tried wiggling the drill using the "small" bit but it just made the top
of the hole larger. The next day it hit me. I taped a piece
of course sand paper to a smaller bit that would just fit in the hole.
I drilled/sanded with this setup and it bored the holes out well.
I used a little wood glue and pressed them in just above the surface so
the lacquer would not be affected by tightening the screws all the way.
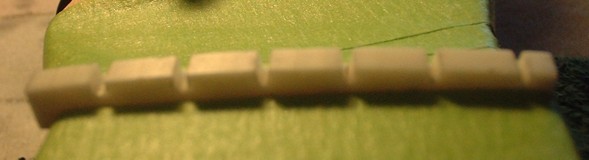
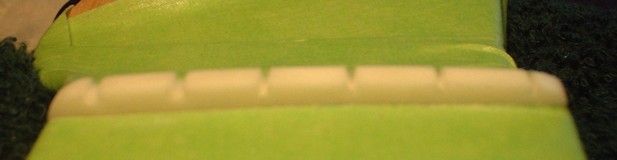
I used the Stew Mac files to cut the nut slots.
Not cheap but I didn't want to use a "pre-cut" nut. No glue used
since it fit in tightly after sanding. Finished the sides and top
with regular flat files.
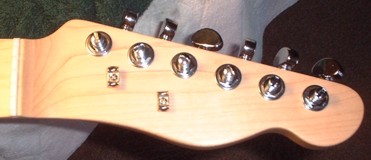 String trees
installed.
String trees
installed.
I then drilled the holes for the volume and tone controls.
Only now could I see how thick the wood was from the top to the control
area. I had played it safe when routing it. It need to
be thinned to allow for the shaft of the controls to come thru the front:
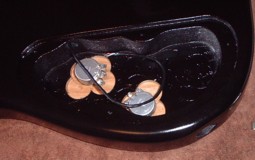
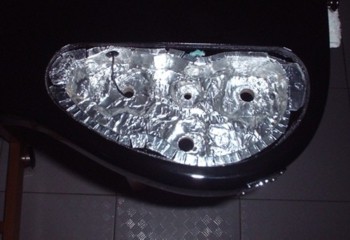
Rather than buying spray to shield out electro-magnetic interference (hum/buzz) I was going to use aluminum foil and contact glue. I was in K-Mart and remembered that auto sections often have repair "tape" for bumpers/chrome. It is basically sticky back (thick) aluminum foil. I found it and used it.
To maintain electric continuity, I used one continuous
piece for the bottom and sides of the cavity:
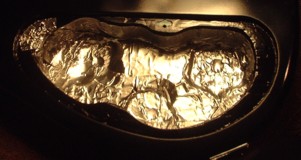 Note the
upper left where I let some come to the top. That will mate with
the foil I put on the plastic cover to create a completely shielded chamber.
Note the
upper left where I let some come to the top. That will mate with
the foil I put on the plastic cover to create a completely shielded chamber.
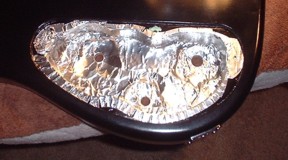 I also ran
a piece across the top/edge that will get its contact from the cover.
I also ran
a piece across the top/edge that will get its contact from the cover.
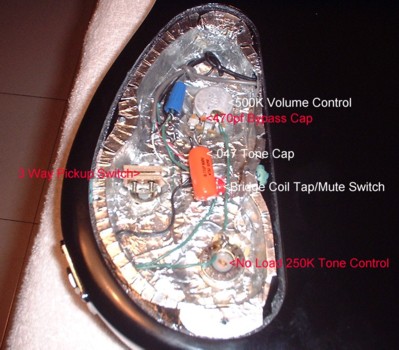
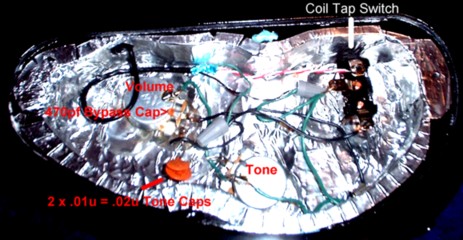 Wired up.
Coil tap option shuts off one half of the pickup to give a "single coil
/ Strat" like tone. 470pf volume bypass cap to prevent treble reduction
when turing volume down. 2 x .01u = .02u tone cap value.
I find the standard .05u value cuts too much middle frequency when turning
the tone knob down.
Wired up.
Coil tap option shuts off one half of the pickup to give a "single coil
/ Strat" like tone. 470pf volume bypass cap to prevent treble reduction
when turing volume down. 2 x .01u = .02u tone cap value.
I find the standard .05u value cuts too much middle frequency when turning
the tone knob down.
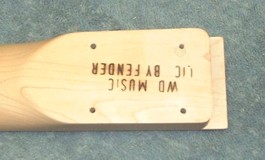
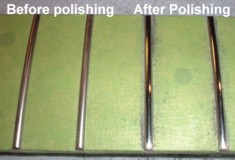
The frets on the WD brand neck either had a "protective"
coating on them or are installed before the clear coating of the neck itself.
This was causing resistance when bending while playing. I polished
them with a small brass wire wheel, then 0 and 0000 steel wool. Another
mistake occurred involving fret#17. More later.
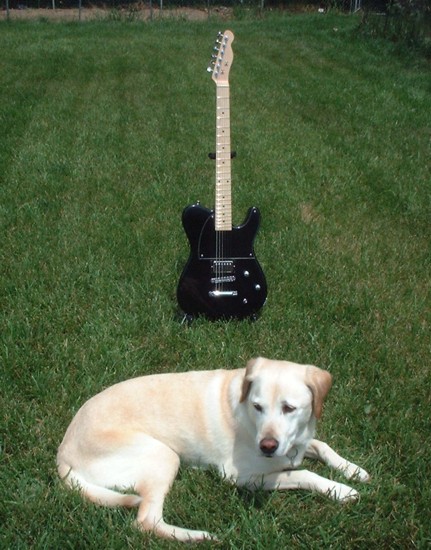
Some photos before installation of coil tap switch. (Sleeping
Buddy too)
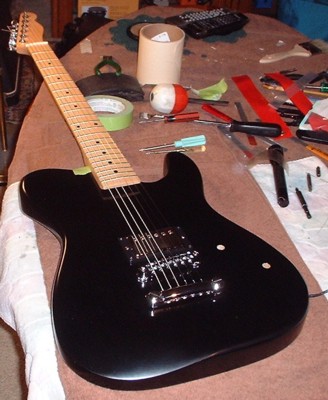
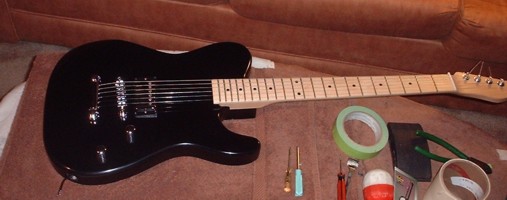
With switch and Dunlop Strap Locks.
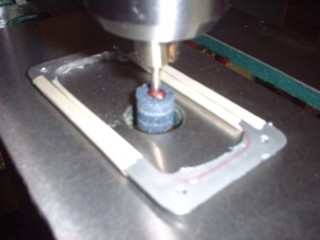
At this point I still needed to trim the clear pick guard so it would fit. It's was cut for a Tele with a control plate and the current pup ring is wider than the guard's cutout. I played it a few times w/o the guard to see if I would scratch the surface and I did. Had to polish again. The strings are high off the body so I thought maybe I'd get by w/o it. I liked the look w/o it but it had to be done.
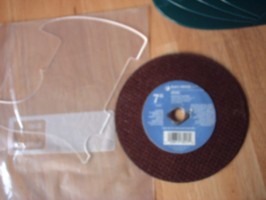 I
had a grinding/cut off wheel laying around so I hooked it up to the table
saw.
I
had a grinding/cut off wheel laying around so I hooked it up to the table
saw.
 Rather than
building a jig I taped it up and to the sliding rail of the cross cut pushing
device (forget the name.) No melting and it worked great.
Rather than
building a jig I taped it up and to the sliding rail of the cross cut pushing
device (forget the name.) No melting and it worked great.
The action ended up excellent. I goofed when I used a non-brass wire wheel to polish fret # 17 after the brass one wore out. It caused grooves in the fret and I had to file it smooth. So it was lower than the others and I had some buzzing when fretting there. I'll had to then file #18-#22 to get rid of it. I don't know what mistake# it was, but it was the last among several.
The intonation worked out within the adjustable range. :)
The sound is fantastic. Tons of sustain which the Tone Pros bridge and tail are known for. I tried it direct into my Q10 computer interface listening with headphones. Very clear and nice sound. I also tried it thru my home-brew Champ type amp and my "Fenderized" Harmony amp. Both distort when cranked and the tone was excellent. My '71 Fender Deluxe Reverb needs a speaker re-cone on it's Weber P12N so it's not good for sound tests at this time.
I mounted the pup (Seymour Duncan -'59) with the adjustable poles (6 screws) towards the neck instead of the "common" way for a bridge pup. I also flipped the polarity of the 2 main pup wires. This makes the tapped switch position use the half of the pup that has the screws. The "recommended" wiring would have made the non-adjustable half the active one in that mode. Since I have the screws set "high" and towards the neck side, the "half power" mode is louder than it otherwise would be. It's actually almost as loud as the full power position but has less mid frequency sound and (of course) is not humbucking. The tapped position sounds almost like an acoustic guitar when play w/o distortion. Also "Stratty" sounding.
Looking back I probably should have used the pre-canned spray blue dye that RE-Ranch sells instead of trying to mix and spray my own. I would have finished it natural, and it would have looked great, but I already have a natural Strat on display and wanted variety.
I have to thank Kevin, a member of the TDPRI discussion
web site. His service was far beyond what any "company" might provide.
He answers all inquiries quickly and honestly. All the advise he
gave me was right on. His prices are very attractive and I
would not hesitate to go to him for any future project. I don't think
there will be any more guitar builds for me in the near future however.
This one took long enough and, at this point, I can't imagine building
anything that I would like more.
Update October 2004 Below
I decided it was time for a neck pickup. I wanted
something "different" but it needed to keep up with the loud bridged pickup.
I considered a P90 type especially after seeing John Fogerty using them
on one of his LPs on the A&E live concert. It would have to be
black instead of the more common cream. I also considered a TV Jones
since it's humbucking so probably louder than a P90 which is a
single coil type but larger.
Virtual mockups:
Black P90 in neck position
.
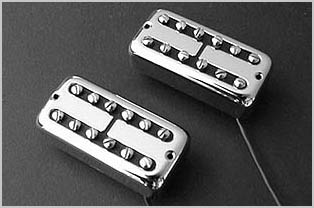
Filtertron type in neck position.
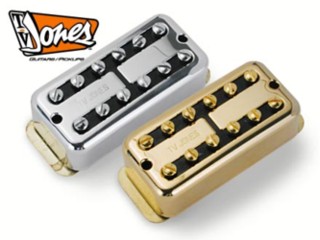
I went with the TV Jones (Filtertron type.) They are modeled after the types used on Gretsch guitars and look very cool with their 12 adjustable pole screws and black/chrome construction.
This is the pic from the TV Jones site.
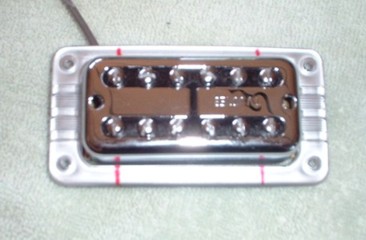
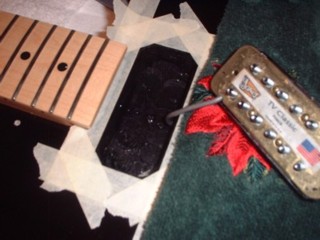
I bought them from Stew Mac's site since I needed trim
rings and some switches. Here's the pic from Stew Mac.
 Notice how
the bottom plates stick out in this pic. That meant I would have
to either grind those ears off (voiding any warranty) or rout wider than
I wanted too. I wanted to be able to use no trim ring as an alternative
but the wider rout would be visible thru the clear pick guard.
Notice how
the bottom plates stick out in this pic. That meant I would have
to either grind those ears off (voiding any warranty) or rout wider than
I wanted too. I wanted to be able to use no trim ring as an alternative
but the wider rout would be visible thru the clear pick guard.
They use unique sized trim rings so I bought a clear and a "silver" one. The "silver" one just had gray paint on the bottom so I used that one as the template for routing. I marked the ring/template with red to align the poles under the strings.
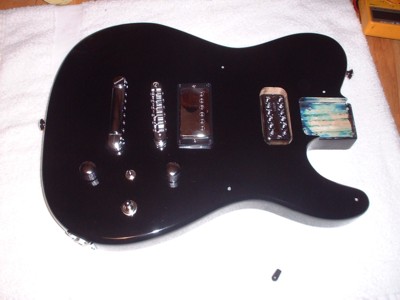
I mounted the guard to a piece of scrap for support and
taped the ring as a template. After some drilling:
The router would have wobbled from lack of good support so I placed the old control cavity template around the ring.
Had to file a little to get a straight enough result but it came out pretty good.

Next, with the guard now on, I drilled out some of the cavity with forstner bits then routed a shallow amount using the guard as the template. Then I used the shallow channel of surface wood as the template to rout deep.
To widen the rout for the ears of the base plate, I needed to first widened the ring/template. I used a grind stone for that then used the wider ring for the 2 step routing process on the wood.
With a second pickup I would need a selector switch. I still wanted to keep the coil tap switch for the bridge so I would need another hole for a second toggle. The TV Jones comes with only 2 signal wires so it cannot be tapped. I would have preferred putting the pickup selector switch at the top of the body like on an LP (and in the "virtual" models) but that would have required some very creative and risky drilling and routing. Instead, I added a small hole between the top 2 holes for a mini-toggle switch. That would be for the bridge coil tap when down, "normal" when in the middle, and mute when up.
I also moved the tone control to the "back" and put the new selector in the "bottom." Here's the cavity after the 4th hole was added, then with the wiring hooked up.
I still wanted to not use a trim ring so I painted the cavity black and put black tape on the visible part of the ears.
Even with the black paint and tape I could still see the
wide rout too much thru the clear guard.
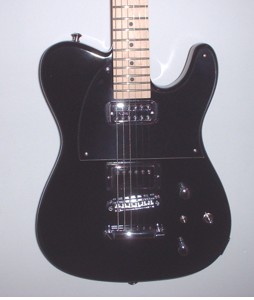
I added the clear trim ring with 4 screws thru the guard
and into the wood.
I may add a chrome trim ring on top of the black one for the bridge pickup since the clear neck trim ring stands out somewhat. Or not....
The output of the new pickup is balanced with the bridge and sounds very good. I was worried I would have to lower the bridge drastically to balance their outputs with each other. The TV Jones is deep and a nice contrast to the bright bridge but isn't muffled at all. I have the pole screws up a little high for good string separation in the sound. I prefer leaving the bridge coil tapped most of the time and that combines well when in the middle selector setting (both pickups on.) They're wired standard-parallel when combined. Now I have 5 possible settings instead of just the 2:
1)Bridge-Tapped: Bright and acoustic like. Single coil sound.
2)Bridge-Normal: Bright and "fat" with more midrange that #1.
3)Neck: Deep
4)Combo w/Bridge Tapped: "Jangly"
5)Combo w/Bridge Normal: "Jangly" with more mids.
I can't call it "LPesquire" any more since "Esquires"
have only a bridge pickup. "Blackie" is taken. Maybe I'll call
it "Keith."