| Stage one: Bring any combo you like, but you'll have to throw it away later on anyway. Shard one: After crossing the seashore, you'll go inside some kind of stone building. The green eyeball things that spit you out (called Zebons) are the tickets to the first Shard. While traveling in them, you will eventually see a shard but go right pass it. You have to drop down when you are on the platform after the sighting with to recover the missing crystal. Shard two: In one of the scenes, you will be in a type of penguin cave. Make sure you pick up the Ice-Bomb combo here. YOU WILL NEED IT!!! Once you get past the scene of the penguin cave, there will be a boss of a smiling white ball with a spike on it's head. I suggest you to keep under the center platform, while using the Ice-Bomb combo below (This will take a while, but it's the best way). When you beat it, the platform in the middle of the room will reveal it's Shard. Shard three: Your patience while beating that mini-boss will pay off. The scene after the boss will be of some sort of wooden bridge layer tower. Go to the bottom floor and find a checkered blue and black platform with a Zebon under it. Blow up the platform with your Ice-Bomb combo and fall into the Zebon. It will spit you up and make you run into a Shard on the way. Stage Two: Come with the Fire-Rock volcano combo. You'll need it. Shard one: When you enter a chamber with a giant king crab at the top of a tower of bridges, defeat it with your Fire-Combo and then break the barrier above you for your prize. Shard Two: You can get rid of the Fire-Rock combo to try and find something else. When you come to a scene with waterfalls, Waddle Dee just can't resist going on a ride. Make sure in this ride that you jump whenever you have a "!". Shard two is off the edge of the second waterfall, so be prepared to jump. Shard Three: After getting rid of the boat you were in, you will be sliding downstream on foot (With the help of invincibility, that is :) ). The last shard is collected right after the final waterfall (A red fish is flopping in front of it) so once you jump off, puff backwords to take it. Stage Three: Bring my personal favorite, the Bomb-Cutter combo. Shard one: When you get to the scene where wooden platforms are gushing up by water pressure, take one up and fly to a rock slab. At the top, drop down a hole and toss a ninja star to the left to uncover the Shard. Toss away this combo when you are done and start looking for a Rock and Cutter power-up to make the Rock-Cutter combo. Shard two: When you fight a green mini-boss who resembles a Cutter enemy, make sure you don't get too close to the boss because when you kill him: The floor near him breaks when he dies. If you are too close, you will miss the shard for defeating him. Shard three: If you got the Rock-Cutter combo, when you start falling down a vertical passage, you will see a barrier to your left when you touch the ground. It is a barrier that you need to break with the Rock-Cutter combo. Blow up the barrier with you combo and collect the 1-Up. Next, go to the left wall of the platform where you got the 1-Up and carve yourself until you become a stone hamster. On the left wall, keep pressing A to climb the wall as a hamster at a rythmatic pace and you will eventually get the Shard. Stage Four: Be absolutely sure to bring the Rock-Cutter combo you got in stage three. Shard one: In one room of this completely underwater stage, you will be caught in a fast moving current to the right. A Shard is a the top of this room, but you can't swim normally to it. In order to not get pushed by the current, turn into a Rock-Cutter bird (I suggest not picking the owl) and fly to the piece. While going up, remember that Rock-Cutter creatures can still take harm. Shard two: At a room with a trippy pink backround, keep swimming downward until you reach a pole. Go to the other side of it and immediately turn into a Rock-Cutter creature. Weighed down, you can collect the Shard at the bottom-right side of the section. Shard three: In one scene, the current is super strong again and you have to turn into a Rock-Cutter creature. This scene has many things coming out of a bottom left-hand opening, so don't forget to dodge them. If you can't find the Shard around here, you're hopeless :) Area Boss: Arco Arco is no pushover like any other bosses. You are limited to only a few Power Mixes because you have to fight him underwater, which can be irratating. However, a personal favorite still works: Bomb-Cutter! Arco starts out spitting many things at you which you can either swallow or get killed by. Swallow up the fish and spit them or chuck a few stars to hurt Arco. Next, you have to watch out for his Dive Bomb technique, which is hard to evade. After taking out his life bar, Arco will go down, just to go back up for round two in a vertical upward tube. Arco will keep going up to spit monsters at you and then dive bomb you. Avoid the dive bombs, attack along the way, and you beat the planet Aqua Star! |
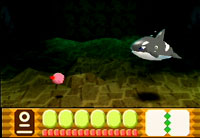 |
| Be very careful in this battle. Arco is apparently faster than a submerged puffball. |
 |
| Aqua Star |