| How I installed a new muffler myself |
| photos by Jeff Opal, taken in 2003 |
 |
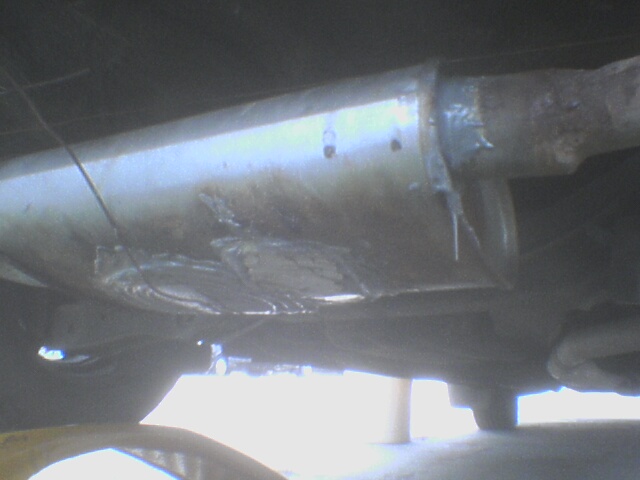 |
| This photo shows metal plates I glued over holes in the muffler, using "JB Weld" brand of glue. The metal for the patches was from food cans. These patches lasted only two months. However, the joints I made for the input pipe and exit pipe seemed to be reliable and secure. |
| This photo shows the seal I created for the exit pipe. A great thing that I learned from my attempts to fix this muffler is that a big gap can be easily filled with JB Weld glue if the glue, when still wet, is mixed thoroughly into fine steel wool. This photo clearly shows some of the steel wool (covered with glue). The wool-glue combination felt like metal to the touch. |
 |
 |
 |
 |
| The six photos on this page show two different mufflers. The top three photos show a new muffler that I put on myself. The bottom three photos show the muffler I was replacing. |
| The bottom three photos show the muffler I replaced with the one in the top three photos. The muffler shown to the right is one that I had put on my car by a muffler shop, for $65.00. Holes appeared in this muffler around two years later (visible in the photo at right). The bottom two photos shows results of my efforts to fix the holes. My repairs lasted only about six months. I then decided to buy a new muffler and put it on myself. |
| The photo to the right of this text shows the new muffler. It is a Walker brand of muffler that cost me only $43, from O'Reilly Auto Parts in Baton Rouge. I was told over the phone (when I ordered it) that it has a lifetime guarrantee. However, after I bought it I found no description of any kind on or in the box about any guarantee. The O'Reilly receipt merely describes a year-long guarrantee. The photo shows how I joined together the exit pipe to the new muffler without using a welding torch. |
| The photo to the right of this text shows the same joint from a different angle. This joint, which seems to be very secure to me, uses three material components: 1-- a metal "splint": a three-inch long piece of the exit pipe (cut length-ways to enable it to be stretched to a diameter wide enough to go around both the remaining exit pipe and the 1.25 inch long stub of pipe extending from the muffler on this side) 2-- a 1.75 inch clamp I bought from a local Autozone store for $1.19 ($1.09 plus tax). 3-- a metal-simulating type of glue, used to seal gaps This new muffler was 17 inches long, which was 5 inches longer than the muffler it replaced. In order to make this one fit I found that I would have to remove at least six inches from the exit pipe. I decided to use the six-inch long piece that I cut off to make the two "splints" for the two joints. Two "slings" made from coat hanger wires are visible in this photograph. |
| The photo to the right shows the joint on the other side (the passenger's side). Unlike the two photos above, the length-ways cut in the 3-inch piece of pipe in this "splint" isn't visible. That is because it is on the other side that can't be seen from this angle. The coat hanger visible in this photo is one that I use to reenter my car when I've accidentally locked myself out of it. |
| The old muffler |
| I've concluded that this fix might have worked if I instead of food can metal I had used a 12-inch by 18-inch galvanized steel plate. I recently found such plates for sale in a local Lowe's hardware store, for only $3 each. The plates were for houses on stilts, for the purpose of making it impossible for termites to climb up the stilts. |