|
|
|
|
|
|
|
|
|
|
|
|
|
|
|
|
|
Author: Warren (Primera Man) Description: An Excellent "How-To" on a way to paint window frames. Contact: [email protected] *NOTE* PLEASE READ and UNDERSTAND TUTORIAL BEFORE YOU BEGIN! :) |
|
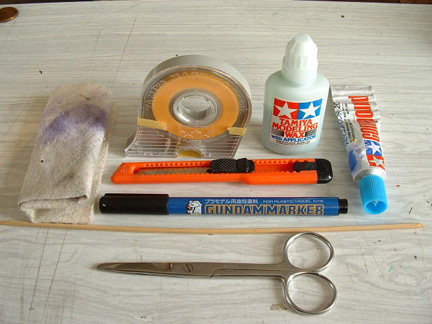
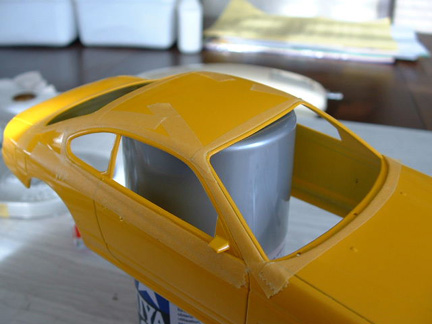
Use Tamiya masking tape as it wont bleed paint underneath it. Lay it all over the car frames etc.
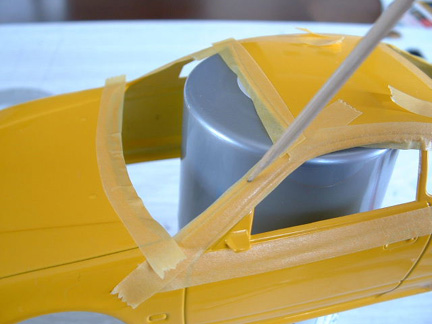
When all the tape is on the car, push it down nice and smooth with a soft cloth. Then use a tooth pick to lightly trace around where you are going to cut.
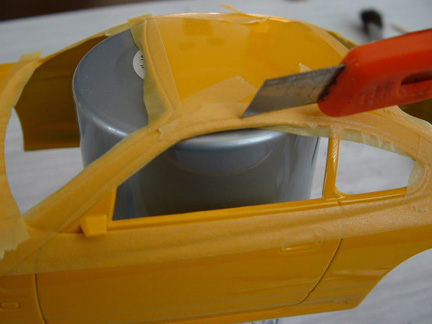
Next...very lightly use the knife to trace around all the windows and frames. The tape is very easy to cut. Don't push hard as it will cut deeply into the model.
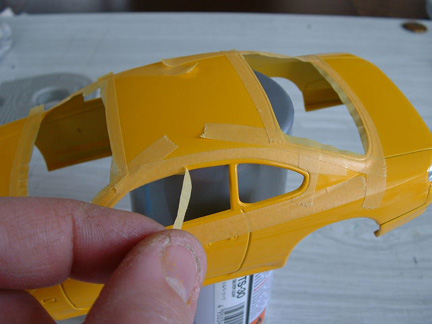
Peel of the extra tape.
Smooth the tape back down again after cutting. The car is now ready for painting.
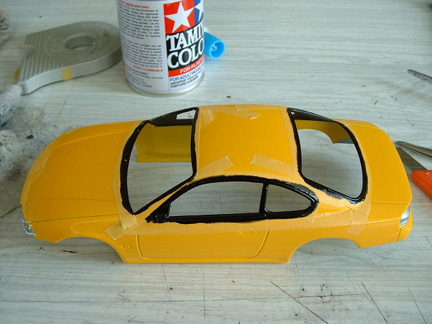
This part you can either spray if you want (well need a lot of masking) or just paint by brush. IMO the brush works out just fine if you use enamels which are longer to dry and leaves a good smooth finish.
Also at this stage remember to do the inside of the car so its black on the inside of the frames.
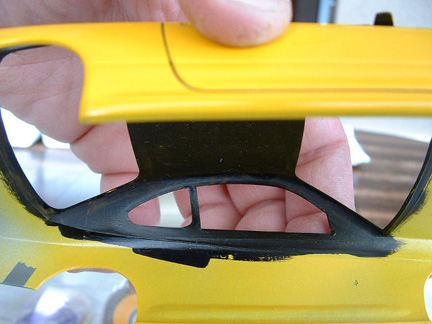
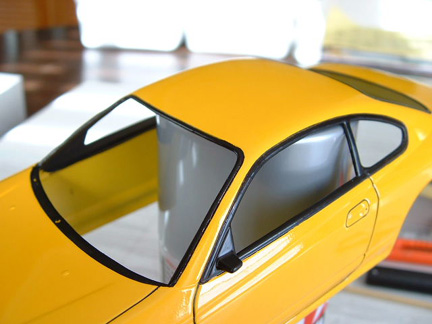
Once the first coat is on everything do the second coat straight away on everything. If you allow the paint to dry to long on the tape it will give a "jagged" edge when pulled off. As soon as the 2nd coat is done start taking the tape off. Leave the paint to dry for 2-3 hours. If you have to do any touch up stuff, I use my marker pen (Gundamarker) to get it looking 100%. All going well it should end up looking like this......
Once
this is done....you can use your marker pen to do panel lines if you
want to.....but that's another story !!!
|
|
JDMF © 2003 |