Step 1
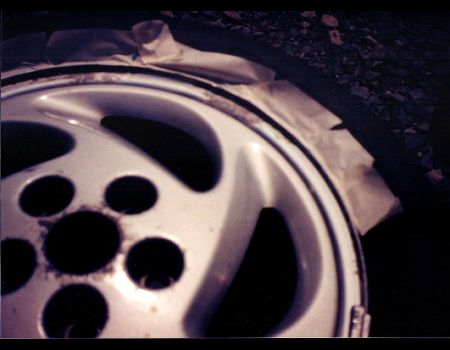
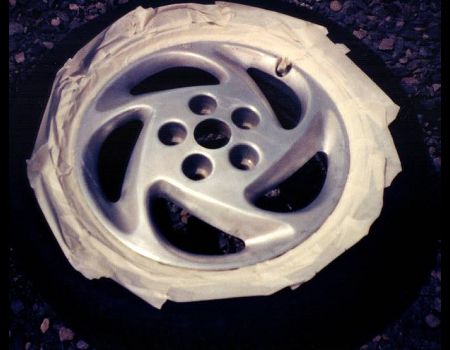
- Remove the wheel from your car. I did all 4 at the same time, you don't have to but it saves time overall since you can be working in rotation (stripping one while the other dries, etc.). Remove the wheel weights, numbering them so you can remember where they go. Mark the tire with a piece of tape where each weight went with it's number. Mask off the tire, no you do NOT need to remove your tires from the wheels.
Note how I'm using small 2-3" long pieces of tape overlapping each a bit. The tape is stuck to the very outside edge of the rim, not on the tire. You do not want stripper to get down in back of the
rim and leak into the tire bead. Mask off the valve stem good too! Note in picture #2 how the tape is all overlapped neatly and the valve stem is masked. Take a look at the paint on this rim! Yuk! Not
shown: Add a second go-round of tape to make it 4" wide or add some newspaper to completely mask off the tire from the stripper. Step 2
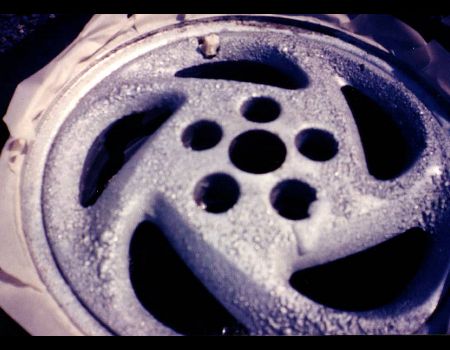
- Spray a good even heavy coat of stripper on the wheel. Wear your gloves and do this outside. DO NOT
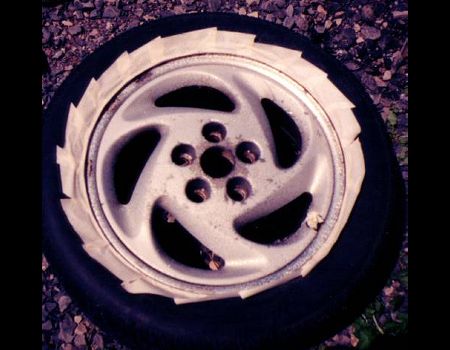
sniff this stuff, it is really nasty. Start by spraying in the lug holes, then inside each swirl, then the rest of the rim. Let it sit for 5-10 minutes. You will see it start to bubble as in pics 3 & 4.
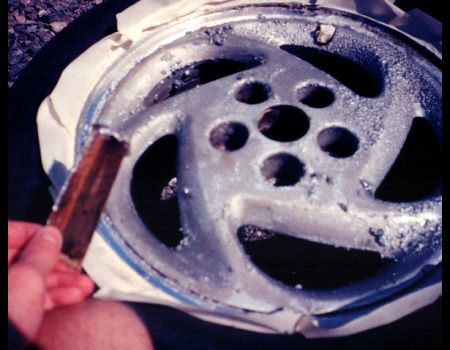
(Yes, this is a different wheel than picture #1. So sue me.) Once the Tal Strip has done it's thing, start to scrape the gunk off. Wear gloves, and use whatever is handy. I used sticks, rocks, putty
knives, and plastic scrapers. Get as much off as possible and if you need to give another squirt of stripper to any stubborn areas. Once you have it clean use a LOW pressure hose and rinse it all off. Use
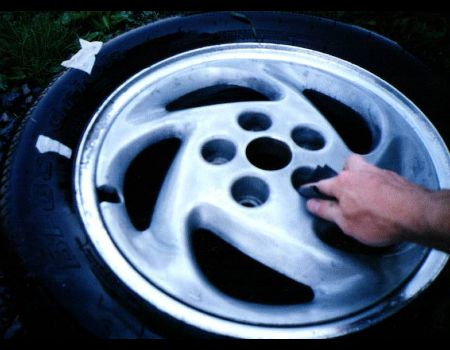
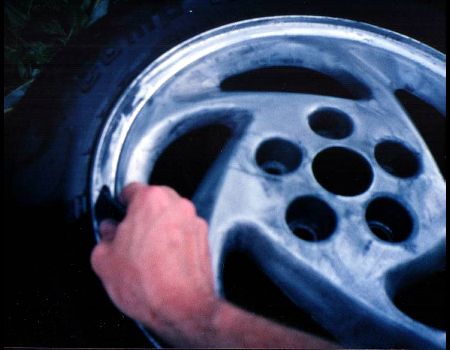
your scrubbrush and dish soap to get it really clean. Be sure to get into the lug holes and valve stem hole. You can remove the tape once you have it rinsed off. SCRUB it well, front and back! (You will get
wet, so dress accordingly). Rinse any spatters of stripper off your skin immediately! Step 3 - Now you must prepare the metal. I strongly suggest
renting/begging/borrowing/or buying a 1/4 sheet orbital palm sander. It makes the work go much faster, and does a better job for the coarse sanding. Either way, sand the surface of the wheel using #240 grit wet paper. Keep it wet, and change it often. Sand out any corroded areas until smooth. Keep away from the polished edge of the wheel or you will put deep scratches into it. (See step 4!) Fllow up with a hand sanding of the entire center with #400 wet.
Step 4
- Now you have a decision to make. The nice shiney polished edge of my wheels was shot in many places. So I have three choices. 1) If it's not too bad just clean the corrosion with a brill-o pad and leave it. 2) If it looks like mine, sand the corrosion completely out and go for a "satin" finish on the rim part. 3) Do step 2 but go ahead and sand down to #800 and then polish it with jewler's rouge and a buffer.
To make a long story short, I tried #3 and it can be done. It takes
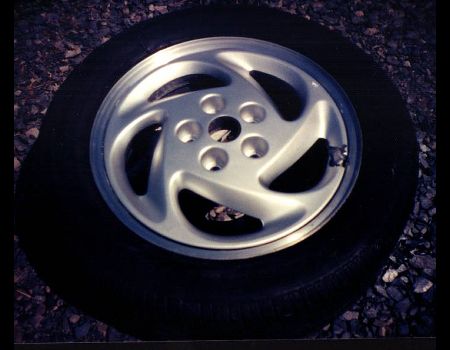
FOREVER and is not worth it. If you do step 2 and sand all around the rim in large circles (follow the rim with long strokes) it will look like the rim was factory satin finished. It looks sweet IMHO, maybe even better than polished. (look at the big pic of the finished rim again...)
Anyway, to "satin finish" the rim of your rims, take #240 and wet sand any corrosion until it is completely gone. This takes time and you will get a blister on your thumb... Use fresh sandpaper,
fold it up, change it often and keep it wet. When you have all the corrosion sanded out, take some fresh #240 and go around the whole rim with it. Keep doing this until you have a uniform satin apperance.
Again, change paper frequently so it "bites". Follow this with #400 and you should have a nice satin appearing rim, all smooth with no corrosion. Now, wash the entire rim. I mean really wash it. CLEAN CLEAN CLEAN!
Use soap and water, scrub brush, sponge, whatever. Rinse it well with water, and set it in the sun to totally dry. Hint, while it's drying start on another rim. Step 5
- Now it's painting time. You should have a completely metal, really clean, dry, rim at this point. If you don't, go back and make it that way. Be sure there is no water under the center of the rim or in the tire bead! (Stand the wheel up)
Take some clean cheesecloth and saturate it with the naptha. Wipe the entire rim down good and let it air dry. Repeat. Now mask off the center
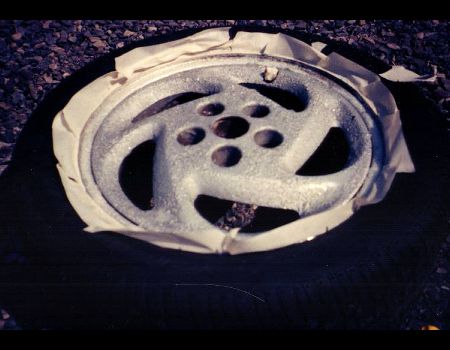
of the rim as shown. I slipped the tape
pieces into the crack under the center section, and went around the rim twice to cover the outer rim and tire. Then (not shown) mask off the tire with newspaper.Spray a coat of the primer. Try not to
make it too heavy, but make it cover the entire rim. Again, start with the lug holes and then the swirls, then the entire rim. I found myself walking around the rim several times in this process. Be sure to
get all the nooks and crannies. When the 1st coat has flashed off (no longer looks wet and it is "touchable but still feels damn") apply the 2nd coat. Repeat for the 3rd coat and let it dry
completely. Notes: If you get "fisheyes" in the first coat of primer and they are small do not panic. Let the 1st coat dry
completely before starting the 2nd coat and likely the 2nd coat will cover the fisheyed area. If not re-coat that area again. I got a few, and by the 3rd coat all were covering ok. If you can't get rid of
them sand the affected area and wipe clean with laquer thinner, then try again.
Don't make your coats too thin or too thick. It's tough to describe, but basically you want to get an even coverage without runs. Just "dusting" a few coats on is not good. You want to get enough
paint on so that it will "flow" out a little, but not run. Practice this technique now at the primer stage. If you get runs in the primer, let it dry, sand it out with #400 wet, and then reprime
it. Step 6 - Well, if you've made it this far you should have a
primed wheel ready to
paint. Once the primer has driedcompletely, apply the first coat of silver. The silver paint isdefinitely more runny than the primer, so go with a light
"tackcoat" for the first coat. (Spotty, not qutie full coverage)Again, start with the lug holes and swirls. Then work your wayaround the rim in a pattern. Once the tack coat has dried for
acouple minutes, lay on the first full coat. Be sure to put enoughpaint on to get it to "wet out". Let it dry until it is no longer tacky(10-15 minutes in full sun on a summer day). Then apply the
2ndand 3rd coats in the same manner. Note: At this point I had all four wheels primed at the same time,and simply went from one to the
other. The time to make it back to the first wheel was just about perfect for it to be dry enough for the next coat. Keep the paint shaken well. Once
the painted rim has died for 30 minutes or so you can carefully remove the masking tape. Try to touch the rim as little as possible at this stage.
Step 7
- (Pic missing) Now go back and mask off the rubber of the tire again, just like you did in step 1. only this time be sure to actually expose all of the rim (it's OK if a little clear paint gets on the rubber of the tire). Once you have the rim masked, shake up the clear coat and follow the same directions as for the silver. Tack coat, then three (or four) full coats. To achieve the best smoothest finish be sure to apply enough paint to get good wet out (Especially on the final coat) but NO runs!
Let the finished rim dry in the sun for an hour or so and remove the tape. Place the wheel weights back on where they went before the whole process and Viola! You are done! Note: Wait at least a few hours befrore remounting the wheel on the car, and even then be VERY careful with that lug wrench! It will be at least a week until the
paint is really fully cured. (Best to wait at least a day before remounting them!) |