 Quiet Waterfall
by John Boretos
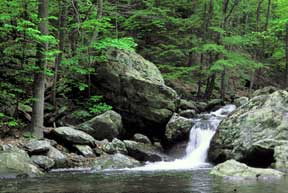 Original Color Image
Simulate Infrared Black
& White From Non-Infrared Color
By manipulating
a color image, it is possible to simulate the look that
Original Color Image
Simulate Infrared Black
& White From Non-Infrared Color
By manipulating
a color image, it is possible to simulate the look that
results when photographing a landscape using black & white
infrared film.
Here is how it is
done.
Make a duplicate copy to work
on using Select > Select All followed by File > Save As.
Step 1
Start by creating a new layer via Layer > Adjustment layer
> Channel Mixer.
{Go to the channels palette and click on the green channel.
Also, make certain that the background image is highlighted
(clicked) on the layers palette.
The New Layer window will appear. Set color @ None, Mode @ Normal
and Opacity @ 100%.
Click OK and the Channel Mixer window will immediately appear.
Check the box for Monochrome.
Set Output Channel to Gray, and Source Channels to equal +200
and - 200% as follows:
Red = - 60, Green +200, Blue - 40. Note: Green should always be
set for +200
but the other values can be varied to suit as long as they total
-100.
The overall result must be 100% (i.e.,+ 200 - 100 = + 100%).
Green foliage reflects the greatest
amount of radiation which infrared film is able to register.
Our eyes do not see this part of the spectrum so we are generally
unaware of this phenomenon.
By enhancing the appearance of the green layer it is possible
to simulate the result that is seen on infrared film.
Step 2
The ethereal punch seen in infrared photography is further addressed
by bluring the green channel.
Select only the green channel from the channels palette and then
Filter > Blur > Gaussian Blur.
Set the Mode to Screen and the Opacity anywhere between 25 - 50%
to suit.
Step 3
As a last touch, give the image a little noise to match the grain
effect usually seen on infrared film.
Filter > Noise > Add Noise. Check the Monochrome box, and
set Tai.htmlDistribution to
Gaussian in an amount that doesn't seem too grainy to you. Perhaps
2 to 5 %.
DO NOT USE THE SHARPEN FILTER
Flatten Image and Save
Music box