 Azalea Cluster
by John Boretos
Azalea Cluster
by John Boretos
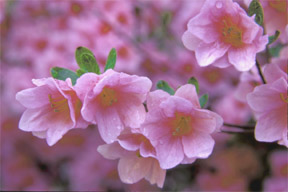 Original Photo
Compare the original
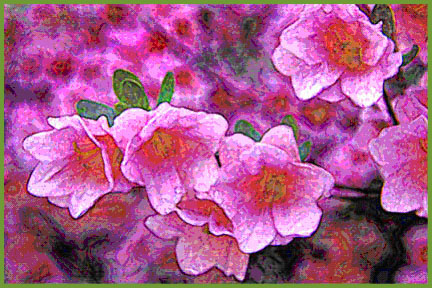
with the artistically rendered version
Original Photo
Compare the original
with the artistically rendered version
What is your preference?
Azaleas Using Photoshop
7 & Artistic Filter
Here is how it was done.
Scan Image into Adobe Photoshop 7.01
Set size to 4”X6”and Resolution to 300 dpi
Adjust Brightness & Contrast via: Image > Adjustments >
Levels
Use slider bar for best highlights, mid-tones and shadows
Adjust Color: Hue/Saturation
Save a Copy and work on the new copy
Clone black spots out of leaves
Emphasize the stamen selecting one with the magnetic lasso
followed by : Edit > Copy > Paste
Place each on a separate stamen location and move them into
place with the move tool as you add them.
Use File > Transform > Rotate to align them in their natural
location.
Reduce all layers to one: Layers > Flatten Image
Select best rendition via:
Image > Adjustments > Variations > Mid-tones set to medium
fine.
The More Magenta choice was selected as being the most
pleasing.
Produce Creative Effect
via: Filter >Artistic > Paint Daubs
Settings: Brush size 14, Sharpness 14, Brush Type Dark Rough
Final Adjustment via: Image > Adjustments > Brightness &
Contrast
Brightness @ +10, Contrast @ +10
Sample green leaves with eyedropper tool to use as a border
Edit > Stroke @ 3-5 pix, Inside, Normal, 100% opacity
Save
Music Box
|