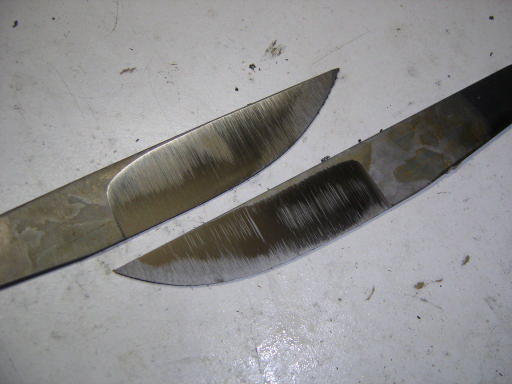
After sanding at 120 grit for a
few minutes you can see the
remaining 60grit scratches.
You can still see them even
without doing the acid etch but
I feel the etch really helps
make them stand out.
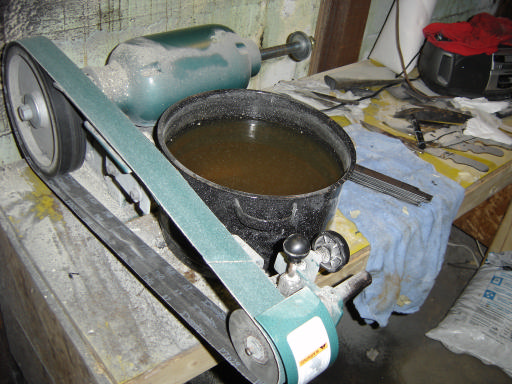
Once all of the 60 grit
scratches are out I then sand
the bevels to 220 grit. I forgot
to take pictures of the 120/220
grit sanding cycles so I will
show you my basic 2x72" belt
sander instead (notice the
water bucket next to it? after a
few seconds of grinding you
have to dip the steel to cool it
down)
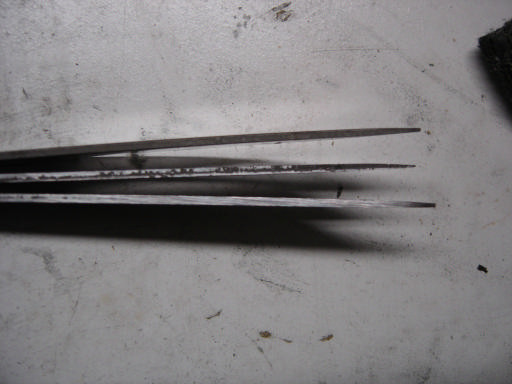
Next step is sanding the profile
to 220 grit. The top blade
shows one unsanded, the
middle pic is halfway done,
and the 3rd is it fully sanded.
Also at this stage I take the
220 grit belt and sand a very
small bevel on the edge(like im
trying to sharpen it) this gets
rid of the sharp corner which
can cause cracking during
heat treating.
I inspect the knife to make
sure all of the coarse
scratches are out of the blade,
that I have slightly rounded the
edge, and that i ground the
blade evenly. If one side is
ground down more than the
other the blade will warp like
crazy during the quench.