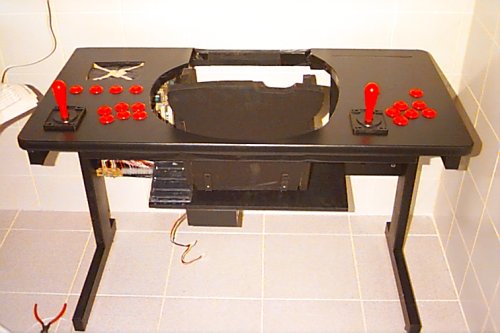
Home

Please be patient... images are big! (but they are highly optimized :)

7. Assembling Time!


Now Things Will Take Shape!

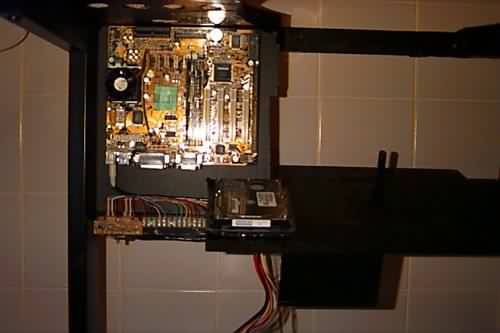
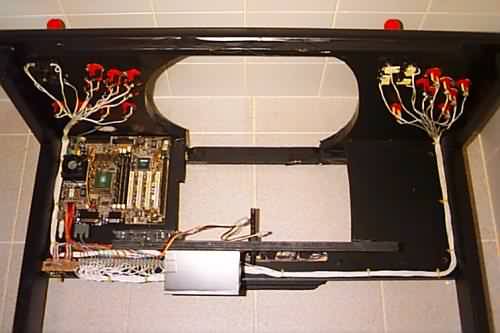
Man, It´s darker down here!

Sorry for this dark photo...

Seeing below the table we have the motherboard with all the connectors´ entries pointing down to ease the connections.

A little below we´ll find the keyboard hack circuit connected to the motherboard.

On the right lies the harddisk (without any connections yet).

And below all we´ll find a black box... This is the power supply.

Hey! NOW it seems like an Arcade Cabinet!!

All joysticks and buttons were in place now.

I leaved the 2 little surprises (those holes on the upper left and right on the table) for the next section: Final Touches.


Again, with a solder iron an a lot of patience I wired all the buttons to their respective connectors on the keyboard hack circuit.

Also used plastic rings and hot glue to make these wires stay in place.

Why white wires ???

Because I had a huge roll of it.

And one note: You´ll use a lot of wire!


Back to Main Page

Flavio Jarabeck © 2001 Brazil

Hosted by www.Geocities.ws

1