Home

Please be patient... images are big! (but they are highly optimized :)

5. Keyboard Hacking


This is the Longest Part...

But not boring... If you never hacked a keyboard (and probably not) you´ll learn a lot about computer keyboards, it´s very cool!

I´ll not teach you here how to hack a keyboard. There is a lot of information on www.arcadecontrols.com and its related sites.

I found old keyboards on a hardware junk depot. I bought 2 for $4 dollars. Since I never hacked a keyboard and for safety, I bought 2 brand different ones (Zenith Systems and a Mitsumi).

This is the Mylar sheet used to map all the keys from the keyboard encoder.

Thanks God I bought 2 keyboards! I discovered from the Zenith keyboard that the 2-folded Mylar would be a pain in the ass to map and also the encoder uses a modified matrix that wouldn´t give me all the necessary keys to 2-player joysticks and associated buttons (12).

So I violated the second (Mitsumi) keyboard ;)

And thanks God again, I found a single Mylar sheet - with all the contact keys on the same side - easier to map all the keyboard keys. That´s the photograph on your left.

Under the Mylar sheet you are seeing the little keyboard encoder circuit.

On the next step you´ll need an Ohmmeter and preferably a spreadsheet to take note of all your mappings.

You can check here the mappings for the Mitsumi - KPQ-E99ZC-13 keyboard

Well, after that you´ll need to truly hack the keyboard.

Since the contacts on the edge of the encoder board are small and delicate you cannot make any mistake or you´ll blow the contacts from the circuit´s surface and even toast the encoder chip.

I opted to make an extension to a Sindal bar of connectors using a flat cable (computer flat cables work fine too). This way I´ll have more room to connect and reconnect the wires that come from the joysticks and all the buttons.

Using a small iron solder and many patience I did it!

Sorry for this blurred image. My poor old Kodak DC40 camera doesn´t have a macro lens ;)

Notice the flat cable solded on the circuit board. Using this kind of approach you´ll end up with a more manageable "thing". Using single wires to do this job you´ll probably have more difficulties on the soldering and handling the whole hacked circuit - identifying the correct wire sequencing, broken wires, etc.

So my advice, use a ribbon cable for this job!


Once again, recycle!

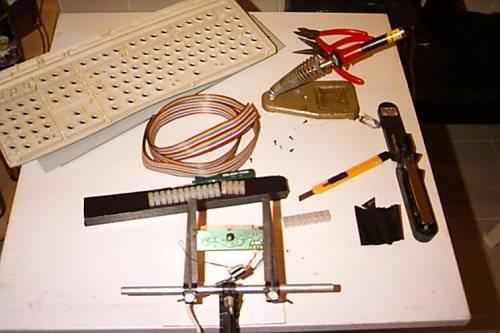
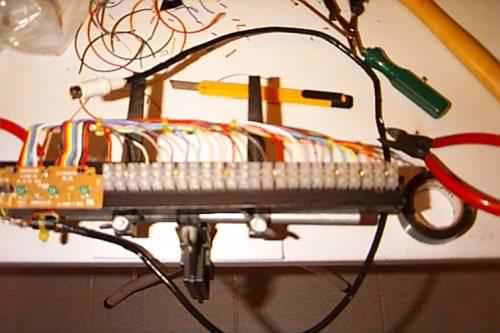
Using a small piece of wood cut from the table I acommodated the circuit and the connectors bar.

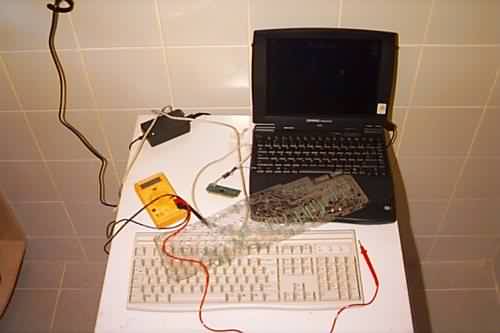
After all the connections were made, I shorted the keyboard cable since this circuit will be very near the motherboard. It´s easy since there are only 4 wires inside.

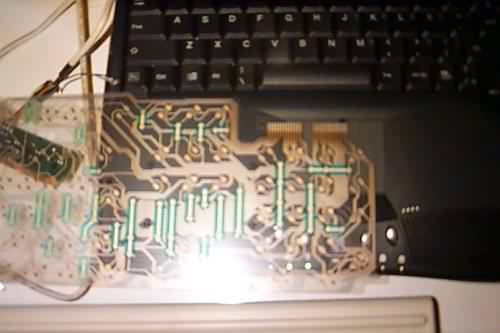
I choose a "very wide" approach for this circuit since the room for this circuit was previously planned... You´ll see on the next parts of this site.

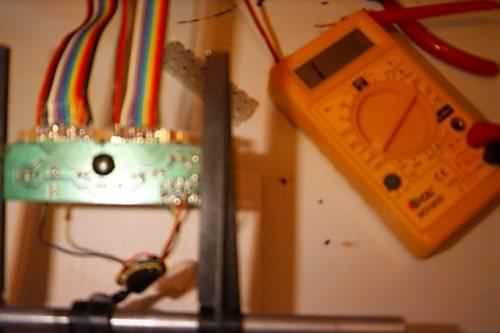
But, you can use a square with the circuit on the middle and splitting by 2 the connectors bar, using the reference got from the "Mapped Matrix" (generally 16x8 contacts). Hey, speaking chinese?!?

You´ll completely understand after read and learn how to hack a keyboard.

Back to Main Page

Flavio Jarabeck © 2001 Brazil

Hosted by www.Geocities.ws

1