
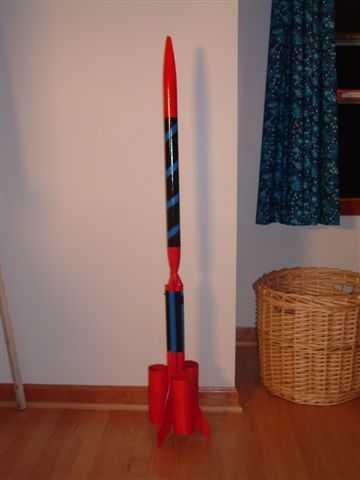
The �Corkscrew� is a single staged cluster rocket that is propelled by three C6-5, 18 mm motors. After the ejection charges go off, the ejection gases go up the outboard tubes and get ducted into the middle tube by paper vents. The gases travel further up into the main body tube where they pop off the nose cone and release the recovery device. This is a rocket that will defiantly stand out from the group and will draw the attention of your friends and viewers.
Parts List
Rocket Components:
-(1) 18� long BT-60 body tube
-(7) 18� long BT-20 body tubes
-(3) 7� long BT-80 body tubes
-(3) BT-20 size engine blocks
-(1) sheet of 1/8� balsa wood
-(1) 40� long 1/4� wide elastic shock cord<
-(1) 18� parachute
-(1) ogive BT-20 to BT-60 balsa transition<
-(2) 1� long launch lugs that will fit overr a 3/16� or 1/4� launch rod.
-Stiff paper such as index cards
Other Materials
-30 minute epoxy
-Hobby knife
-Sand Paper
-Spray Paint
Step by Step Instructions:
Step 2: Sand off the glossy coating of the 7 BT-20 tubes. Evenly glue 6 of the tubes around the central, 7th tube, so that the central tube sticks out 5 inches above the other 6. Let dry. The best way to glue the tubes straight, is to first glue the six surrounding tubes into pairs, so you have 3 sets of 2 tubes. Wait for these to dry, and then glue the pairs to the rocket. This will make sure the tubes are all parallel to the middle tube.
Step 3: Apply a thin coating of wood glue to the protruding end of the central BT-20 tube. Slide the transition over the tube so the larger end of the transition is flush with the top of the tube. Let dry.
Step 4: Apply a coating of wood glue onto the shoulder of the transition and slide the BT-60 body tube over it. Let dry.
Step 5: Cut three evenly spaced rectangular holes in the central BT-20 tube, the part of the tube that is between the transition and the 6 other tubes. The holes should be evenly spaced and each one should be above one of the outer BT-20 tubes. The holes should be approximately 1/4� wide and 1/2� long.
Step 6: Make the following vent template and make three cutouts of it on a stiff sheet of paper. Spread a very thin layer of glue on each side of the vents and let dry.
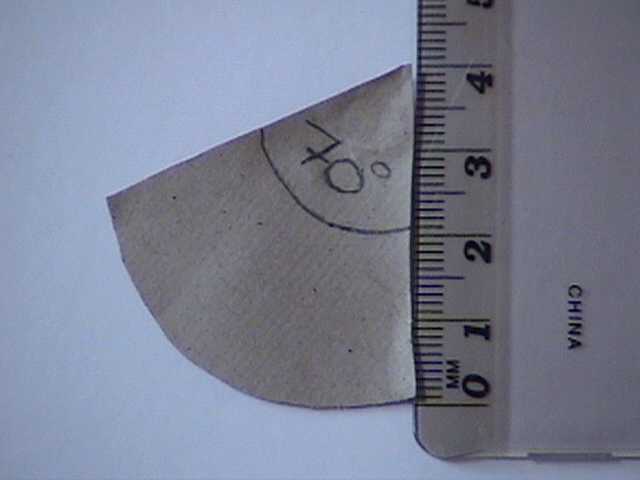
Step 7: Glue the vents onto the rocket so that they cover up the rectangular holes in the central BT-20 body tube. Make sure the vents are flush with the tops of the outer BT-20 tubes as shown in the following picture:

Step 8: Apply a layer of epoxy on and around the vents to strengthen them and the central BT-20 tube. Keep applying layers of epoxy until the vents and the body tube are very hard.
Step 9: Make the following fin template and trace it on a sheet of balsa 3 times. Cut out the fins using a hobby knife and airfoil them if you wish.
Step 10: Use wood glue to glue the fins in between the outer BT-20 tubes at the bottom of the rocket as shown:
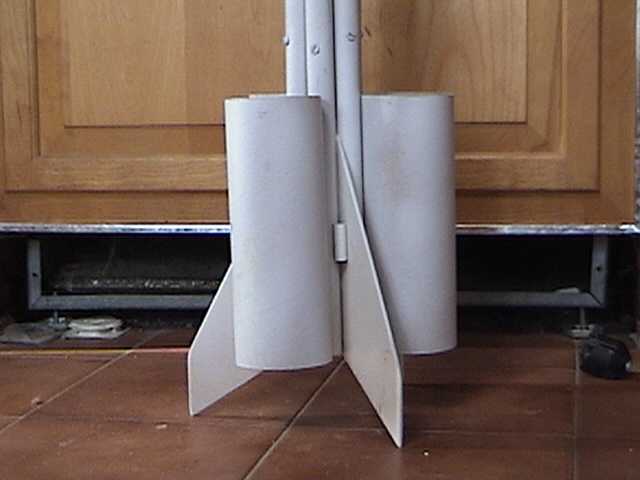
Step 11: Glue the 3 BT-80 tubes in between each of the fins as shown in the above picture.
Step 12: Apply a thin ring of glue on the 3 engine blocks and use a standard Estes motor to push the engine blocks into the 3 outer BT-20 tubes that have the vents.
Step 13: Glue one launch lug 3 inches from the bottom of the rocket between a fin and one of the outer BT-20 tubes. Glue the second launch lug 13 inches further up from the first, so they are both perfectly aligned.
Step 14: Attach the shock cord into the front end of the BT-60 tube using your preferred method. Then tie the other end of the shock cord to the eye of the nose cone. Finally, attach the parachute to the shock cord.
Step 15: Paint the �Corkscrew� with your own design or use my paint scheme, whatever you think looks best!
IMPORTANT NOTE: When preparing the Corkscrew for launch, make sure that you put the three engines into the tubes WITH the vents.