I just leave them there permanently now in my Outlook Express.... its quick, easy and you get used to seeing them there... I use them all the time when I make my toppers and need to change things around ... alter codes for colours, make the topper static etc...
Once you have got those three tabs... go up to Message, New Message....
Go to Format, background, picture... and choose something nice ... florals, stripes etc.. make sure its seamlessly tiled... so you don't see any joins. You can use the 20/20 program for this or even snag some from webpages you like or just use a plain colour if you prefer... (select one from the colour options instead of picture options if you just want a plain colour like I have on this grey background )
Browse through your files to where you have the background picture you want to use...select it ...
click ok and you will see it now in your Outlook Express letter. Click on that part .... where you would normally write your letter... move your cursor to the centre .. and down... so you are not right at the top .... click on the source button and where you see <BODY in the code ......
copy and paste the following words into the space before the angled bracket...
It must be exactly in that spot.... <
<div align="center">
<center>
<table border="2" cellpadding="0" cellspacing="0" style="border-collapse: collapse; border-style: double; border-width: 3" bordercolor="#000000" width="300" bgcolor="#F8F0E0">
<tr>
<td> </td>
</tr>
<tr>
<td> </td>
</tr>
</table>
</center>
</div>
If you are going to continue making these types of stationeries ... you would of course need to copy and paste the above code into your notepad or wordpad or just do like I do and put it on an email in your drafts folder ... Its very easy then to click back and forth to it from my new letter ...
each time I want to use it....
Okay now you have the code in your html body of your letter.... click on edit ... you should see a little box pop up ... that is where you will put your image or text or both...
I usually do a few enters on the keyboard to bring it down a bit more from the top.... it looks better .....
Click on the corners of that large box and you will see little boxes come up on each corner
which you can drag open or shut ... depending on the look you want....
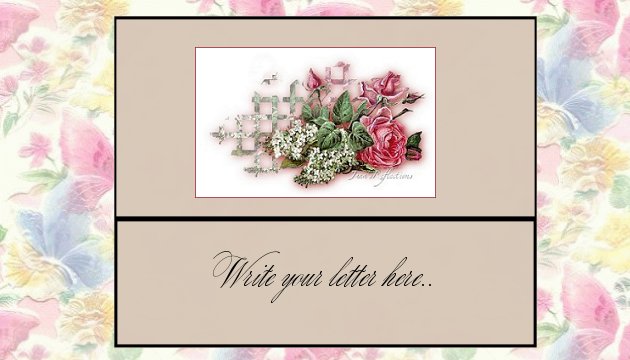
I want to add a picture to my top area ... so I click in the top part of the big box which you just created... and then centre my cursor...go to insert picture and find one you like.. You can add a space to the top or bottom .. pull out the box more or less .. do your own thing and create it nicely so it looks good. ... okay you should now have your picture placed correctly.
Now all you need do is simply click in the bottom area and write your letter as you normally would do.
that's it. You can of course go back to the source code and change colours where it says COLOUR#....... and put in any number you want.. You will get different colours which you could match to your picture ....The box will expand as you type ...
I hope you enjoy this one as much as I do.
I find it a great way to make announcements to the group and what a nice way to send someone a photo ... you could put the photo in the top box and write a caption in the bottom box... Lots of uses for this one...
best wishes from Jana