 |
|
|
|
|
|
|
|
|
|
|
|
|
|
|
|
|
|
|
 |
|
|
| Main Page |
|
This short tutorial only covers the coloring stage and basic information of the tools I used for this particular drawing. This tutorial does not cover the making of the drawing or the preparing of it for digital coloring.
I also assume that you have common knowledge of Photoshop and its basic tools, such as the selection tools, fill tools, and the layers palette. This would be essential tools needed for this tutorial, since learning all the different things Photoshop can do is a whole other tutorial on its own.
Well, let�s begin. |
|
|
|
| Similar Tutorials |
|
|
|
|
| Steel Dolphin |
|
|
|
|
| Farlow Studios - the 32 |
|
|
|
|
|
|
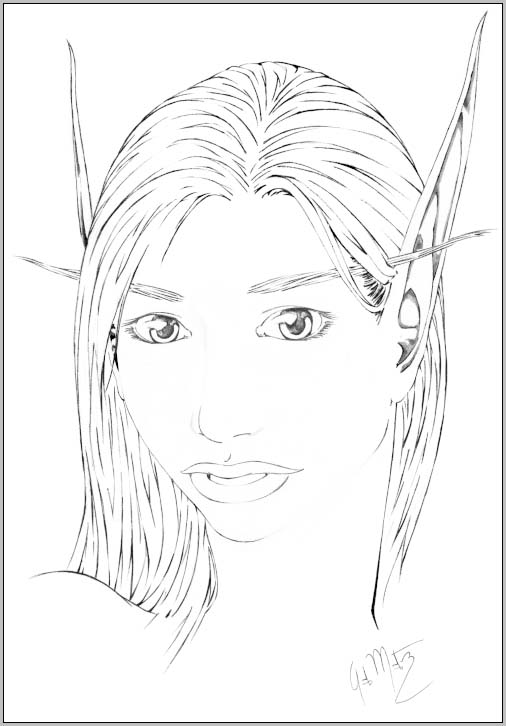
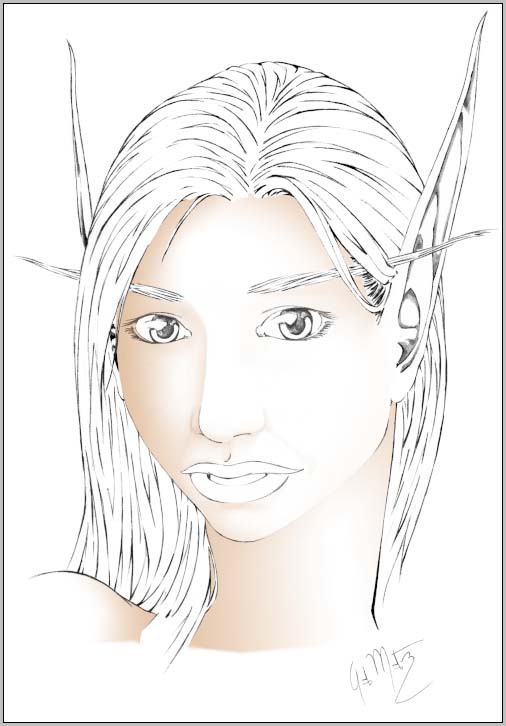
This is the image I chose to render in color. |
|
|
|
 |
|
|
|
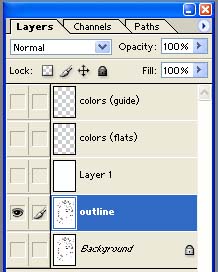
I begin by making a copy of it and adding it to a new layer. This way I have the original artwork saved just in case it is ruined later on. I then go on to create any other layer I might need. |
|
|
|
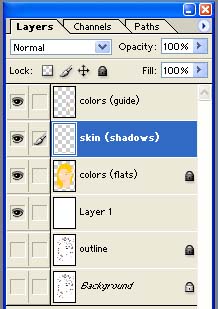
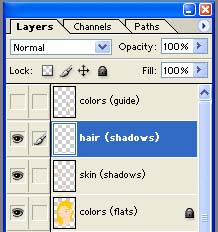
This is how my layers palette looks like at this moment with the basic layers I will be using. |
|
|
|
 |
|
|
|
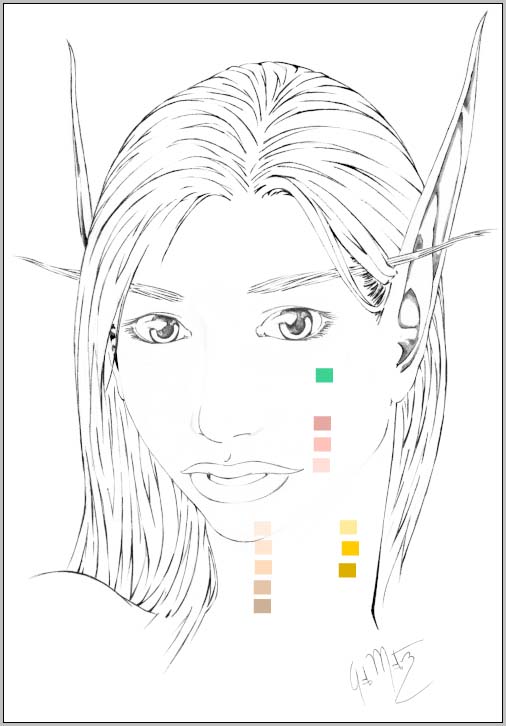
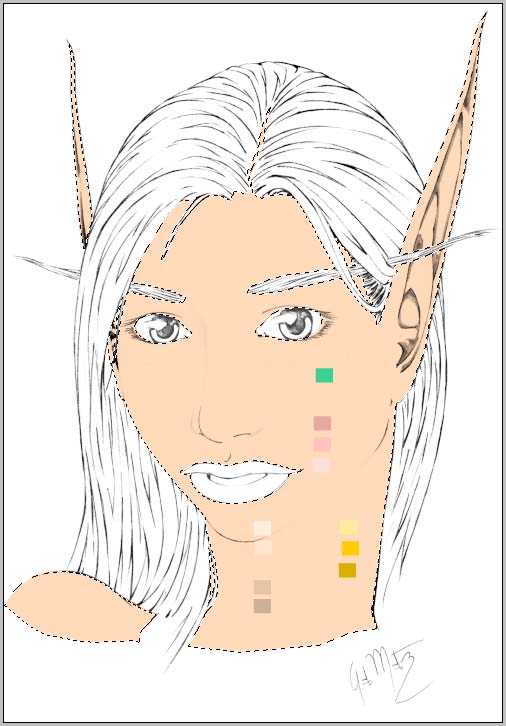
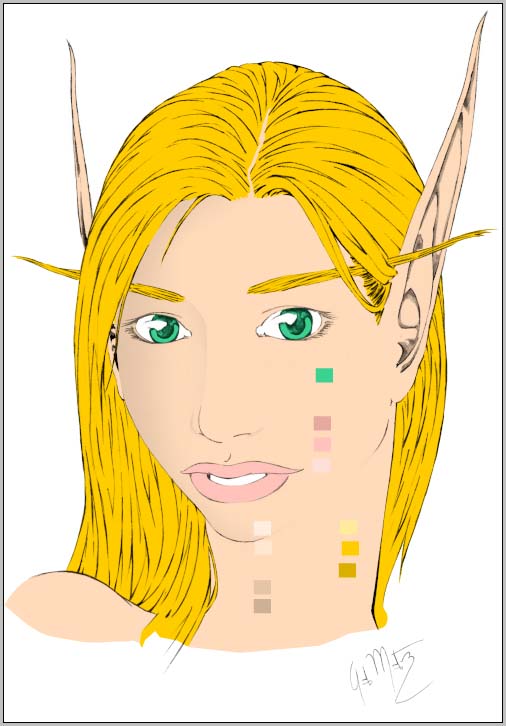
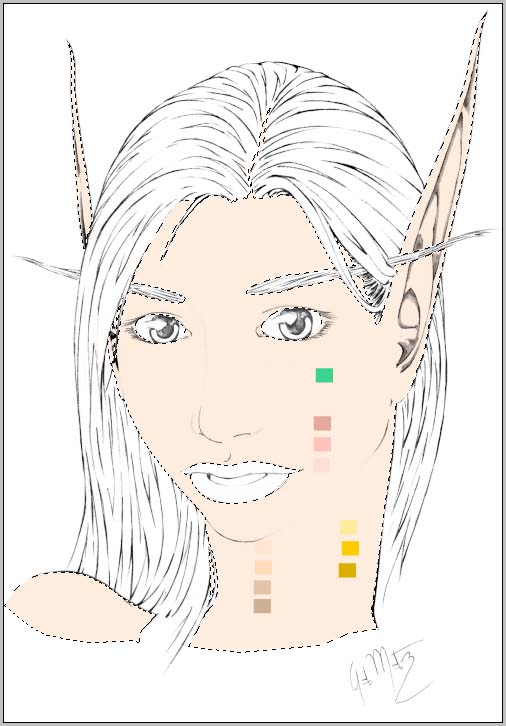
Using the �colors (guide)� layer, I make a series of squares with the many different colors I will be using. I like to do this so that I will not run into any color issues later and because I already know all the basic colors I will be using. You do not need to do this at this moment, but I do recommend having all your colors or an idea of the colors you will be using somewhere in the drawing though. |
|
|
|
 |
|
|
- This layer is separate from the actually �outline� layer, which means it will not affect it in any way. - |
|
|
|
|
|
- Make sure the layer you have selected is the one you want to work with. - |
|
|
|
|
|
|
I then switch to the �colors (flats)� layer. |
|
|
|
I then begin to select a general area using the Polygonal Lasso Tool trying to stay within the black lines as best I can. |
|
|
|
After the selection, I pick one of the colors using the Eyedropper Tool and apply it to the selected area using the Paint Bucket Tool. I then continue to do so until I have all my base colors. |
|
|
|
 |
|
|
|
This is how my base colors look at the moment. They also work as a guide for selecting a specific color area that you might need at the moment. |
|
|
|
 |
|
|
|
I then create a new layer called �skin (shadows).� I also lock a few layers so that I do not accidentally damage them. |
|
|
|
 |
|
|
|
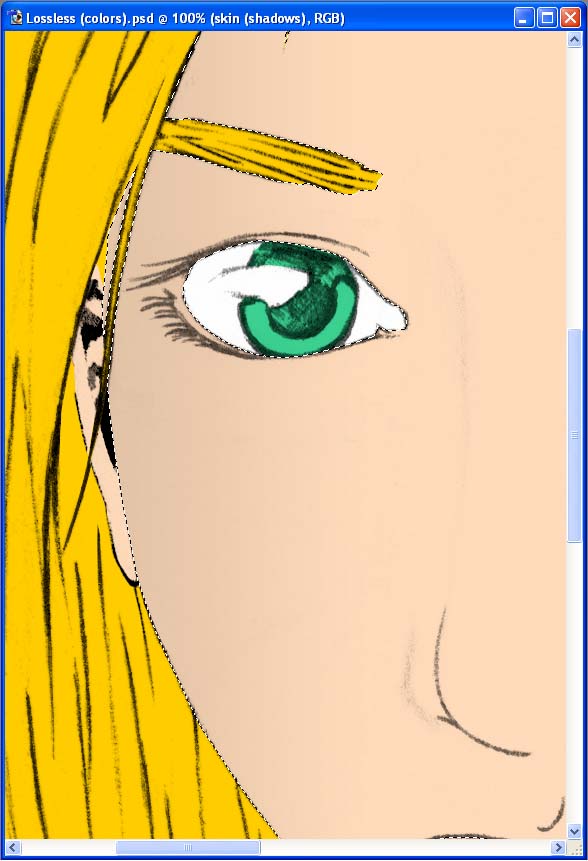
I then begin to select an area of the drawing using the Polygonal Lasso Tool. After I have the area that I want to work in selected, I make sure I am working on the �skin (shadows)� layer. I then select a darker color from my color guide and apply it to the selected area using the Gradient Tool. |
|
|
|
 |
|
|
|
I then continue on to do the same process throughout other areas of the face, skin colors. |
|
|
|
 |
|
|
- There are many different settings to the Gradient Tool, but for this particular moment I used a Foreground to Transparent setting. I like that setting because at some point it will just fade into the base color I have set, but feel free to experiment with any of the other settings available, you might find that you like another setting best. - |
|
|
|
|
|
|
 |
|
|
- Using a white background instead of the base colors helps to see details better, especially when the colors are so similar. - |
|
|
|
|
|
- The Gradient Tool is a great and easy way to apply blended shades, but sometimes it might not fulfill a certain thing that you may want to accomplish. On certain areas I had to go back in with the Brush Tool to add or subtract certain details that were missed or overdone by the Gradient. - |
|
|
|
|
|
|
I then create a new layer called �hair (shadows).� |
|
|
|
 |
|
|
|
- For every new little detail I want to add, like shadows or highlights or a certain area, I make a new layer just to be safe. This though a great idea, in my opinion, also makes the file size very big and the more layers you make the bigger it gets and the harder it gets for your computer. If the computer you are using is not a computer specifically made to handle these types of applications, you might want to cut down on the layers, otherwise you might experience some problems like slower speeds while using certain tools or other programs. - |
|
|
|
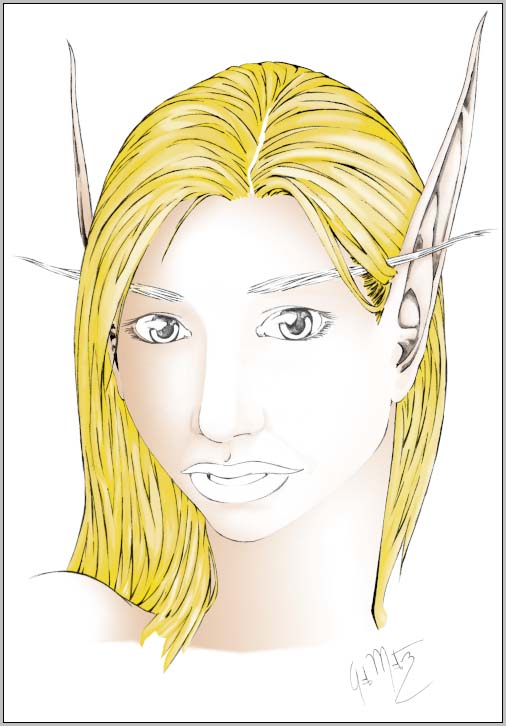
I then begin to select areas of the hair and begin to apply the Gradient Tool using a darker hair color from my color guide.
I then begin to select little areas, usually between the lines, and using the Brush Tool, I add and subtract details to the hair. |
|
|
|
 |
|
|
- There are many setting for the Brush Tool, this time I tried using the Screen mode at low opacities. Other settings I use are Clear to erase certain things, or Normal, to add details. Other settings offer different results. - |
|
|
|
|
|
|
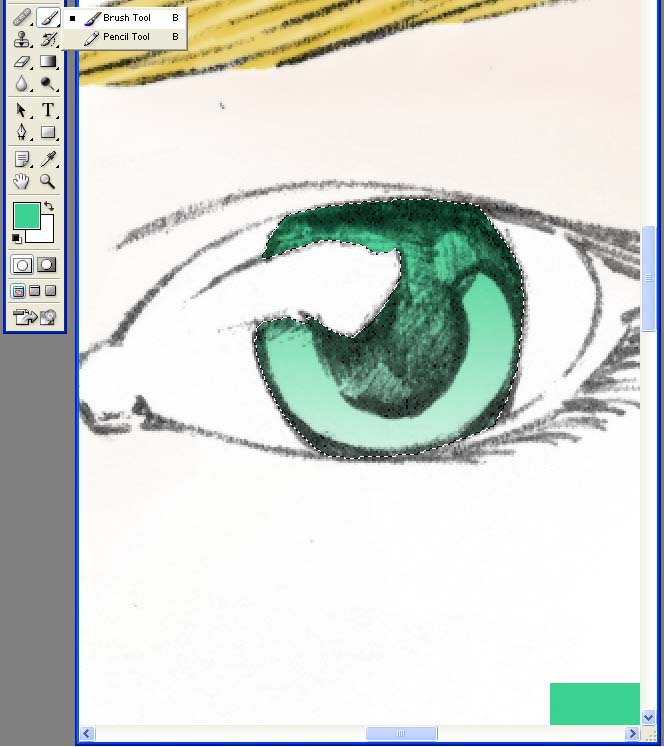
Moving on to the eyes and lips, making respective layers for each, I begin by just using the Brush Tool on a Normal setting and trying to get the curves to look as realistic as I can. I then use Clear mode to fix little problems or to just make an area lighter. |
|
|
|
 |
|
|
|
At this moment the bulk of it is basically done. With the shadows finished all that remains is adding little details or highlights depending on the feel you are going for. |
|
|
|
My idea has changed quite a bit from the moment I began to work on this. At this moment I am going for a simple not too bright light. |
|
|
|
I select the original base skin color and replace it with a lighter skin color from my color guide. |
|
|
|
 |
|
|
|
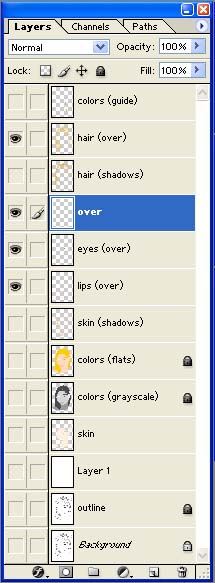
This is how my layers palette looks like at this moment and they are basically all of the layers I made and used throughout the making of this. At this point, I�m happy with what I have done and begin to finalize the project. |
|
|
|
 |
|
|
|
- In the end I just want a color layer and the prepared outline. I also would like to save the file as something easier and manageable for other people to use, such as JPEG, and this can not be done if you have multiple layers. - |
|
|
|
|
|
I begin to merge and delete layers. |
|
|
|
|
|
After I have the layers I want to keep and have deleted all the others, I change the color layer�s mode to Multiply. |
|
|
|
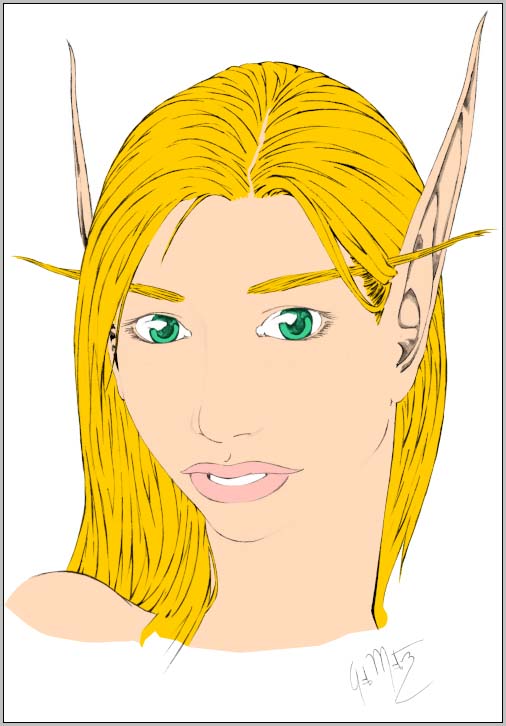
And this is how the image looks like at the moment. |
|
|
|
 |
|
|
|
At this stage it is just a matter of flattening all the layers so that you only have one and saving the file under a name and format of your choosing. After that, you have a JPEG or any other format to send to different people, print, etc. |
|
|
|
- I like to keep the original Photoshop version just in case I want to work on it some more, but that is entirely optional. - |
|
|
|
I hope this tutorial has helped you in some way. There are no real rules for doing this, it all depends on whatever you want to do. Experiment with the many different tools available and find ways to realize that specific something that you want, eventually you will create great things.
Thank you for reading my little tutorial. |
|