
I will assume that most of you are familiar with PSP. I will show you the shortcut keys
but you can use the point and click method if you rather.
SAVE YOUR WORK OFTEN!
Step 1: Start a new picture 350 x 350 pixels, resolution: 300.000 pixels/inches,
raster background,
color depth: RGB - 8 bits/channel, transparent (checked).
With the Flood Fill Tool, fill with a darkish color. (one that is not going to
be in your dream catcher)
Step 2: Create a new Raster layer (alt+L+L) and name it sinedot.
*Make sure the new layer is active.* (highlighted in layers pallet)
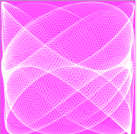
Open the Sinedots plugin (alt+T+L - DragonFly - Sinedots II).
Click OPEN and choose cathys_corner_white.cfg  |
Click on dropdown menu, Choose jl02  |
Set BLEND to Screen Color * White * leave other settings as are. click OK  |
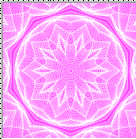
Step 3: Let's make it into a kaleidoscope. (alt+T+R+K)
Set as shown |
 |
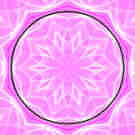
Step 4: With the selection tool set as follows, ![]() ,
,
start at the very center of the picture (coordinates x:150 y:150)
![]() . Drag the circle up and left until you reach
. Drag the circle up and left until you reach
the
inner edge of the white circle (x:271 y:271).
Step 5: Click on the background layer at the bottom of the layers pallet to make it active.
Create a new Raster layer (alt+L+L) and name it black.
Invert the selection again (alt+S+I).
Use the Flood Fill Tool and fill the selection with black.

Step 6: Click on The sinedot layer in the layers pallet.
Create a new raster layer (alt+L+L) and name it 'ring'.
*Make sure the new layer is active.* (highlighted in layers pallet)
Expand the selection (alt+S+M+E) by 12 pixels.
Flood fill the selection with the PINE pattern set at Angle: 45 and Scale: 100.
(Different fill may be used if you like)
Now contract the selection (alt+S+M+C) by 12 pixels.
Click delete.
Do NOT deselect!
Step 7: With the Magic Wand Tool, hold down the shift key and click outside the ring.
Once again, invert the selection (alt+S+I).
you should have ants running around both inside and outside the wooden ring
Open the Eye Candy plugin and select "Bevel Boss".
Use these settings Click "OK" |
 |
Step 8: Create a new raster layer (alt+L+L) and name it "feathers".
*Make sure the new layer is active.* (highlighted in layers pallet)
With the Picture Tube Tool, add my 3_feathers tube at these settings.
Scale: 75 Step: 200 Placement mode: random Selection mode: random
Grab the Move Tool and pin the feathers to the wood ring anywhere that looks good.
Final Step: Merge the layers. (alt+L+M+V).
Resize if you need to
Now use the Unsharp Mask (alt+A+S+U) set at
Radius: 1.00 Strength: 80 Clipping: 10 Luminance Only checked.
Set the transparency (ctrl+shift+V) to the background color.
Save as a .gif

| Click on a folder to continue |