Making the bannisters
Let's continue building our set of stairs by creating the bannister post and handrail. If you haven't seen the first part of this tutorial, you can check it out here:
As before, start a new TrueSpace scene in 4 panel view. Enable grid and select the Add Polyline tool.

Trace out half of the profile of the bannister post in the top view as shown below. Click the Close curve button to draw a line connecting your last point with the first to close the line.

With Move curve point selected, apply Smooth corner to the points circled in red below.

Now select and then right click the lathe tool button to bring up the lathe properties box.
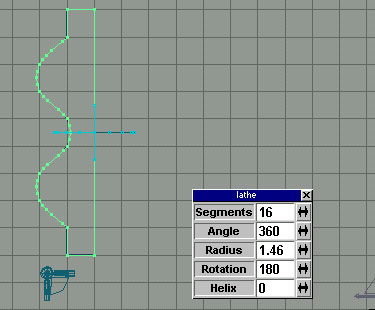
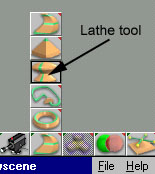 Set the lathe Segments to 16, the Angle to 360� and the Rotation to 180�. Drag the Radius arrows to line up the lathe pivot line with the inside line of the bannister post profile.
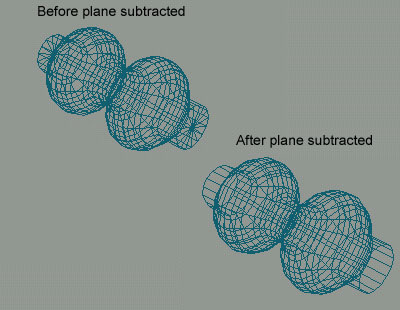
Click on the lathe tool button again to apply the lathe to the object. You should now have a simple bannister post object lying on it's side. We want the top and bottom of the post to be single faces but you can see that the lathe tool created 16 faces (the number we entered in Segments field to make the bannister postround. To delete the edges, create a plane in the top view where it is not touching the post, select the post, select Object subtraction and click on the plane. The flat edges are deleted from the top and bottom of the post and we now have single faces.
Select the Object tool button (the white arrow) to exit point edit and and rotate the bannister post in the left view with the right mouse button to make it verticle. Centre and normalize the rotation of the axis. In the object info panel, set the x, y, z size of the post to 0.2, 0.2, and 1 metres and set the x, y, z position to 0, 0, 0.
Add the object to your House objects object library and call it Post.
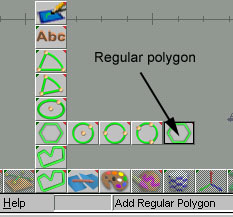
Now we're going to create the bannister's handrail. Click on New Scene and toggle Enable grid so that is not enabled. Select the Add regular polygon and set the number of sides to 6.
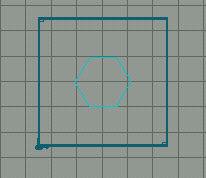
Create a polygon in the top view as shown below.
Extrude the polygon by click on the Sweep tool. Toggle Enable grid so that is On and rotate the object with the right mouse button in the left view 90�. Centre the axis and normalize the axis rotation. Right click on the Object tool (the white arrow) to access the object info panel and set the x, y, z size to 0.2, 2, 0.2 and set the x, y, z position to 0, 0, 0. Right click on the object in the perspective view (you may want to zoom in) to enter Point Edit mode. Select and delete the top/left and top/right edges with the Erase vertices button.

After the edges are deleted you should have this.

Add the object to your House objects object library and call it Handrail.