 |
|
|
|
|
|
|
|
|
|
|
|
|
|
|
|
|
|
|
|
|
|
|
|
|
|
|
|
|
|
|
|
|
|
|
|
|
|
|
|
|
|
|
|
|
|
|
|
|
|
|
|
 |
|
|
Doll Eyelashes |
|
|
|
Done the Imp's Way! |
|
|
|
|
|
|
|
|
|
|
|
|
Preparation and Fabric |
|
|
|
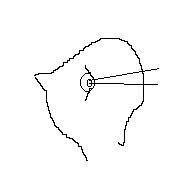
Be sure to use a stretchy fabric for the head and face. Use a thready fabric such as organdy for the eyelash material. Anchor the eyebeads by starting at the back of the head and pulling the bead to the back of the head. |
|
|
|
 |
|
|
The Stitching |
|
|
|
|
|
|
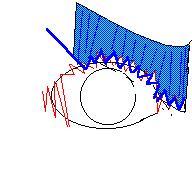
Using a whip stitch, start a stitch on the outside lid, by pulling two small folds of fabric together with one stitch. Continue until you reach just over the corner of the bead then pull the lids together (this should cover the corner of the bead). Continue the whip stitch only on the upper lid. to the tear duct area and whip stitch the top fold and bottom together for 4 or 5 more stitches, ending at the tear duct. Covering the tear duct area of the bead. Push the thread to the back of the head and anchor |
|
|
|
 |
|
|
Attaching the eyelash fabric |
|
|
|
|
|
|
Take a piece of organdy or light stiff thready fabric and fold it in half so you have a piece approximately 1"x 2". Begin to whip stitch the fold to the outside lid and continue only on the upper lid where the eyelids now part. Continue whip stitching along the upper lid to the tear duct area. End the whip stitch and push the whipping thread to the back of the head to anchor. Don't worry if this piece is to long, you will be trimming it. |
|
|
|
 |
|
|
Trimming |
|
|
|
|
|
|
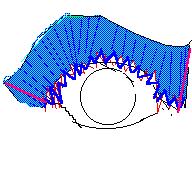
Cut the thready fabric at an angle when trimming. Cut towards the tear duct area on the inside of the eye almost leaning the scissors on the nose and cut towards the nose on the outside of the eye leaning the scissors towards the ear. |
|
|
|
 |
|
|
|
Adjusting the Eyelash |
|
|
|
 |
|
|
|
|
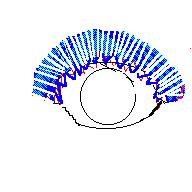
Grab the eyelash fabric between two fingers and pull it downward and towards the cheeks. Pull in an upward and outward motion. Take a straight pin and remove all of the horizontal threads down to the whip stitching at the eyelid. |
|
|
|
|
|
Final trimming and Completion |
|
|
|
|
|
|
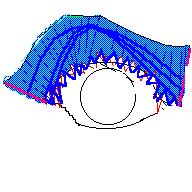
At this point you can trim the length of the eyelashes to what you wish. The process is complete and if you use different colors you will always have the right color of eyelash that you desire! Enjoy! :o) |
|
|
|
 |
|
 |
|
|
|
|
| Imp Designs: From my very own little impish head! |
|
|
|
|
| Imp-dom:Back to Imp's Home |
|
|
|
|
| Impish Egg-pectations Pattern |
|
|
|
|
 |
Links to other sites on the Web |
|
|
|
 |
homepage |
|
|
|
|
|
|
|
|
This page hosted by |
 |
Get your own Free Home Page |
|
|
|