
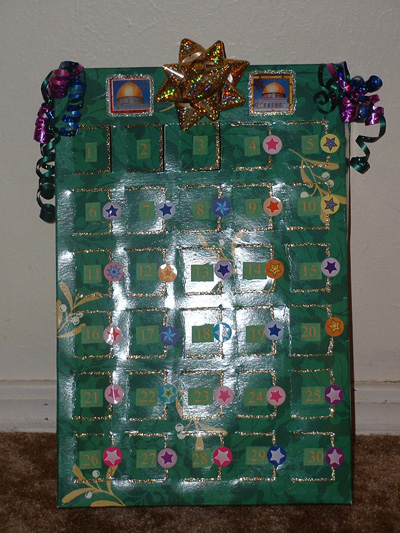
I have adapted the idea of an advent calendar for Ramadhan, to make a fun way for our children to count the days of
the month and to get an idea of how long it is, as well as making each day special for them. The calendar has a window for each day of the month and when you open each window you find a piece of candy or a
(very) small toy inside.
Another idea, which I credit sister Iman Badawi with helping me come up with, is to wrap
dates in colored plastic wrap and put them into each hole and give them as a gift to friends and family. Try to put enough dates so each member of the family can have one, or at least the adults. (The spaces are small so depending on what kind of dates you use you will be limited in the numbers you can put in there.) Present the calendar as a gift at the beginning of Ramadhan with the instructions that the dates they should break their fast with each day are in the calendar. This way you will give them an attractive gift, dates, and you will get the reward for the fast of each person who broke their fast on your dates, as the Prophet
Salla l-laahu `alayhi wa sallam said:
"Whoever gives food to a fasting person with which to
break his fast, will have a
reward equal to his, without it detracting in the slightest from the
reward of the fasting person." [Tirmidhi]
Here's how I did it:
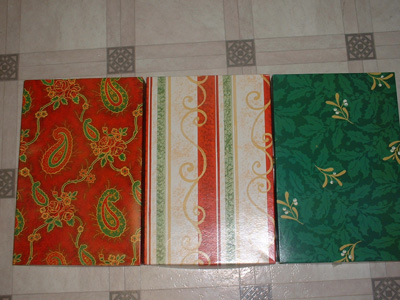
For the box: I used recycled gift boxes! You can use old ones you have lying around the house, try to get one from a department store, or you can buy them from the gift wrap section of stores. A good tip is to shop at your local discount store on the day after Christmas for gift wrap and supplies like boxes, tissue paper, and ribbon. The stores are crowded on that day, but the 50%-75% discounts on wrapping, decorating, and gift supplies is not to be missed. You can get a package of 4 gift boxes for .50-$1 this way. Not everything has a distinctively Christmas print on it either. I have even gotten big rolls of plain green wrapping paper, and I have a collection of gift boxes with very neutral prints on it.
You can approach this two ways: 1) Use a plain white box (or a box with a print you don't like) and cover it with wrapping paper, or
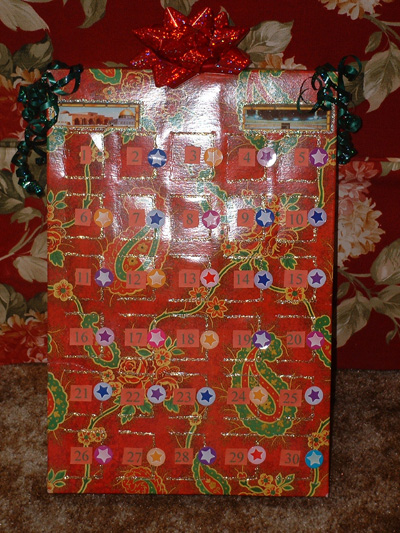
2) use a pre-printed box and you will see the design already on it.
For my girls' boxes I started with plain white boxes that I covered with wrapping paper. When I later discovered that I had a stash of printed boxes I used those to make for gifts.
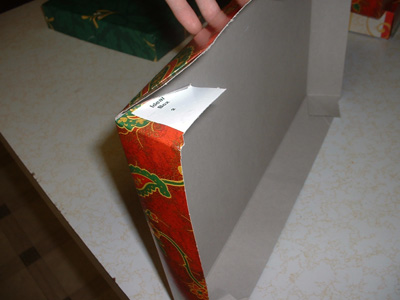
First, carefully open up the box if it's one from a department store that has been glued shut. This is necessary to make it lie flat.Store-bought
ones can be cut open and taped closed again later.
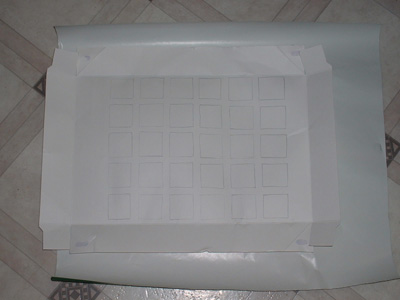
Then you need to plot where you will put your "windows".
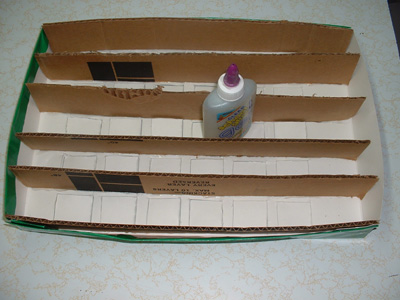
I don't recommend a window size any smaller than 1 ½ inches wide and 2 inches wide. If it's smaller than that you'll have a hard time fitting a piece of candy or dates in there. On the one you see in this picture I had enough room to make the windows 2 inches by 2 inches but
these particular boxes were a little oversized. (They were 15.25 inches long and 10 inches wide.) The more standard size for a
gift box seems to be 14.25 inches long and 9.5 inches wide which is what my printed boxes were.
To make 30 windows for the days of Ramadhan, I used the following calculations to figure out where to plot my windows:
For Standard sized (14.25 inches X 9.5 inches) boxes:
To fit 5 windows across:
1.25 (inches wide) X 5 (boxes) = 6.25 inches
+ .5 (inches between each window, this number is always 1 less than the number of windows you have in each row) X 4 = 2.0
=8.25 inches
The box is 9.5 inches wide so I can leave slightly more than a 1/2 inch margin on each side.
To fit 6 rows of windows: 1.5 inches X 6 windows = 9 inches
+ .5 (inches between each window) X 5 = 2.5
=11.5
The box is 14.25 inches long so you can split the difference to make the top and bottom margins, or leave only ½ an inch at the bottom and write "Ramadhan" at the top.
If your box is a different size, just divide up the measurements with the same
method. It's very simple math.
I used a ruler and a pencil to plot out my windows on the inside of the box
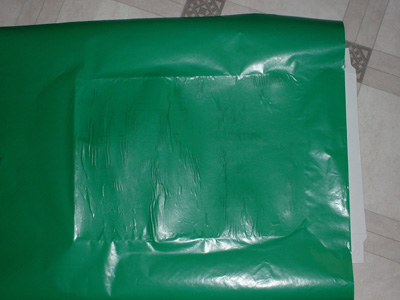
For the white boxes, I covered them with plain green wrapping paper. I mixed some regular old school glue with a tiny bit of water
to thin it out a bit and I used a paint brush to paint the glue over the entire surface of the box. Then I spread the paper out on the table, colored side down, and I flipped the box over and quickly set it down on the paper, then smoothed it out to get the smoothest finish possible. I let it dry overnight.
NOTE: LET IT DRY! If the glue is even a little bit wet
the paper will tear when you cut the windows out.
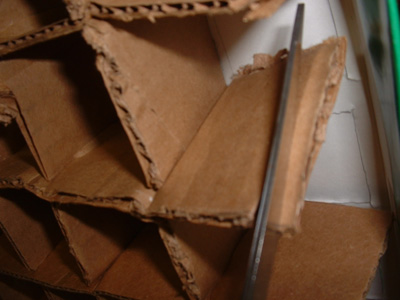
To cut the windows out, (on three sides) I highly recommend using tiny nail cutting or hair trimming scissors (as your husband might use for his beard) for this. I got a pair at the dollar store, they're very cheap. The smaller the scissors and the finer and shaper the point, the less damage will be done to the cardboard where you puncture it. The bigger and duller the scissors, the more white fibers will be pushed out and the uglier the finished product will look.
(note that you can see in this picture that I actually messed up on this when I set the box down on the paper and I did it off-center, so a part of the edge of the box was not covered. Oops.)

The first time I did it with scissors that are too big
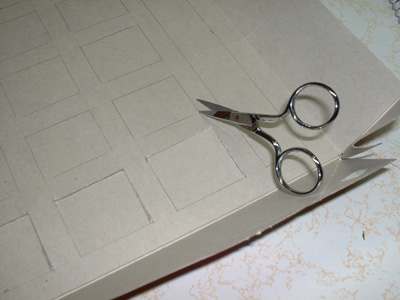
The second time I did it, with better scissors.
Next, I re-glued the box corners and finished wrapping the box itself. Then I wrapped the back of the box separately.
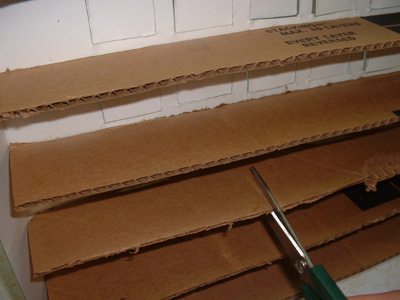
Next, I measured and cut out some thick, sturdy cardboard for the inner "shelves" that will hold the treats inside. I used-guess what?-a warehouse store box! You could use any thick, sturdy cardboard box such as a moving box or even a mailing box.
Both types of boxes I used were 2 inches high. So I cut out the shelves according to the length and width of the boxes. When measuring and cutting it's always better to err on the side of making them longer-you can always trim them later-than it is to make them shorter by accident. An exacto (utility) knife worked best for cutting out this cardboard. Just make sure you have another cardboard box underneath so the knife doesn't cut through to the floor!
For 14.25 inch boxes:
6 columns, 14.25 inches long and 2 inches wide
6 shelves, 9.5 inches long and 2 inches wide
(Note: it's not necessary to have the top
row closed off with another top shelf, however if you're planning on shaking it
around a lot or perhaps shipping it in the mail, it might be a good idea to cut
another shelf piece and cover that top row.)
Next I glued the 4 middle columns into the front part of the box between the windows.
Then I cut slits into them about 1 inch deep, at every row. (The side ones will be attached at the end, put those two aside.)
Then I took the shelf pieces and placed them on top of the columns where they will be placed. I marked each one and then cut slits in them that left only about ½ an inch left.
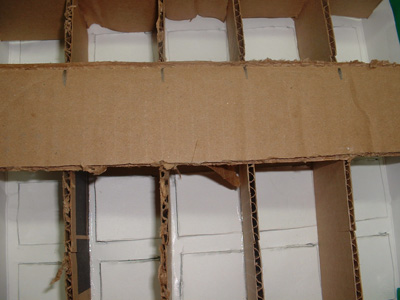
Marking the places for the slits
Cutting the slits
The next part is a little tricky, but it gets easier the more you do it and once you get the hang of it. The shelves are interlocked with the columns at the slits. You will have to kind of force them in a little bit. You might not end up with perfectly square shelves, but it's okay because you won't notice when the box is closed up. If one of your shelves turns out to be a little too long to fit into the box, you can trim it but beware of trimming it too much. If you trim it too much, there won't be enough left to attach the side columns.

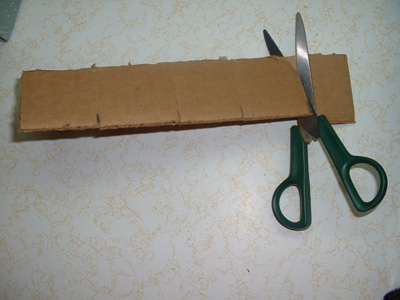
When the shelves are all installed, cut slits in the ends of the shelf pieces about ¼ inch from the ends, and about 1 inch deep. Then line up the side column pieces and mark them the same way you marked the shelf pieces, then cut slits in the column pieces on the marks leaving about ½ inch left.
Cutting the slits in the shelves
Then attach them to the shelf pieces using the slits the same way you attached the other pieces.
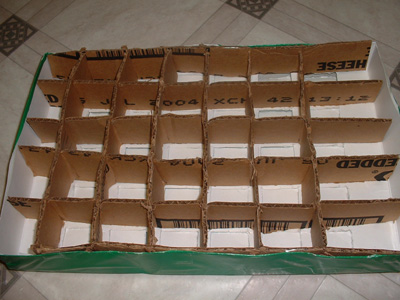
The finished shelves
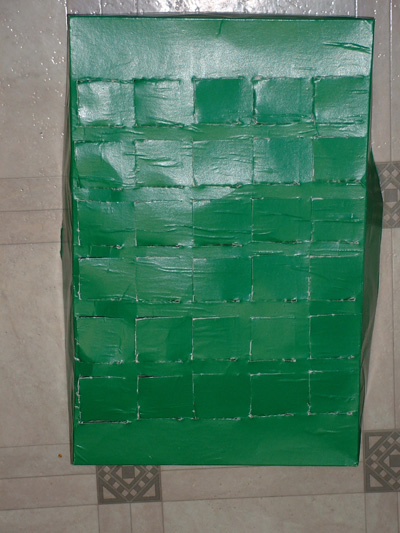
Then put the box together. It'll be a tight fit but it'll work. Then you can use some clear tape to hold it together.
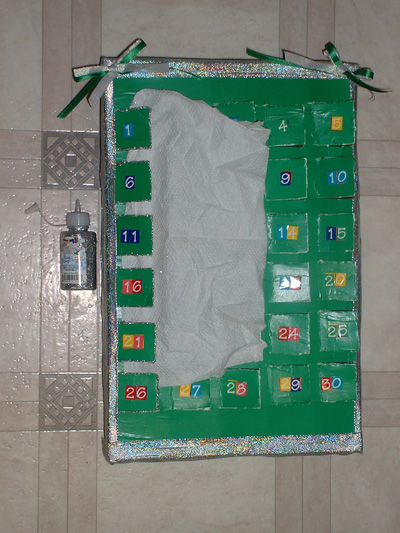
I used wide ribbon to decorate the tops and sides, and narrow ribbons to make bows and other decorations.
Next all that's left is to decorate your box!
For numbers I used number stickers. Unbelievably, these were incredibly difficult to find. In
two huge aisles worth of stickers at Michael's craft store I found only one
set of number stickers and considering the number of packages you need to ensure you have enough 1s and 2s, (you need 8 each of 1s and 2s) that could get expensive. Another idea is to buy some colored paper and print out numbers from your computer and then cut them out and glue them on.
For my paper-covered ones, I originally planned on using a can of spray glitter paint to decorate it and cover up the defects (the white fibers that got pushed out from the cutting of the windows). The problem was that the glitter spray I bought seemed to be defective (it was a disaster but fortunately it was a disaster on a test piece of paper and not the actual boxes!) so I returned it and since it smelled so bad anyway I decided to frame the doors with glitter
glue instead.
Putting glitter glue on the edges of the windows.
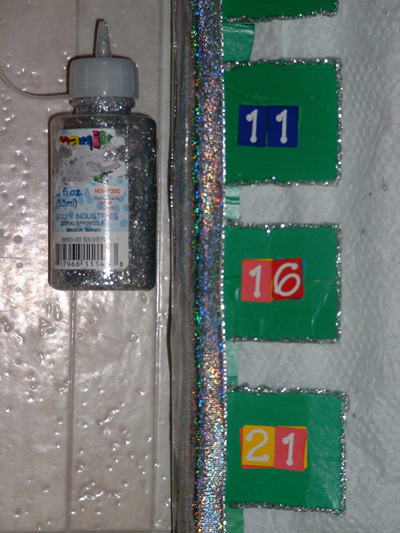
Close up of where I put the glitter glue