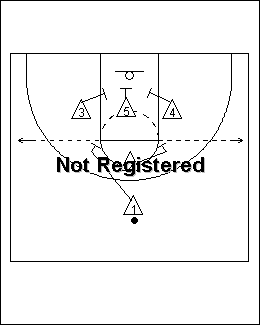
دفاع یارگیری
|
|
دفاع یارگیری
|
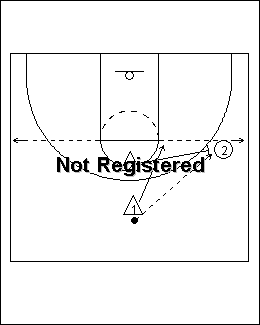
Guard Drills Point to wing pass. X2 sprints to the wing, X1 sprints to the High Post |
X1 stays with the ball. X2 stays with the High Post. |
X1 deny pass back to wing. X2 deny high post at elbow. |
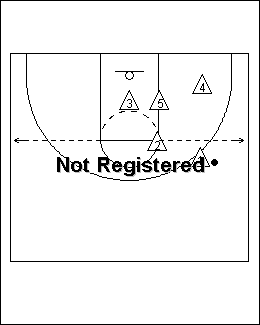
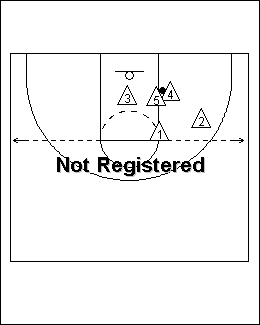
1. Always pressure the ball man to man when it is above the free throw line extended. 2. Guards work in a tandem with one guard always being behind the other one. 3. Guards must keep the ball out of the high post area. 5. When up guard is on the ball, the back guard is in the high post. |
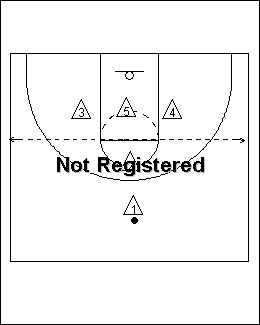
1. Point: Up is on the ball, back is denying the high post and is in a position to give help on the penetration. |

Up is on the ball, back is denying the high post and is in a position to give help on the penetration |
1. Up, ball side guard, is 1/2 way to ball at free throw line extended. 2. Back, the other guard, is at the free throw line in the circle denying the high post. |
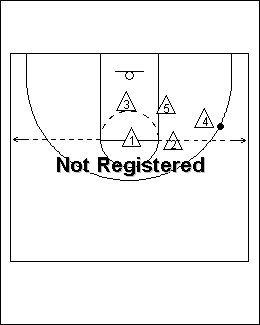
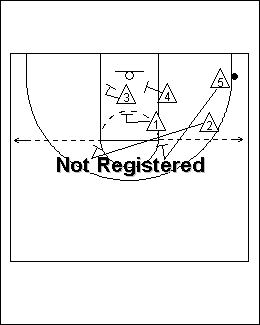
1. Up guard moves to a cut off position to deny the pass back to the wing. 2. Back guard denies the high post at the elbow. |
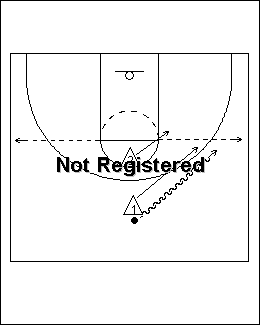
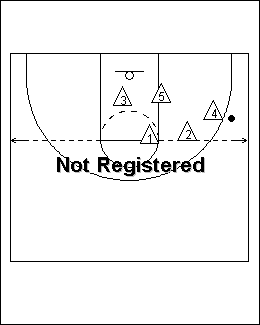
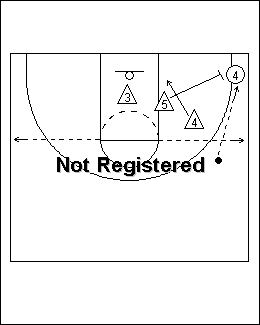
Wing pass when the ball is above the free throw line extended). X4 is Up. X5 is Middle. X3 is Hoop. |
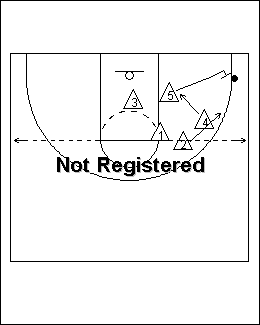
Option 1: Middle to Up and Up to middle. X5 is Up. X4 is middle. X3 is Hoop. |
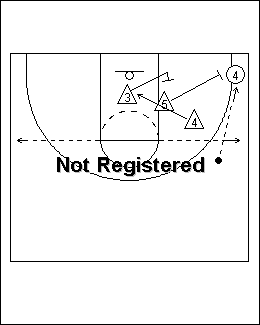
Option 2: X5 is Up X3 is Middle. X4 is Hoop. |
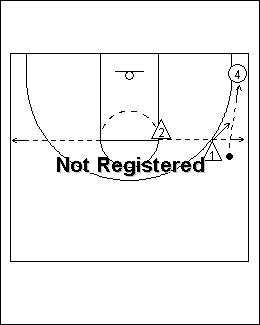
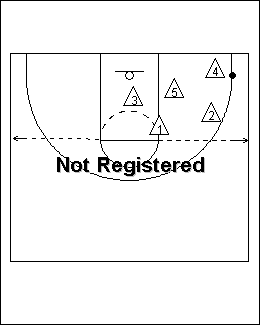
1. Defend from the free throw line down. 2. Each outside player must have one foot inside the lane. 3 If in doubt move to the ball! |
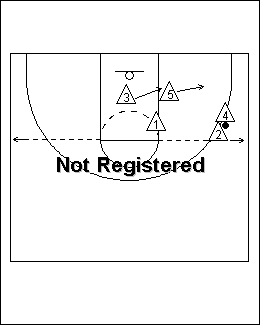
No player in corner. X 4 fronts the low post, X 5 moves to mid lane area, X 3 moves to hoop. |
Player in the corner. X4 moves 1/2 way to the corner, X5 fronts the low post, X3 moves to hoop. |
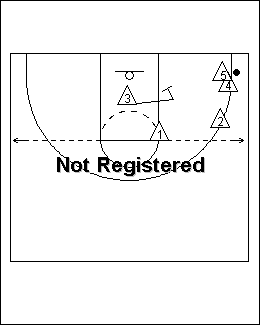
X 4 is up and sprints to the ball, X5 is middle and fronts the low post, X3 is hoop and moves to hoop. |
X5 is up and sprints to the ball, X4 is middle and sprints to front the low post, X3 is hoop and stays at hoop. |
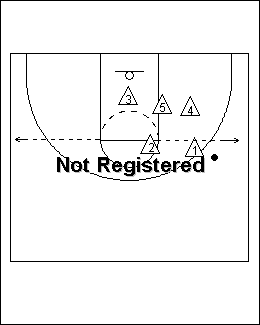
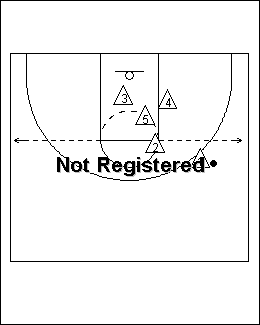
When the ball is dribbled to the wing X4 moves to a modified up position ready to take the ball if it is dribbled or passed below the free throw line extended. |
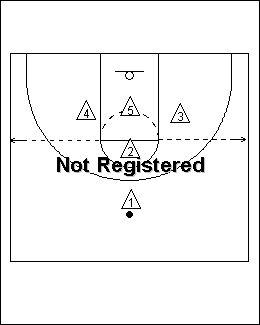
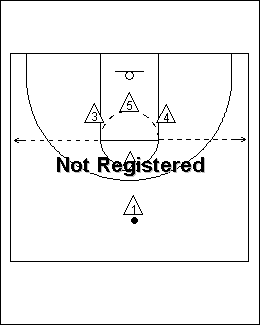
Shot from Point X5 is middle rebounder. X4 is strong side rebounder. X3 is weak side rebounder. X2 is weak side elbow. X1 is strong side elbow. |

X1 is middle rebounder. X5 is strong side rebounder. X3 is weak side rebounder. X2 is weak side elbow. X4 is strong side elbow. |
X1 is middle rebounder. X4 is strong side rebounder. X3 is weak side rebounder. X2 is weak side elbow. X5 is strong side elbow. |

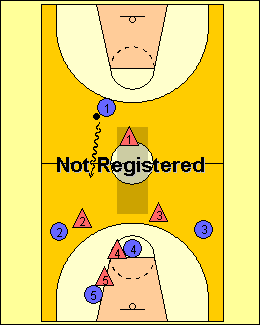
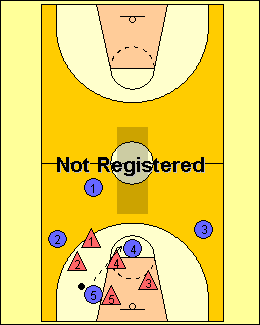
JER166(at)aol.com Winnetka Bullets, Los Angeles Ca http://www.angelfire.com/ca4/winnetkabullets 1-1-3 Match-Up Zone Defense Rules Rules All movements are a sprint. 1. Stop the ball. 2. Put pressure on the ball as much as possible when it is held, dribbled, passed, caught, or shot. 3. The closest man will always take the ball. 4. Sprint to coverage area and break down into defensive closeout position. 5. All five players must rebound. |
Wing: Up guard X2 and Up forward X4 trap. If there is also a player in the corner X5 will move to the cut off the passing lane while X3 will front the post. X1 will take away any pass to the high post and be alert to deflecting or stealing the pass back to the top. X1 will gamble on this pass if it is made across his position. The straight back pass to the top is the only pass we will give up without a challenge. |
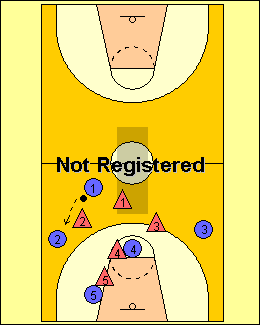
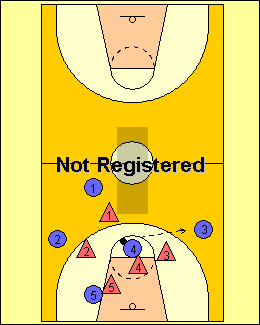
Up Forward X4 and Middle X5 trap. |
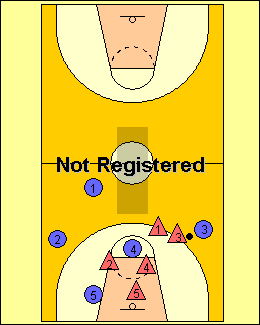
Middle X5 and Up forward X4 trap. X2 will split the passing lane between the wing and corner reading the offense looking for the steal or deflection. |

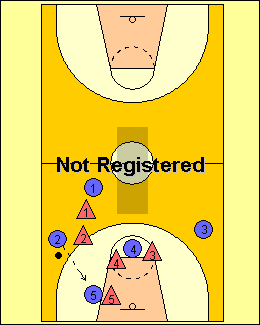
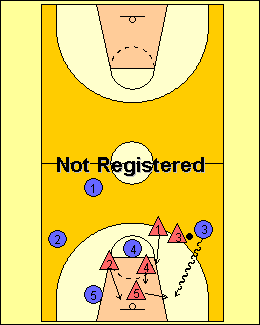
Up Guard X2 and Wide Guard X1 trap. Up Forward will move toward the lane and be alert for anyone flashing or cutting into the lane. X4 will jump any flash or cut into the lane and play it m2m. |
Put your best defender (D1) on point guard (P1). P1 is given a side. Important - don't allow P1 to get within the grey area (within this area the guard has more passing opportunities). D2 denies P2, as well as D4 denies P4. D5 fronts off P5. Weak side (D3) sags towards the middle line, yet within the passing lane. |
D1 prevents P1 from dribbling to weak side. D2 plays a high deny. The only way the pass should go to P2 is by the lob (in that case D2 has a good chance of stealing the ball, otherwise D2 has time enough to get a good stance). With the high deny D2 sends a mental signal to P1 not to penetrate towards the basket, because of the risk of being doubled and lose the ball. |
If the ball is passed to P2, D2 steers P2 towards the baseline! (Important to give P2 the "dead zone".) D1 denies P1. D4 denies P4. D5 plays on the back of P5. D3 sags towards the middle/ball. If P2 tries to lob pass P1 in the grey zone/weak side D3 steals the ball. |
If P2 passes P5 on the low post, all players act as in regular man-man help defense. (By my meaning that is) D3 sags to middle line, D4/D1 sags to ball. D2 sags to ball and tries to steel if, and only if, P5 bounces the ball. Many lob passes can be taken from a sleeping P2! |
If ball is passed to high post (P4) D4 steers P4 to strong side. This to prevent the ball from moving to the weak side. D1/2 sags towards the ball, yet standing in passing line. D5 fronts of P5. D1 denies P1 (this is normally the easiest pass from high post), to prevent the guard from getting the ball within grey area. |
If Weak side forward (P3), gets ball D3 steers P3 towards the baseline (closing elbow cut). D1/2/5 sags towards the ball. D4 denies P4. |
If P3 penetrates towards the basket, D5 doubles right outside the paint. D4 sags down, as well as D1. Most important is D2. D2's job is to sag down and steel the baseline pass to P5. |
|
|