

iPAQ 3870 and 3875 Rom Upgrade
3rd Party Supplemental
![]()
iPAQ 3870 and 3875 Rom Upgrade
3rd Party Supplemental
![]()
this is not an official hp document or website.
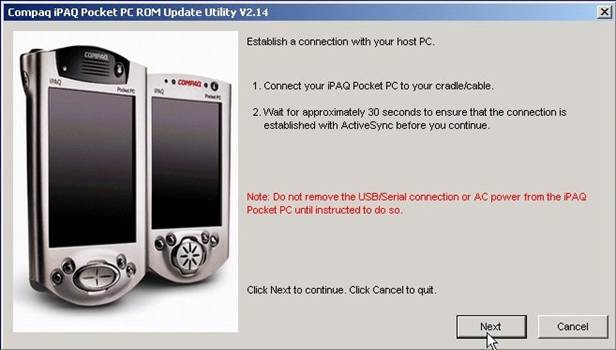
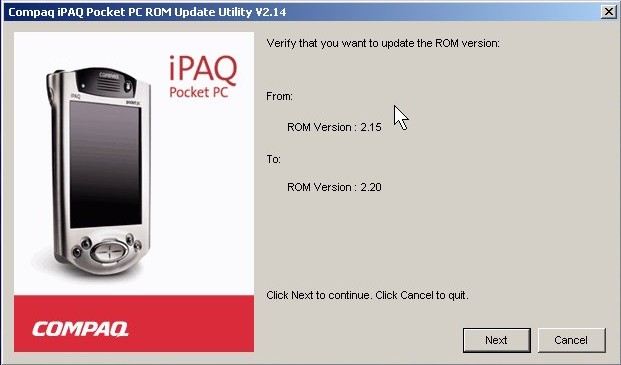
Please read the following important information relating to updating the ROM on your iPAQ Pocket PC using this utility.
Allow an appropriate amount of
time to perform the Rom Upgrade!
I estimate approximately 1-3 hours.
This includes the time to review the Rom Update Instructions, and follow all
pre-emptive steps outlined before the process, as well as the actual update
itself.
3 Hours out of your day is better than a dead iPAQ that has to be sent in for
service!
SYSTEM REQUIREMENTS:
· Microsoft Windows 98SE, Windows ME, Windows NT 4.x, Windows 2000, or Windows XP.
· You should use ActiveSync 3.5 (build 12007) or later with this update utility. If needed, please upgrade to this minimum version from the Microsoft web site before performing the update.
· A direct USB or Serial port connection.
NOTES:
· Caution: this update utility is designed to replace the current ROM image and erase the partnership and all user data and programs on your iPAQ Pocket PC*. Copy your information using ActiveSync Explore from the iPAQ Pocket PC (including iPAQ File Store) to your host PC or a storage card before starting the update. For standalone users, Compaq recommends installing Microsoft Outlook on a host PC and synchronizing your PIM data. After the ROM update, synchronize again to transfer the PIM data back to the iPAQ Pocket PC. Outlook is included on the Companion CD.
* Permanent PIM backup of Contacts or Appointments is not erased by this utility.
After completing the update, re-selecting Contacts or Appointments will restore the
data.
· After completing the update, ActiveSync will automatically suggest that you establish a new partnership and will prompt you through the process to synchronize your iPAQ Pocket PC with your host PC. Since partnerships are unique to a host PC, you will not be able to use the previous partnership. When complete, re-load your programs from the Tools -> Add/Remove Programs menu in ActiveSync.
· Compaq recommends that you make a backup of the current ROM image before performing the update. This will allow you to reinstall this version of the ROM in the future if you have any requirements to do so. Select the Backup button after launching the utility before selecting the Update button. The Backup process will allow you to name and save the ROM image to your host PC.
· A previous backup of user data and programs associated with the current ROM image should not be used in a restore to the new ROM image after the update. Doing so may cause unpredictable results due to possible changes in Pocket PC 2002. You may want to keep an older backup of user data and programs to use if you choose to restore the older ROM image in the future.
· This utility uses a different method from the H3100/H3600 Series ROM Upgrade Utility to update the ROM. This new method requires the iPAQ Pocket PC to be manually placed in update mode. These steps are explained when running the utility. Once in update mode, ActiveSync may post the message ‘Device Not Recognized’ and to Disconnect COM Port or to Retry. You should ignore this message and follow the instructions as displayed by the update utility.
· If the update utility fails and generates an error, follow the instructions as displayed in the dialog box. Resolving the error usually involves correcting the condition and then restarting the update utility. You should never perform a Full Reset (hard reset) unless instructed to do so.
KNOWN ISSUES:
· After the update is complete, two ActiveSync icons may appear in the system tray on the host PC, one active and one false. Moving the mouse cursor over the icons will make the false icon disappear.
· Connecting the iPAQ Pocket PC to the host PC through a USB hub can result in a communication error. Docking stations, port replicators, convience bases, quick docks are also hubs!
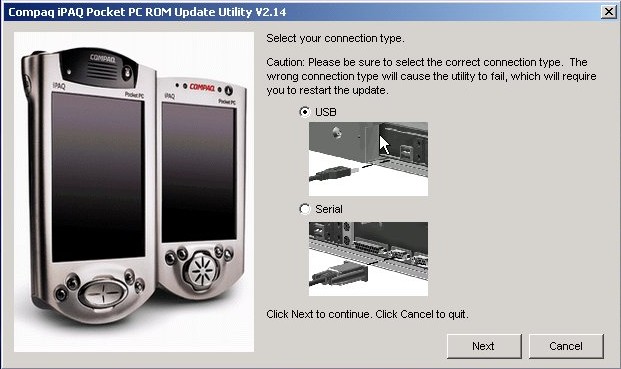
· Using any form of connection besides USB or Serial will cause the upgrade to fail. Example, do not use IrDA, Bluetooth, WLAN, LAN, etc.
1) Getting Started 101- Detailed Instructions
Make sure you have established a partnership with Microsoft ActiveSync before beginning.
If you are having synchronization issues, follow the ActiveSync Troubleshooter (Connection issues)
…this page can also be accessed by opening ActiveSync and choosing Help ~> Microsoft ActiveSync Help. If you still experience issues, contact Technical Support at 1-800-652-6672 option 2, 2, 1,1.
DO NOT ATTEMPT the rom update if you are experiencing connection issues!
Before going any further…
Make sure you are using Microsoft ActiveSync build 12007 (or higher).
This build is NOT on the iPAQ Companion CD Rom.
To find out what build you have, open ActiveSync, choose help ~> about Microsoft ActiveSync, you build is listed on the first line. See below:
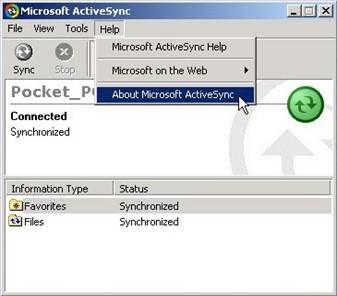
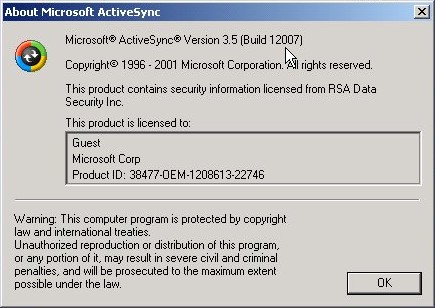
If you do not have ActiveSync build 12007, get it from Microsoft's Pocket PC Website
IMPORTANT!
If you are using an older build of ActiveSync and need to upgrade, follow THIS method for upgrading. (it doesn’t actually upgrade well)
Disconnect the iPAQ.
Uninstall ActiveSync (Start ~> Settings ~> Control Panel ~> Add/Remove Programs, Highlight Microsoft ActiveSync 3.5 and choose Add/remove (or change/remove.)
Reboot your computer!
Install the new build of ActiveSync 3.5 (12007) (file name msasync.exe) from the above listed website.
At the “Get Connected” screen, reboot your computer again.
Power on the iPAQ
Reconnect the iPAQ
Wait 15-20 seconds while your computer reinstalls the driver.
If the iPAQ doesn’t connect automatically, double click the Microsoft ActiveSync icon on the desktop.
Setup a partnership.
2) To Begin the Rom Upgrade:
DISABLE all Firewall Software and Antivirus programs on your host computer.
Exit out of every open program, disconnect from the internet, etc. This is NOT optional!
If you are unsure how to disable your antivirus and/or firewall software, you will have to temporarily uninstall it, and reboot your computer! (You can reinstall again when the rom update completes.)
Disable Screen Savers and Power Management. This is NOT optional!
See Below:
To Disable Power Management and Screen Saver, RIGHT click on the desktop area (an empty area) and choose Properties.
Click the Tab labeled Screen Saver, from the pull down menu, and choose NONE.
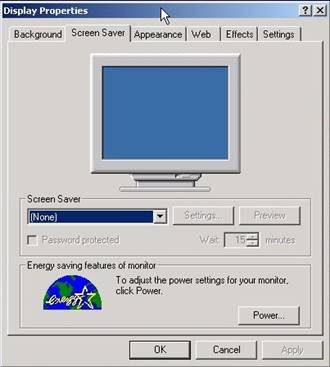
Click the icon near the bottom of this window labeled either Power or Advanced (wording depends on operating system)
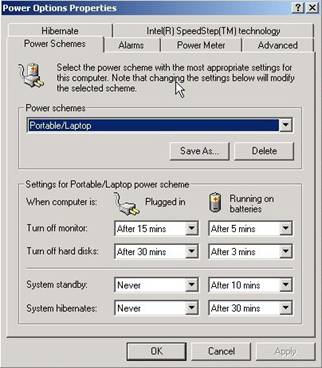
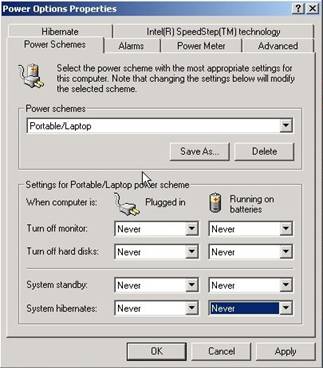
Click the Power Schemes Tab
*note it does not matter if it is set to portable/laptop , home office/desk, always on, etc whatever power scheme it is on, LEAVE IT.
Look for the power cord and battery icons- it says…
“When Computer is PLUGGED IN…” and “RUNNING ON BATTERIES…”
Change all of the 8 pull down menus to NEVER
See below:
 BEFORE
 AFTER
AFTER
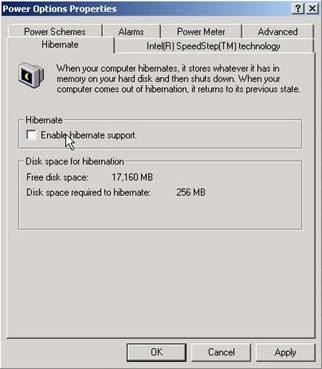
Now Click the Hibernate Tab, and uncheck “Enable Hibernation Support”
Click apply, and ok. (See below)
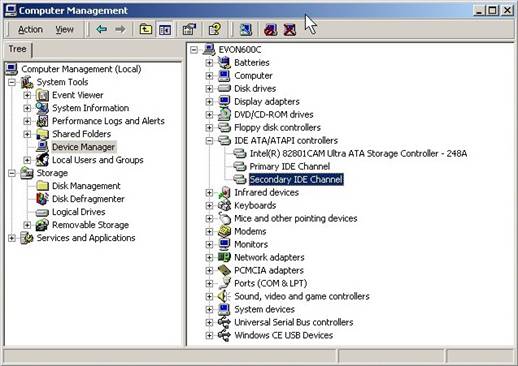
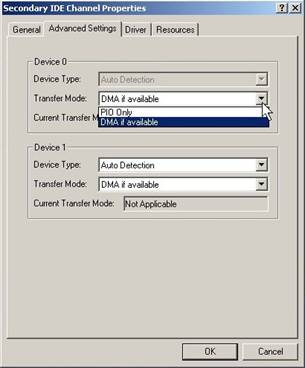
ALSO – check that both the Primary and Secondary IDE Channel under the category
“IDE ATA/ATAPI controllers” are set to DMA (if available) not PIO Only!! (On the host computer)
If they are set to PIO Only, change them both to DMA (if available), and reboot as prompted!
Windows98/ME: right click the My Computer icon, choose properties, then device manager- click the plus sign beside IDE ATA/ATAPI controllers, double click the Primary and secondary controller, and click the Advanced Settings tab, change to DMA if available. Click ok.
Reboot as needed.
Windows 2000/XP: right click the My Computer icon and choose Manage- choose Device Manager on the left- on the right hand side- click the plus sign beside IDE ATA/ATAPI controllers, double click the Primary and secondary controller, and click the Advanced Settings tab, change to DMA if available. Click ok.
Reboot as needed.
If you need more assistance with this step, contact your computer manufacturer or Microsoft if you are using a retail copy of Windows.
See below:
Last but not least… If you have ANY other USB devices attached to your computer, disconnect them, if you have a USB mouse and/or keyboard, you will need to attach them using PS/2 until the rom update is completed. (You will need to reboot after reattaching the mouse/keyboard) This step is NOT optional!
Now we are finally ready!
*you can get Communications Error 113 during the rom upgrade if other USB devices are attached!
Only after you have successfully done ALL of the steps above, without omitting any step, proceed to Step #3.
3) Upgrading the ROM
Download SP21465.EXE from
iPAQ 3870/3875 Rom Update Download Page
Choose Save to Disk and save it in a directory you can remember, such as My Documents (NOT Pocket_PC My Documents!!!)
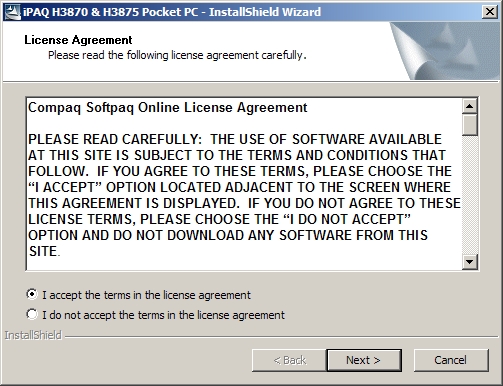
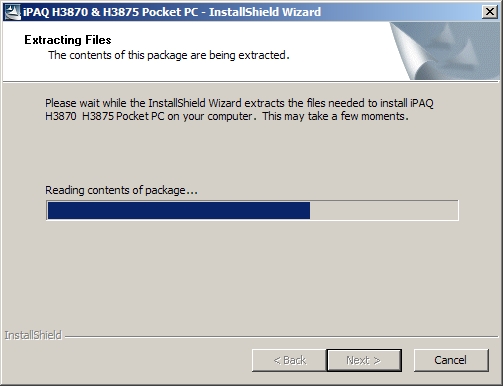
When the File is finished downloading, Double click “SP21465.EXE”.
Follow the on-screen instructions- choosing next, next, finish.
See below:


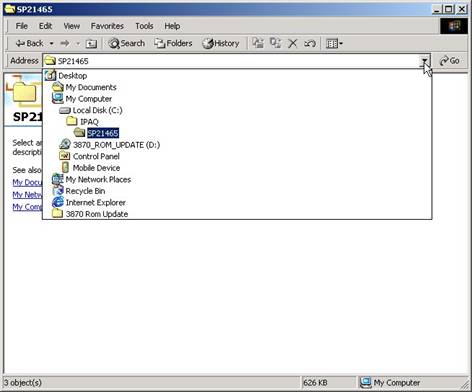
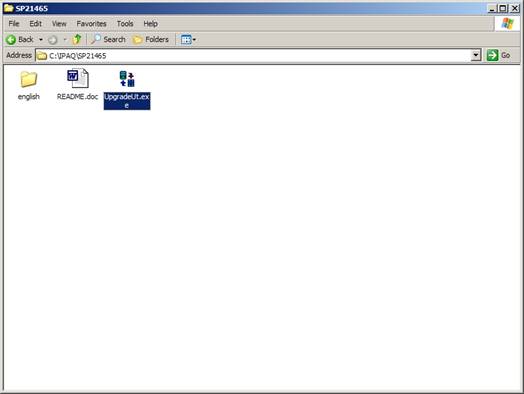
Go to the location on your hard drive you just extracted the Rom Update to, the default is
C:\iPAQ\SP21465
See below:
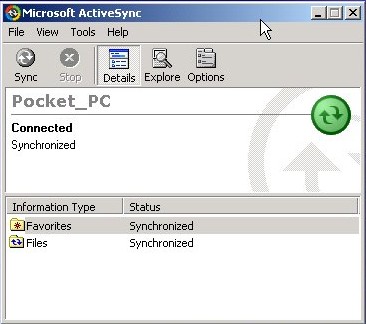
Make sure the iPAQ is connected and synchronized with no errors.
See Below:
Double click the file called UpgradeUt.EXE in the folder C:\iPAQ\SP21465
see below:
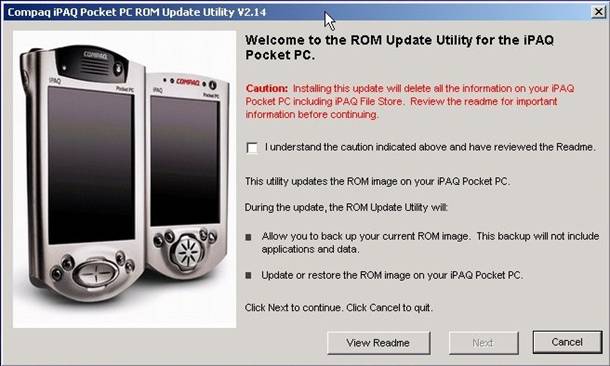
Close any windows that are open, except the Rom Update Utility, as shown below:
Follow the on-screen instructions carefully.

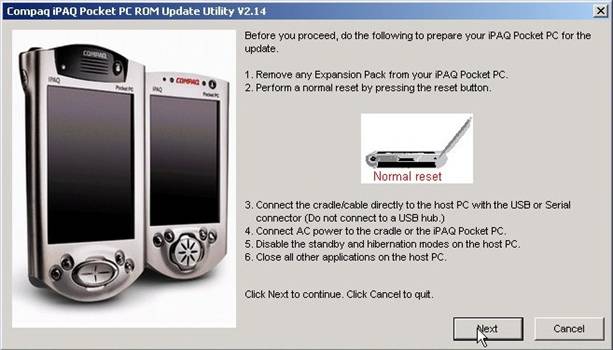
As stated above- remove ANY Black Expansion Jackets and soft reset!!
(Yes, they REALLY mean it. Notice the picture, your iPAQ should be ‘naked’ like shown in the picture.)
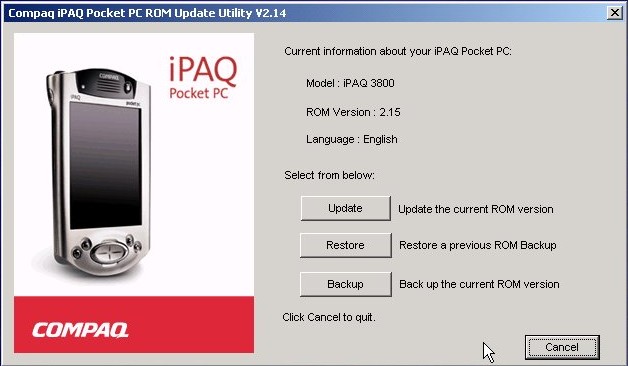
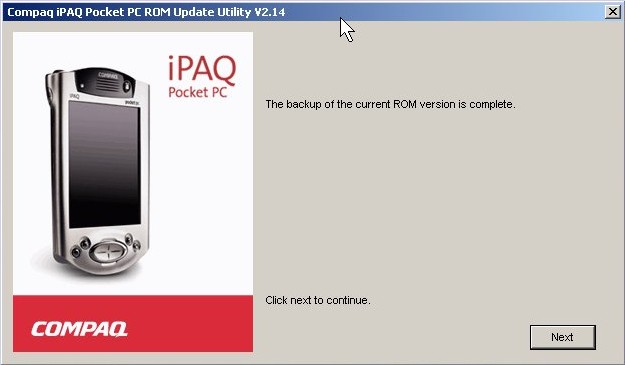
* It is important that you backup the current rom at this point.
Save the rom image to the My Documents folder, see below:


Now choose Update.
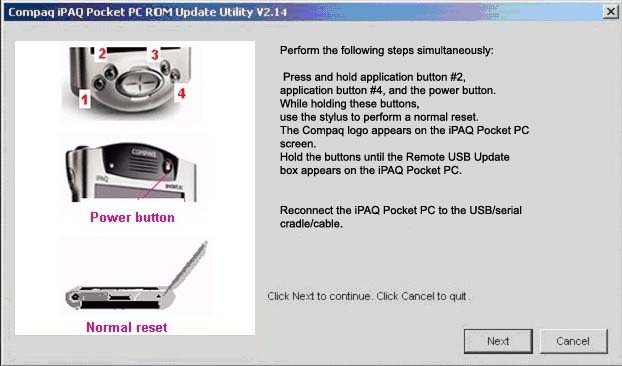
This is the tricky part! I found that it is easiest to put the iPAQ in ‘upgrade mode’ by placing it upside down on a flat surface, power button facing you, curved portion away from you- take your thumb and press the power button, use your index finder to press button #2, use your forefinger to press button #4, and use your other hand to press in the stylus in the soft reset hole. Do not release the buttons until it shows “Remote USB Update” on the screen.
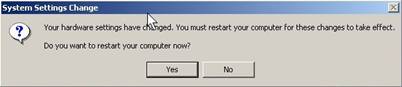
If you get “Device not recognized, disconnect Com Port or Retry” when you reconnect the iPAQ, IGNORE this message, and choose NEXT on the Rom Upgrade Utility.

If the iPAQ still says “Disconnect Battery” just remove it from the cradle- and soft reset.
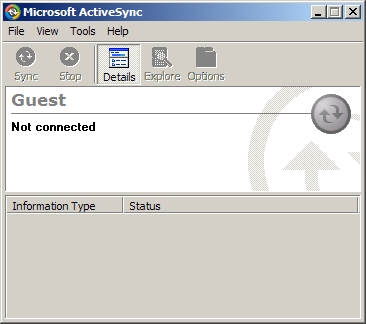
4) Re-Establishing a partnership
Before reconnecting the iPAQ, open ActiveSync on the host pc, and choose File ~> Delete Partnership.
Say Yes to the confirmation prompt, but NO to deleting any Synched files and folders.
See below:


Repeat this step until ActiveSync shows “Guest” (Not Connected)
Reconnect the iPAQ (soft resetting beforehand is recommended)
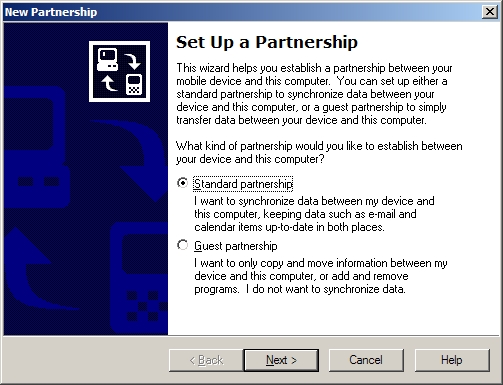
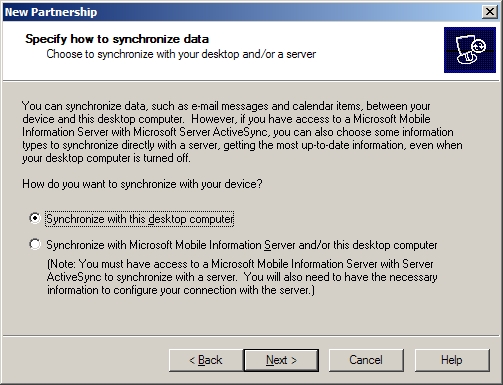
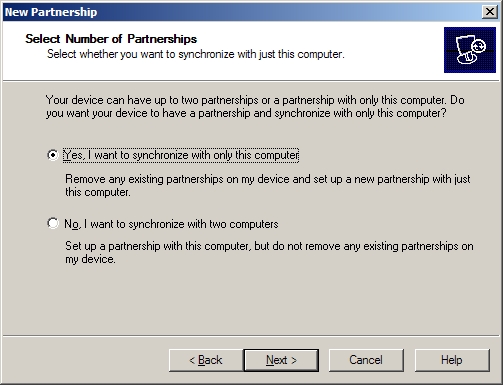
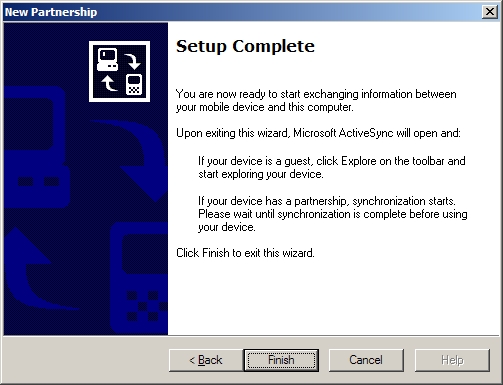
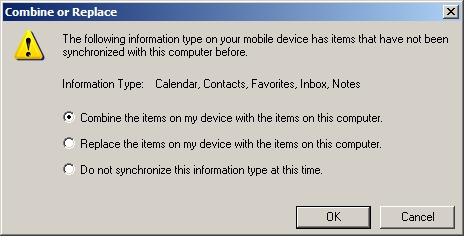
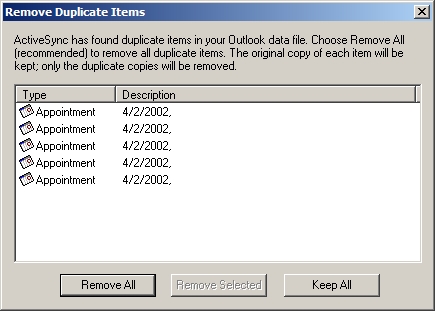
Establish a new partnership (See below)
*Note if you are on a managed network and plan to synchronize with a Microsoft Exchange server using Microsoft Mobile Information Server 2002, contact your network administrator/ IT Staff for guidance on establishing that kind of partnership.
The instructions below are for those who plan to synchronize with Microsoft Outlook on their host pc.
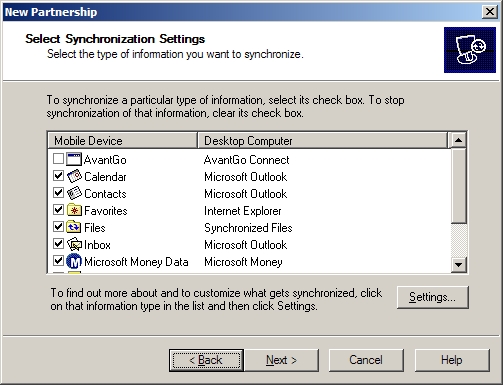

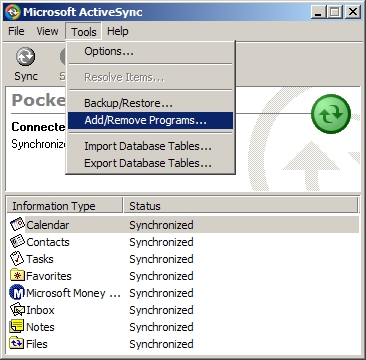
You can now reinstall any 3rd party program or game, driver, etc by either going into ActiveSync Tools ~> Add/Remove Programs, checking the items, and choosing install- *or by running the setup installer for the driver/game/ program again. (*recommended)

iPAQ®, Compaq® , hp® ,Microsoft® and Pocket PC® are all registered trademarks of their respective owners.
*any copyrighted material is referenced/reproduced with all due respect to its original owner.