PM 8-1(Garden of Antiquity)
PM 8-2(A Fate Decided)
PM 8-3(When Angles Fall)
PM 8-4(Dawn)
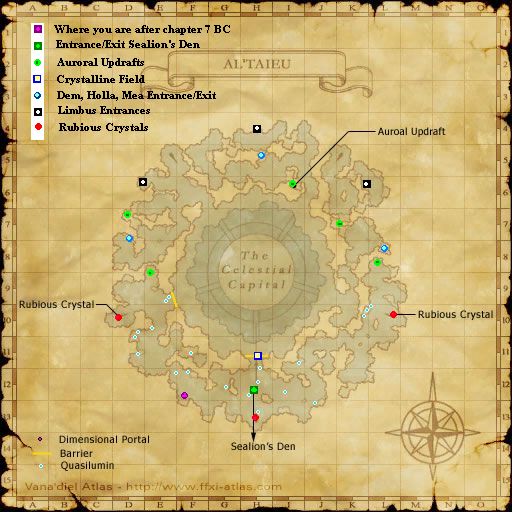
Alright kids, you've made it this far. Now you have sea access. This includes Sea both South and North. (Which means you can do Limbus). So, you're plopped out in Altaieu. Lemme get you a map so you don't go crazy.
8-1:
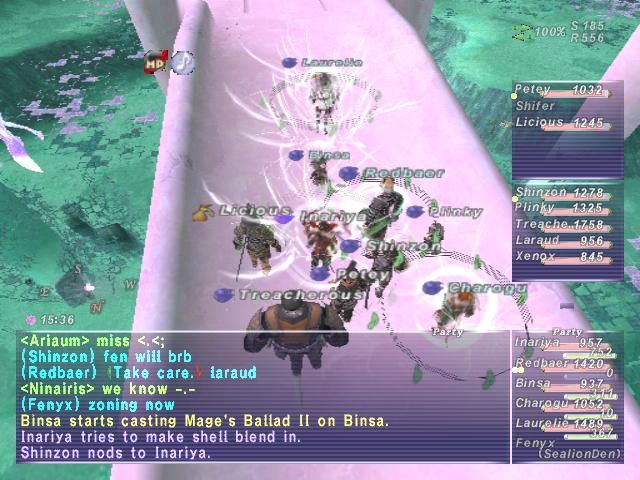
| Before this, let me explain to you a bit about aerns. Aerns have all normal jobs that a beastmen would have, however you do not know what job they are till you attack them. It's fairly easy to pick up on but if you go in without knowing this you're all "WTF??". Normal aern mobs can have reraise on. I'd say it's about a 50/50 chance that when you kill them they're going to get up. this does not apply to these NM aerns for 8-1. These 8-1 Aerns do not sleep well at all; they are -highly- resistant. It is suggested to Elemental Seal Sleepga and kill aerns one at a time. the more Elmental Sleepgas you have the longer your have to kill your chosen aern. All 8-1 job aerns have a 2 hour which corresponds to their job. All 8-1 NM Aerns have the same name: Ru'Aern |
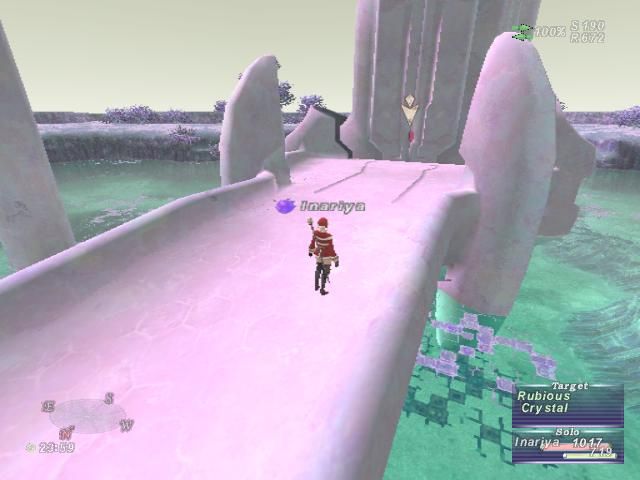
D-10 Rubious: this is a safe area inhabited by hempede mobs. As soon as you touch the crystal you will spawn 3 aern mobs of these job types: DRK, RNG and RDM. After defeating all 3, recheck the crystal.
H-13 Rubious This area is fairly safe inhabited by various mobs in the surrounding area. As soon as you touch the crystal you will spawn 3 aern mobs of these job types: SAM, WAR and WHM. After defeating all 3, recheck the crystal.
L-10 Rubious: This area is fairly dangerous inhabited by about 3-4 mantas which can aggro on the ramp if you are far enough down. (which is nearly at the top). please take caution at this crystal. As sono as you touch the crystal you will spawn 3 aern mobs of these job types: MNK, PLD and BLM. After Defeating all 3, recheck the crystal.
8-2:
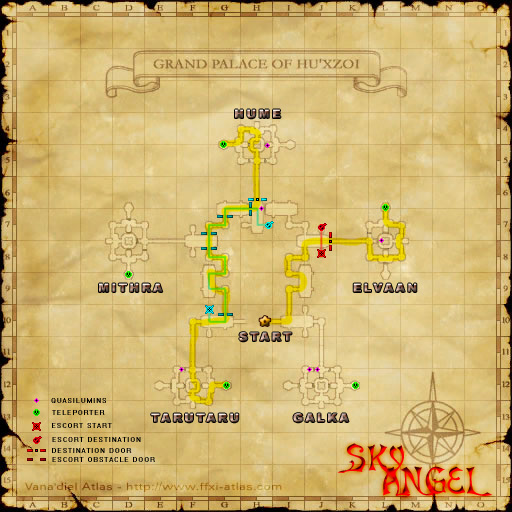
| Like 8-1, this cannot be soloed. you will Need a full party. Mobs here are VT. The entire mission is within The Grand Palace Hu'Xzoi and will take you about 2 hours. (longer if you have stupid and/or confused people leading) You need to make it from Start to Finish where at the end you will fight a Graph type mob who's element is dependent on the game day. The NM is fairly easy, but is capable of all normal graph things as well as tier III -ga, etc. There is an exellent guide that has been marked out that was posted on Killing Ifrit Forums. It's somewhat old and picked through but you will find it below. |
|
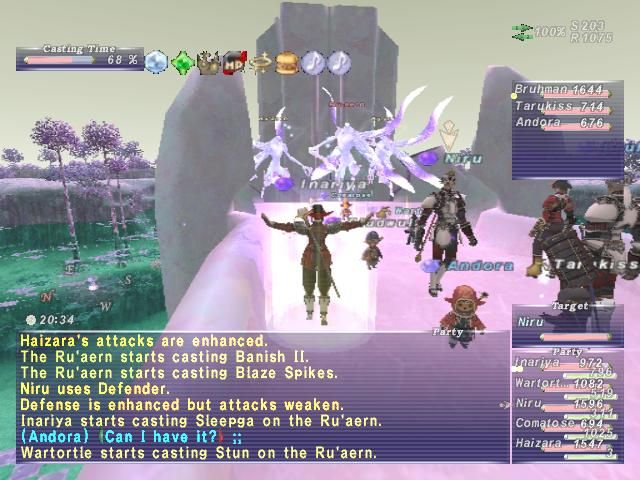
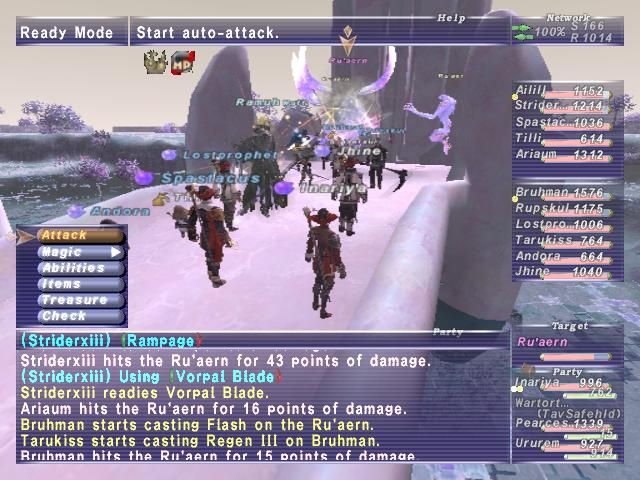
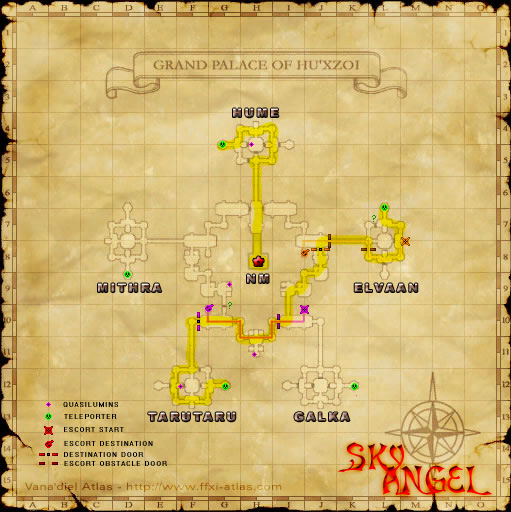
As you can see here, I have produced a more readable map for this area.. to aid in both the mission and acquiring the map. I have placed the locations of every Quasilumin, as well as updated the escorts to be a little more specific and helpful. Lines now connect the path which the quasilumin NPC actually moves along to give you an idea. Let me explain a little about my symbol legend here.. - The teleporters on one floor link to the same exact spot on the other floor, basically like an elevator. - The escorts are color-coded to seperate them from each other, to help reduce confusion. - The escort destination doors are doors that only open once your escort quasilumin makes it to his destination and is clicked. - The escort obstacle doors are doors that are in the way of his path, and are only opened (automatically) when he gets near them and passes through them. They can only be manually opened from the other side. - The yellow star "START" is where you enter at , you cannot ever enter through the west door, so don't try^^ - The red star "NM" is in the secret unmapped area beyond the door there. You pop this NM for CoP 8-2 and beat it up for a cutscene. It's a disco ball that can take the shapes of spider, bird, or even a HUME PLD that uses vorpal blade! If it's in spider mode, it can use sickle slash =X anyways... hope this helps! I am aware that the Mithra corner on one of the maps has no barriers marked, there probably are not any there, but i didn't get to check the north and west sides because we were rushed and had a ton of slept mobs chasing us all over the map. |
(Again, that was all taken from the post and I take no credit other than just compiling it here. I luff using it)
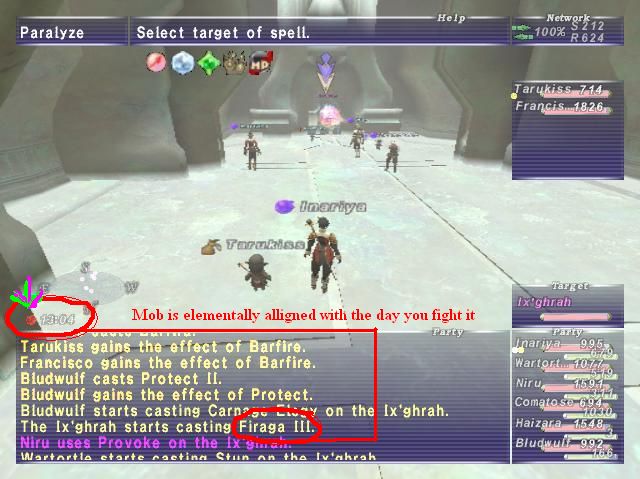
NM's attributes and two hour are based on the day you kill it. generally it will do mighty strikes on most days, some it will do invincible i believe. the day usually easiest to kill it is light or darkday. please keep in mind if you try thundersday you're going to have a mob able to cast thundaga III and can't be stunned.
|
further information on 8-2: -other doors will sometimes be marked "???" do not under any circumstance check them or use them or you will be made to exit the area you are in if you should go through them. -You will be required to fight some things but otherwise it is ok to wait and go without fighting anything. the mobs can aggro the NPC you are escorting. -Just follow the Map that's marked out and you will be PERFECT. promise. -all mobs (asumming they aren't graph dark based) are sleepable. blms should be ok sleeping in Hu'Xzoi. -at the end, spawn the NM, kill the NM, recheck door for cutscene and you are DONE with 8-2. escape, tele, etc. out. there is no other way besides going back up and through to try and get to an exit. |
8-3:
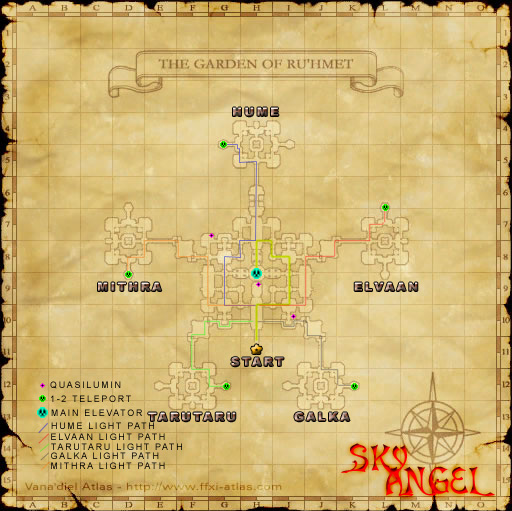
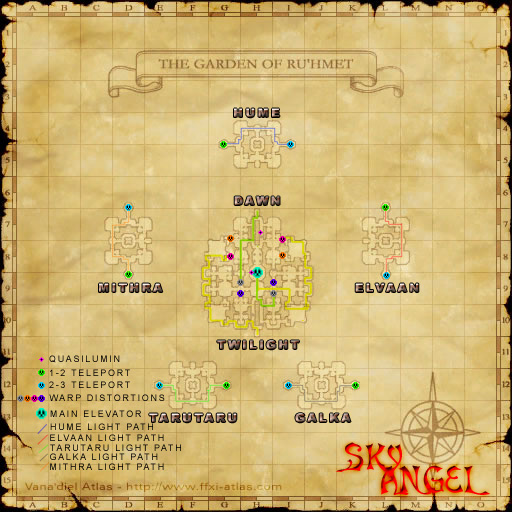
| This will give you Access to the Garden of Ru'Hmet. 8-3 takes place entirely within The Garden of Ru'Hmet. This consists of A, Getting your light back, B getting Brand of Twilight and Brand of Dawn (key items), and C a NM fight against 4 Pot type mobs. The same person who did the Hu'Xzoi guide above did one for 8-3. Parts of her/his guide follows below. |
|
Enjoy ^^ This one is even more cluttery than Hu'Xzoi, but this mission is obviously more complicated^^. I marked each race's run up their respective tower to retrieve their lost light and labelled the towers as such. In the Garden of Ru'Hmet, you can technically get around by yourself with extreme amount of skill and timing- unlike Hu'Xzoi. Spinning pots are your main problem for this tower.
Climbing each tower, even to just get your light, is very tricky.
- On the first and second floors of the towers, the corner rooms will have little 'cubby holes' with a fast spinning pot inside, for me to sneak by them, i actually have to run quickly across as the BIG EYE is facing outward (because of latency with the server, i see the big eye but the server sees the little eye at this moment. Lag sucks for this stuff). If you aggro, hope you good at making a beeline for the teleporter or are a job that can sleep or bind the mobs along your way. You can also just use flee XD.
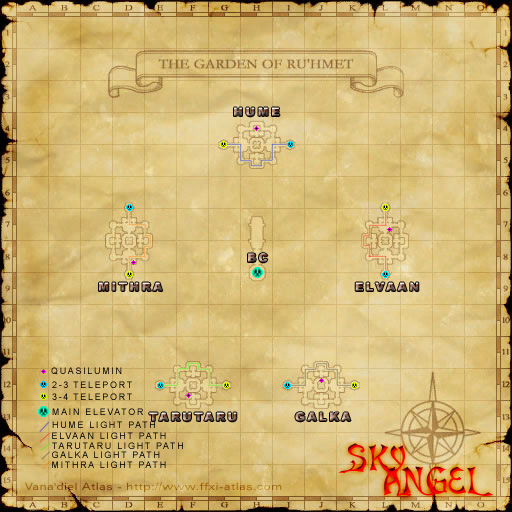
Accessing the Central Elevator, getting your Brands
Brand of Twilight
Brand of Dawn You got both Brands? GREAT! AWESOME! Guess what you get to do now? CLIMB THE FERRIS WHEEL OF DEATH, err i mean the elevator, ascending once again to the THIRD floor of the tower's central portion. You will land in a simple square room with a particle gate. Touch the gate for a crazy cutscene, then touch it again to enter the BC fight with your 5 buddies. What? You do have 5 buddies right? =P
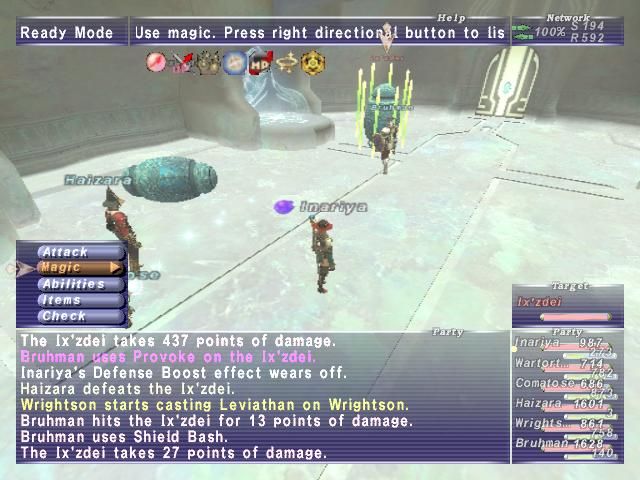
The BC |
|
Additional Notes of my own: -You can make it fairly easy through the spinning pot room. Just make sure you're watching all the pots. If you are -right- next to one side of the pots, the pots from the other side can't see you. This might help better your method through. Otherwise just RR up, die at the far door, and RR when the doors are open and pots are back. -Once you Aggro those 4 pots you must die. You cannot sleep them. The doors are down game over. -There are 3 other rooms with pots that will take you into the elevator room. the one from the North is the one that has the slowest turning and ideal pots. -Mobs in the garden are IT. Blms can't sleep some of them. Rdms can. Normally I'd take a person through 1 at a time to their light and brands. Takes 30-60 min per person. Very painless and no chaos. -For pot fight I highly recommend you have multiple people able to elemental seal sleepga. (They don't sleep without ES sleep) A good strategy can be to all have RR on. Kill as many pots as you can. wait till they all go back to their places, RR up, heal to full, and do it again. -Monks do good damage on the "BC" pots. -It's not an actual BC. you can TP in garden and your for this "BC". -Only 6 people at a time can enter the "BC" but you can target the players/mobs from outside the "BC" as well as see what's going on inside. |
| Important fight specific - There are two Blm pots and two rdm pots. The Blm pots -will- benediction to full (each theirself) when they reach their pad, however the rdm pots -will not- benediction. If you do not get both blm pots dead before your first wipe, it might be a good idea to pack it in and try over. If you get both blm pots dead and are going to wipe on a rdm pot, try to get the rdm pot's health down as much as you can before you wipe. |
8-4: Well... you made it to the final BC.
|
The fight is fairly easy. can sometimes be a hit or miss, you just have to know what you're doing. the -best- idea is to kite it around. Pld, Ninja, or even war/nin are equally good.
-Boss has 2 Forms. After you beat the first form you get a cutscene. |
| Win... and Congratulations for the last time. You've beaten the CoP missions. |
![]()