The first part deals with the creation
of a drawing is in relation to its sketch.
The draft shows the "skeleton" of the
drawing, or
the position of the main subject in relation to the fund or other objects, if
there is movement and what it is.
In this first lesson we treat the draft of a male
human body, which is the most widely used in comics.The
practice is very important for the improvement of tecnic.
I
am used to draw on all paper that appear in front of me, whether talking to someone on
the phone, or by taking classes in college. I was always drawing.
Remember always: PRACTICE!
Well,
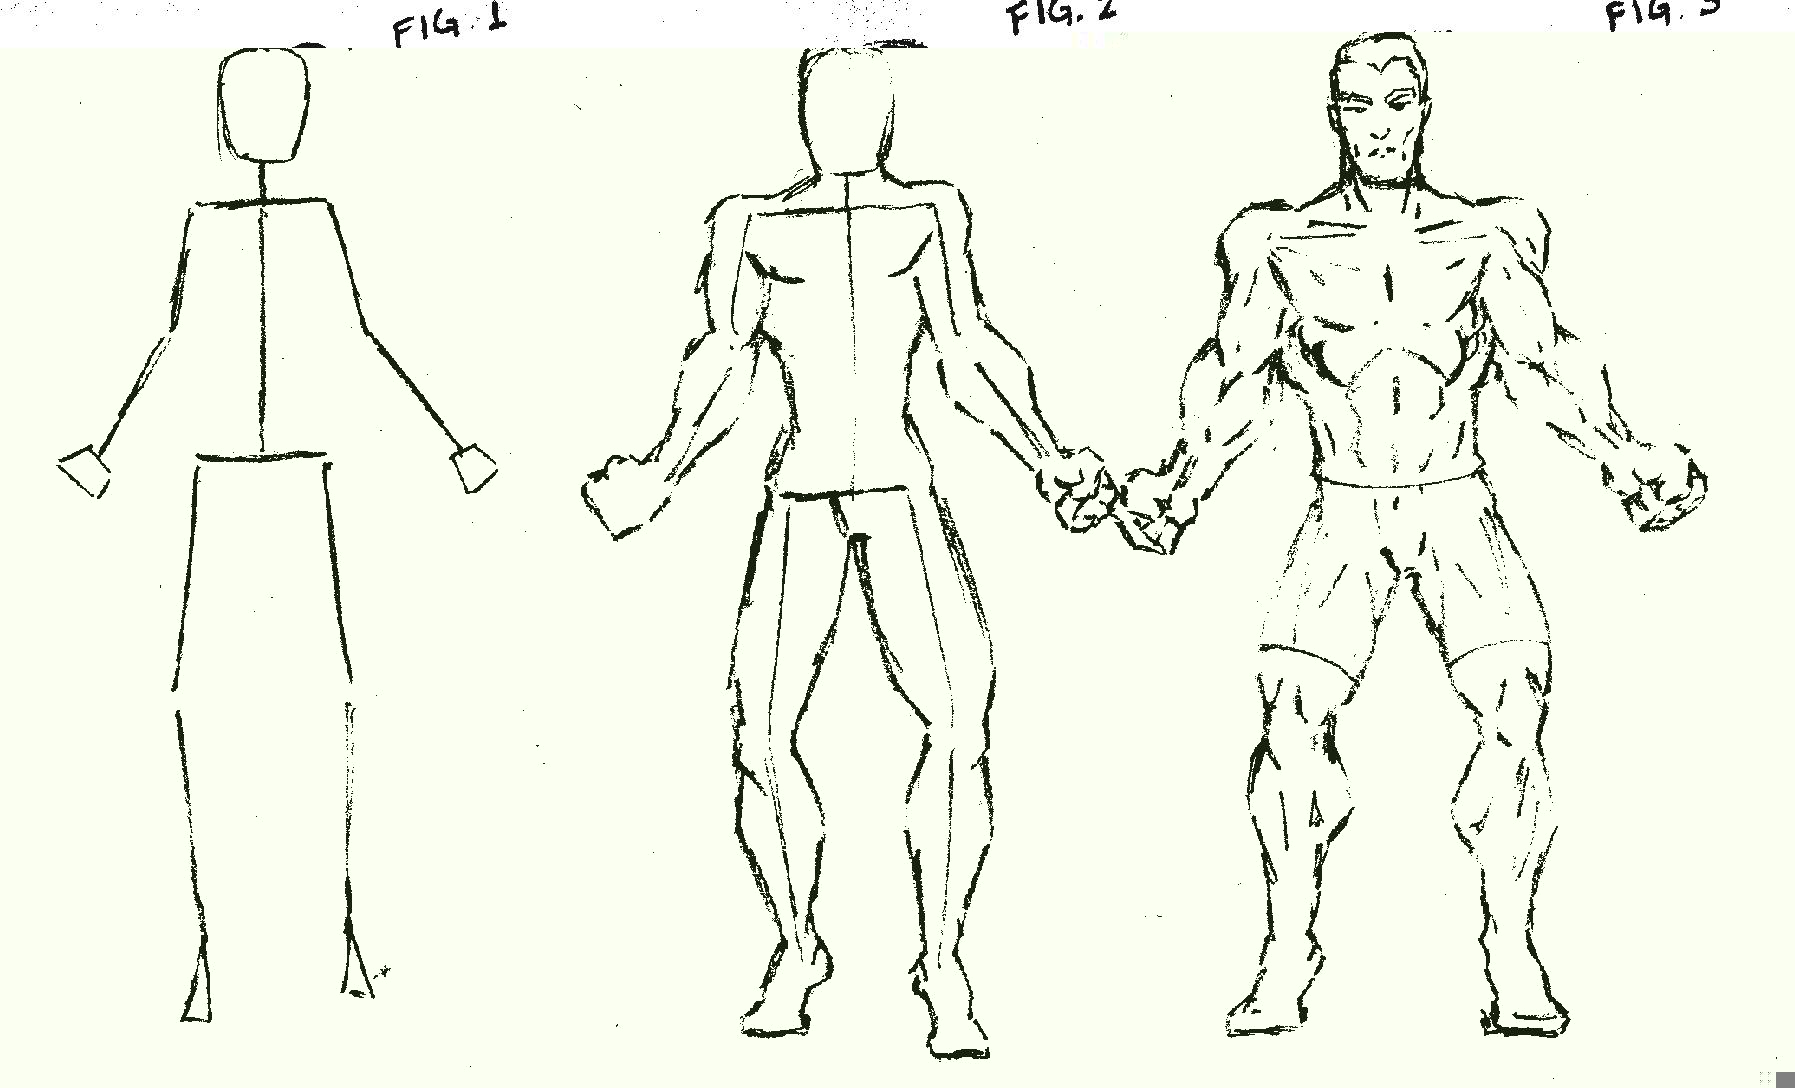
in Figure 1 is the beginning of everything, the good old-man toothpick.
This is a great basis for the construction of the body,
either male, female or children.
Note
that obeys the "classical" body which measures seven times the head.
Note that the legs are larger than the
trunk, and that, because it is a muscular body, the shoulder is larger than the
hip (the draft should have shoulders and hips, and the neck).
The "filling" of the skeleton will be seen in the
next few lessons as well as facial expressions (figures 2 and 3).
IMPORTANT: The dash made by the designer should never
be continuous, which
hamper its accuracy.
Make small traces next to each other.Know the time to choose
beetwen do a unique trace or various.
No rascunho não há tanto mistério, mas na hora de passar a
limpo, isso é importante. In the draft there
ain´t much mystery, but the final art is important.
At this time, designers generally use
the "ink" pen, which can be found in any stationery.
The pack of the pen showshow to handle them.
The pen comes in sizes as
pencils, starts at 0.1.
In the next few lessons, we´ll show technical drawings
on ink.
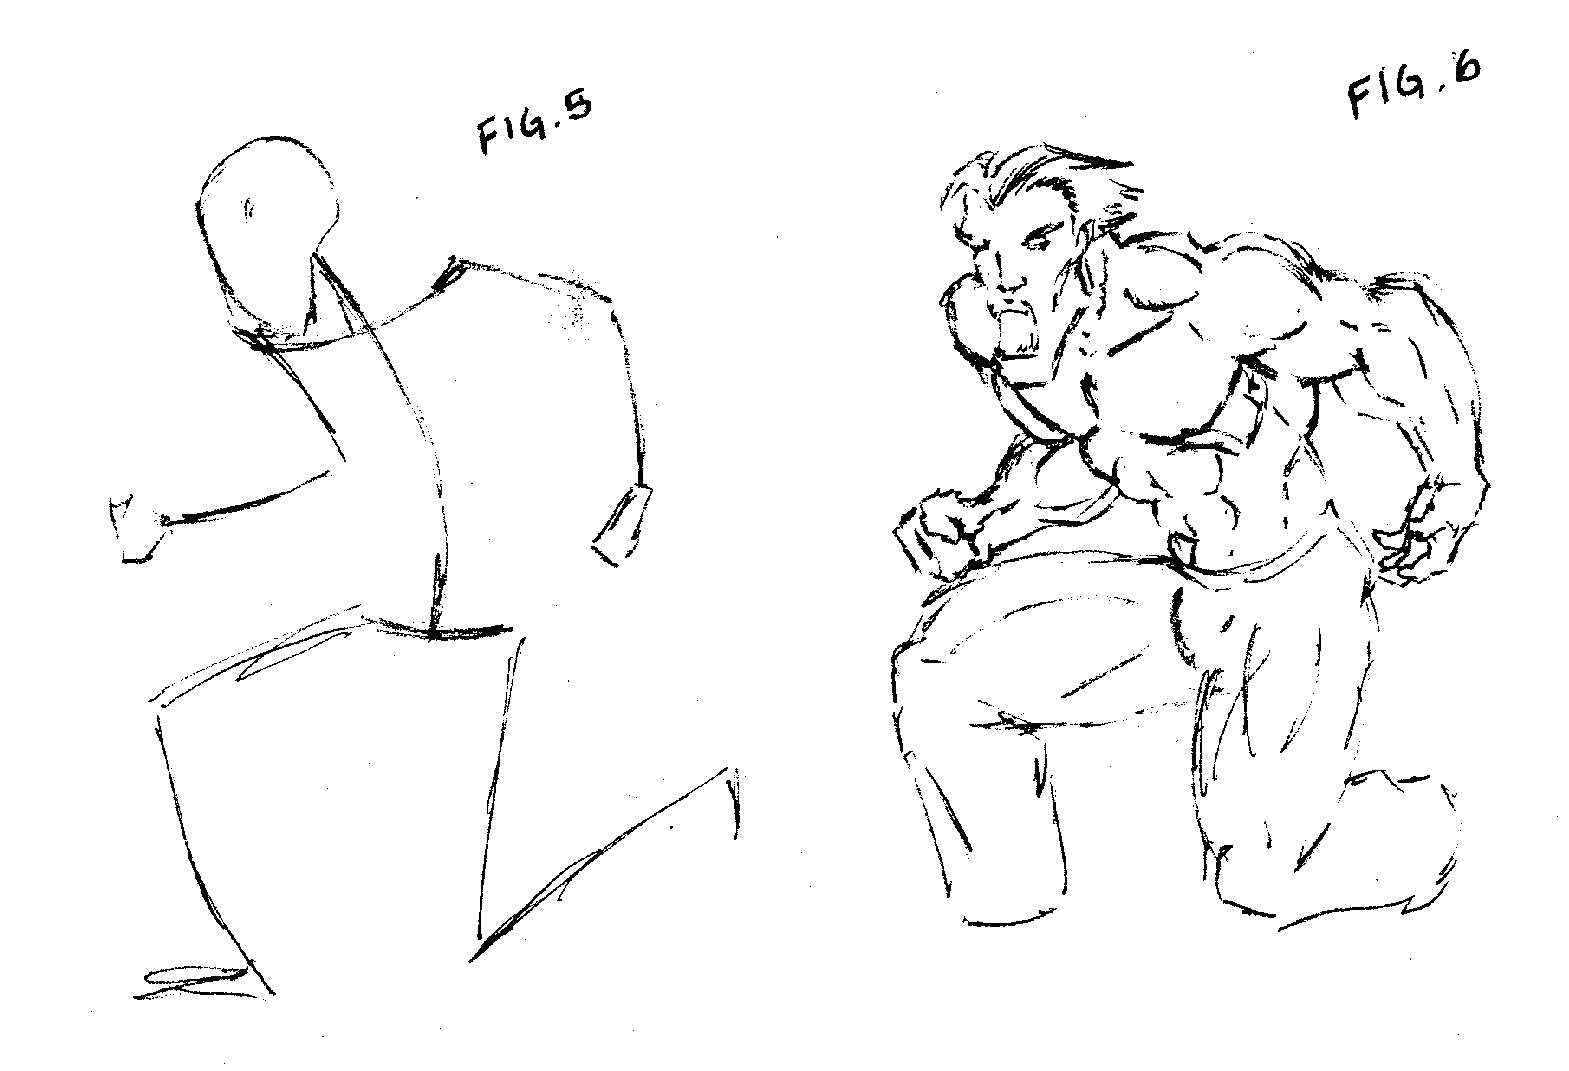
Here we see ways of moving the
body.
. Important: the movement can not be impossible to be done,
as a huge twist of the abs, or turn a knee further than the is possible.
THE BETTER WAY OF DRAW A MOVEMENT
IS SEEING IT BEFORE.
VIEW YOURSELF IN THE MIRROR, LOOK AT OTHER PERSON.
THIS LESSON WILL FIT ALL TYPES OF SKETCHES. Do not forget to respect the
proportion of the body.
Do not be ashamed to look in the
mirror or ask someone to make a move in "slow motion" so you can choose a
position. The framework of a design must summarize a
movement of a person and not put it frame by frame. You can do a
drawing of a step of one person to demonstrate that it was going from home to the bar,
for example. And not by drawing all of their steps.
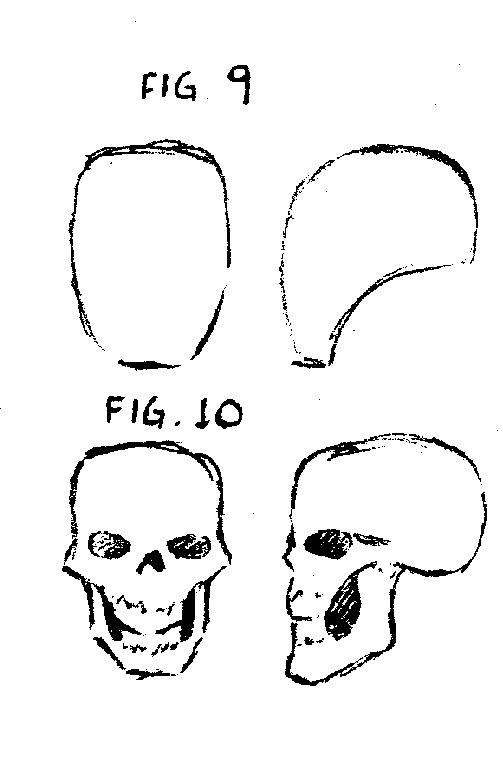
The draft of the head (fig.9)
is never round, it tends to be oval, to follow its base that is the skull of a
person (fig.10).
Note photos of
human skulls to understand this concept.
This will help when studying the movement of the
mouth an the jaw. We´ll see it in the lesson intended to facial expressions, but I will advance some
visual tips:
the eyes of the person
are in the middle of the head.
eyes are separated by the
distance of an eye.
the top of the ear is at the height of
the eye.
try to draw the
male nose as a "v".
try
to draw male mouth with just a dash (the male has lips with the color as like the
skin)
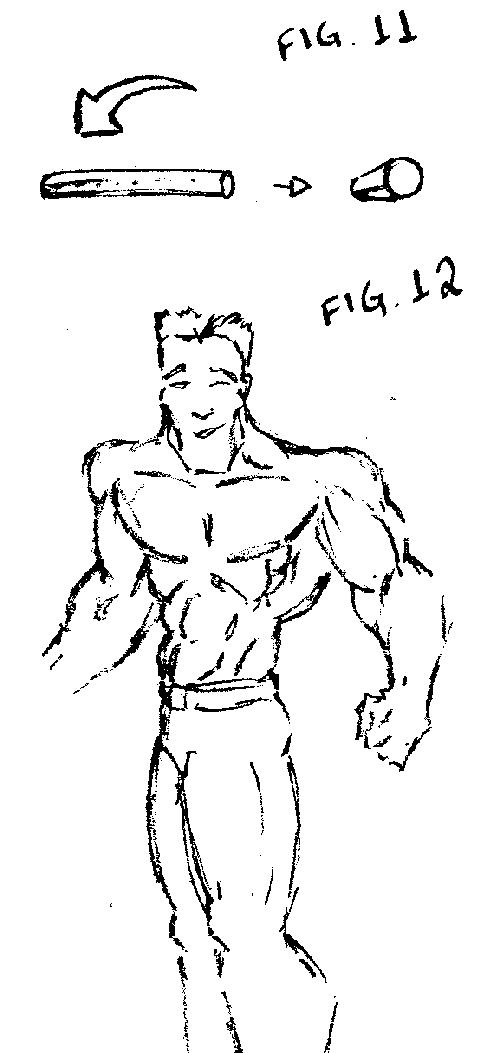
Na figura
11, vemos que, perspectivamente, quando se olha um objeto em ângulos diferentes,
ele ficará "deformado", trata-se da perspectiva que estudaremos à frente, que já
é importante na feitura do rascunho. In Figure 11, we see that,
in perspective, when an object looks at different angles, it will be "deformed".
It is the perspective, we´ll see lessons ahead, which is important in making the draft.
Finally we have, just above, an example (fig.12) of a possible twisting of the body.
How would be its draft?
To summarize, we have seen in this lesson that
the draft is the basis of the art-final, and it is of extreme importance.
The way of doing it must be practiced, with traces
one after another. Another point: look at the world and for people when in need
of
models for a movement.
Look at yourself.
The perspective is important: what is closer seems
bigger than the same object that is far.
At last but not least,
practice a lot.