Workshop spring 99:

Matlab interface to video camera and Face Detection

By :

Ido Milstein , ID 037684966

Amir Fish , ID 032025595
 

Introduction:

The field of Face Identification is usually separated into two sub fields. The first, Face Recognition, concentrates on finding ways to recognize specific faces from a list of faces. In this case one already knows that he is looking at a face, and tries to find out which face it is. The second, Face Detection, looks at images, and tries to make a judgment on whether or not that image contains a face. This second problem is more of a general object recognition task. Evidence from psychology shows that the two tasks are probably performed in different parts of the human brain. This implies that different techniques and/or different attributes should be considered for the different tasks.
In this project we try to locate faces in pictures from video cameras. This application can be useful to provide authentication of employees in a company entrance, etc. The application is comprised of two main parts – the remote unit and the base unit :
The remote unit is responsible for communicating with the camera, grabbing a picture at predetermined interval of time. The picture is then transferred to a recognition algorythm, where it    decides whether the image actually contains a face. If the answer is yes, the image is then compressed,    and sent to the base unit for further analysis (compare with a database of faces , etc. ).
We shall concentrate on the remote unit, where we should identify whether there's a face in the image (like in the second problem). More over, we focus on identifying faces that look straight towards the camera, and we don't mind if there are several faces in the same image (we just look for 1). But we do also try to identify the specific locations of face features, i.e. we look for the locations of the eyes and mouth.
 
Schematic View of the remote unit
 
The remote unit is consisting of a main (endless loop), which constantly do the following :
1. Grab a picture from the camera.
2. Detect whether it's a face or not (based on the algorithm described below).
3. Compress the picture.
4. Send it through the network to the base unit.
 
How does the Video grabber work ?

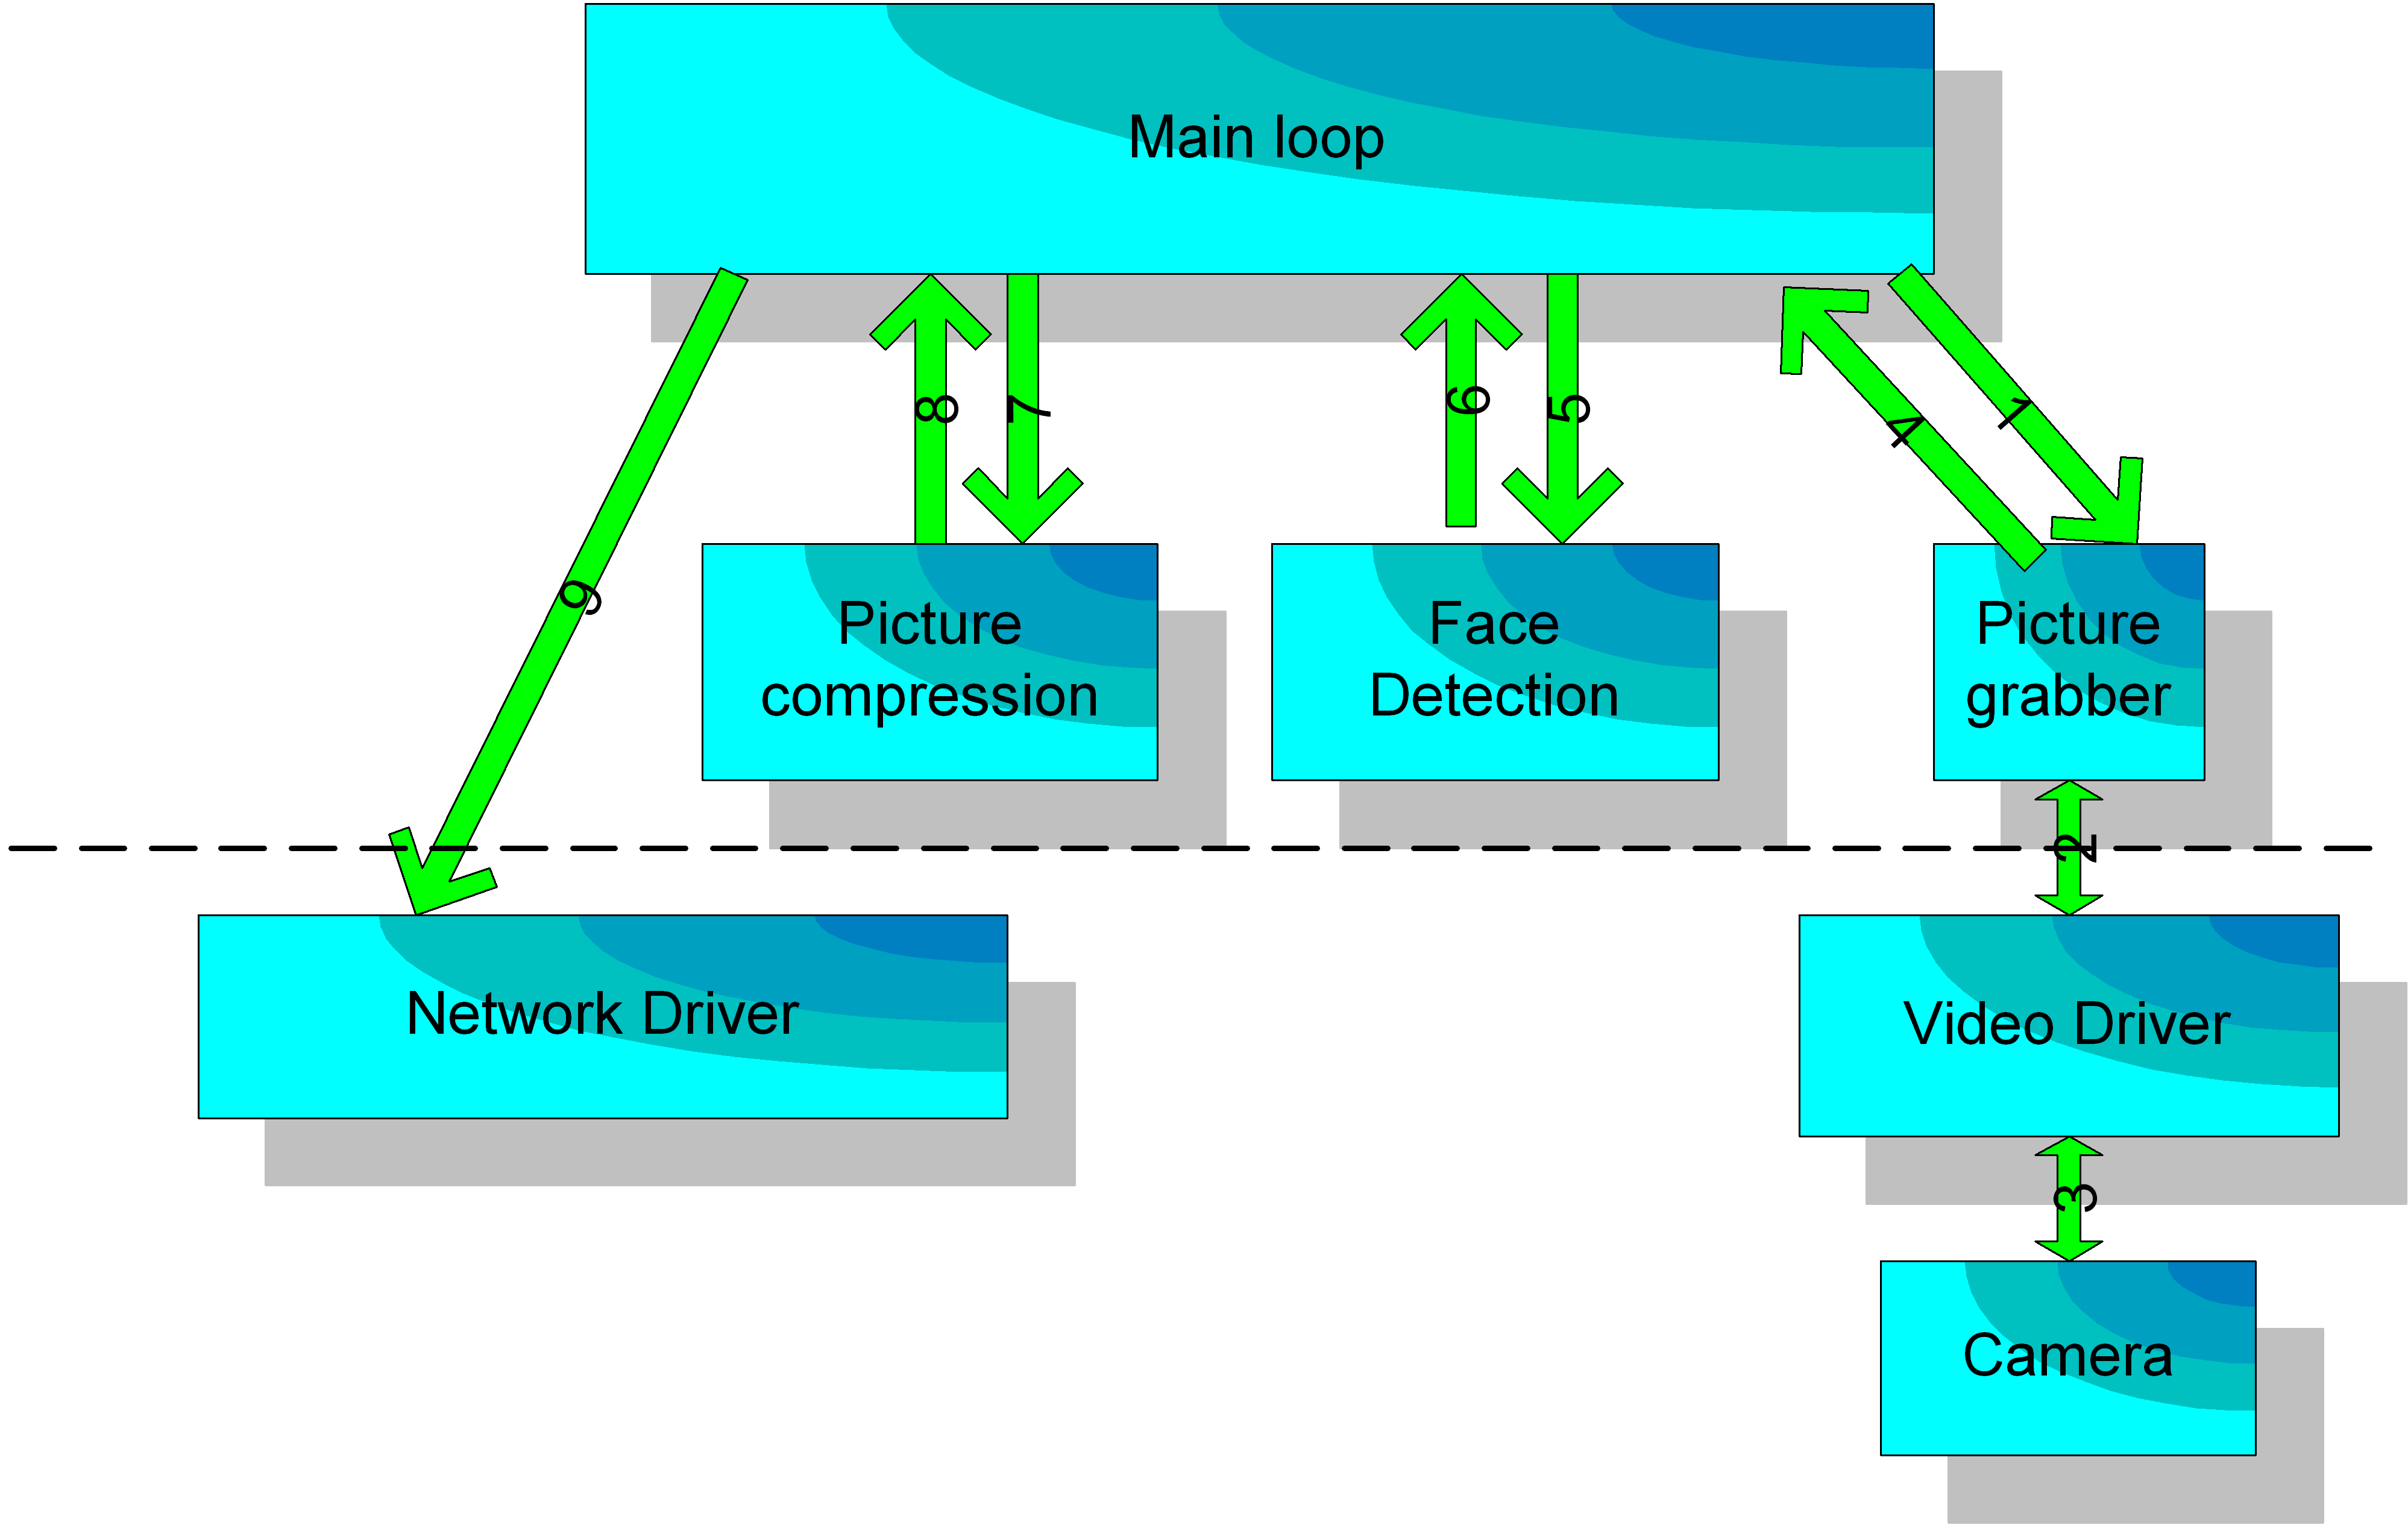
AVICap supports streaming video capture and single-frame capture in real-time. In addition, AVICap provides control of video sources that are Media Control Interface (MCI) devices so the user can control (through an application) the start and stop positions of a video source, and augment the capture operation to include step frame capture.

The windows you create by using the AVICap window class can perform the following tasks:


Addressing the task of face detection:

Trying to identify faces from non faces poses some difficult problems. The most important problem is how to define what a non face is? Clearly we can pick hundreds of examples of faces to train on, but it is very hard to form a collection of non face images. Some research has been performed in the last years on "learning from positive examples" using statistical Baysian methods, but as far as we know, there are no breakthroughs in these attempts up to date. Other more general problems involve the high dimension of the inputs (typically images in the order of 100*100 or more), limited computation resources, and various kinds of noise, including different lighting, camera noise, etc.
We used a supervised learning method suggested by Rowley, Baluja and Kanade ("Neural Network-Based Face Detection" PAMI, January 1998). In there article they suggested and tried many variants of the same algorithm, out of which we picked the following algorithm:

 
Training:
1. Take the initial set of training faces, find a best fitting linear transformation that will move the face into a 20*20 box, with eyes at predetermined locations. Find where this takes the other attributes (in our case  - just the mouth center).

2. Apply preprocessing to the images (linear compensation for different light situations).

3. Add random images as an initial non face collection (and apply preprocessing to it too).

4. Train a neural network on the training-set.

5. Use the network to look for faces in scenery images that do NOT contain faces. Mark all the detections as false alarms and add them as such to the training set.

6. Repeat 4,5 a few times (8 times in our case).

7. Train several networks using this algorithm.
 

Simulation:
  1. For each one of the networks you trained look for locations in the image, that contain faces (looking in a variety of scales).

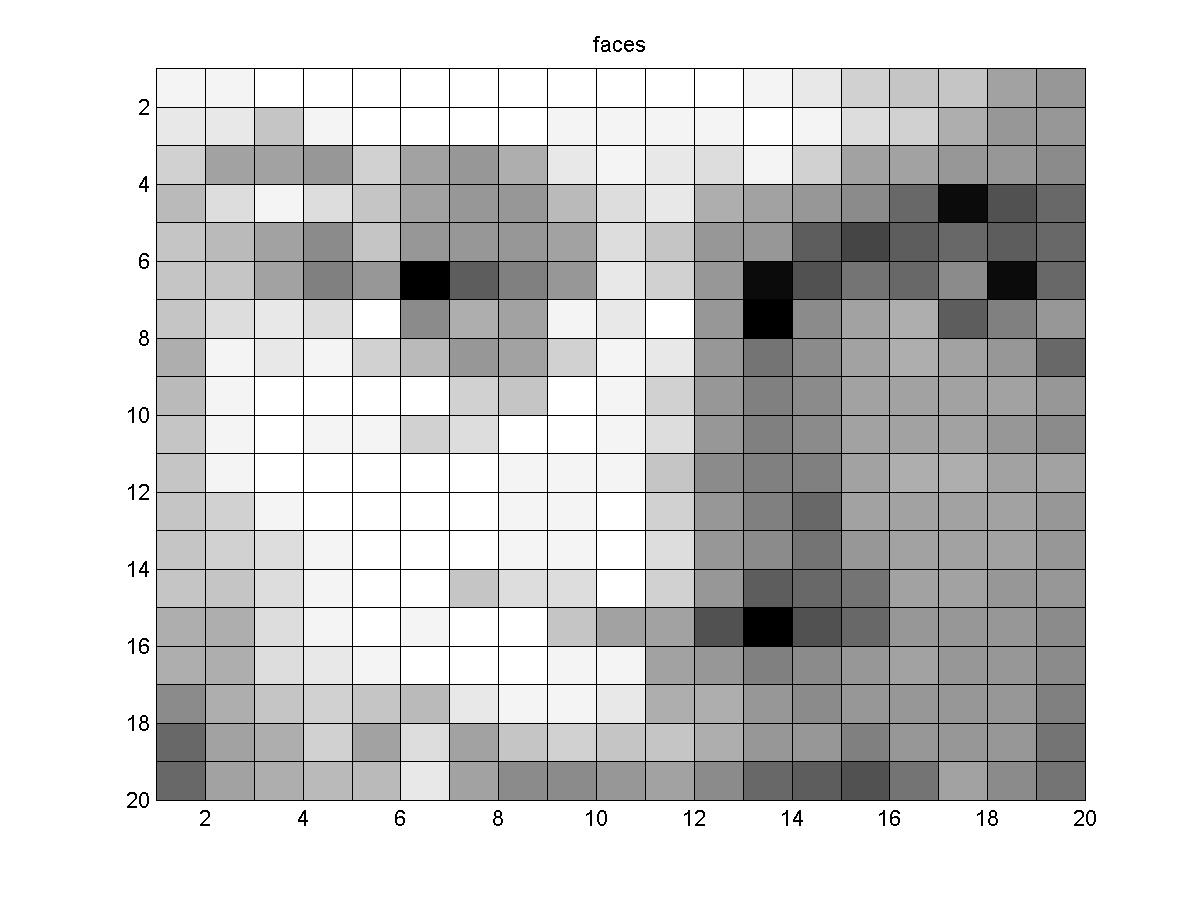
2. For each location mark how many times a face was found in a box that contains that location. If there is a location for which this number is greater than a threshold, find the center of the highest detections.

3. In this center, look for faces at various slightly separated scales (to get a better tuning for the scale). If the number of detections in this center does passes a second threshold, then a face is detected at that center with the given scale.

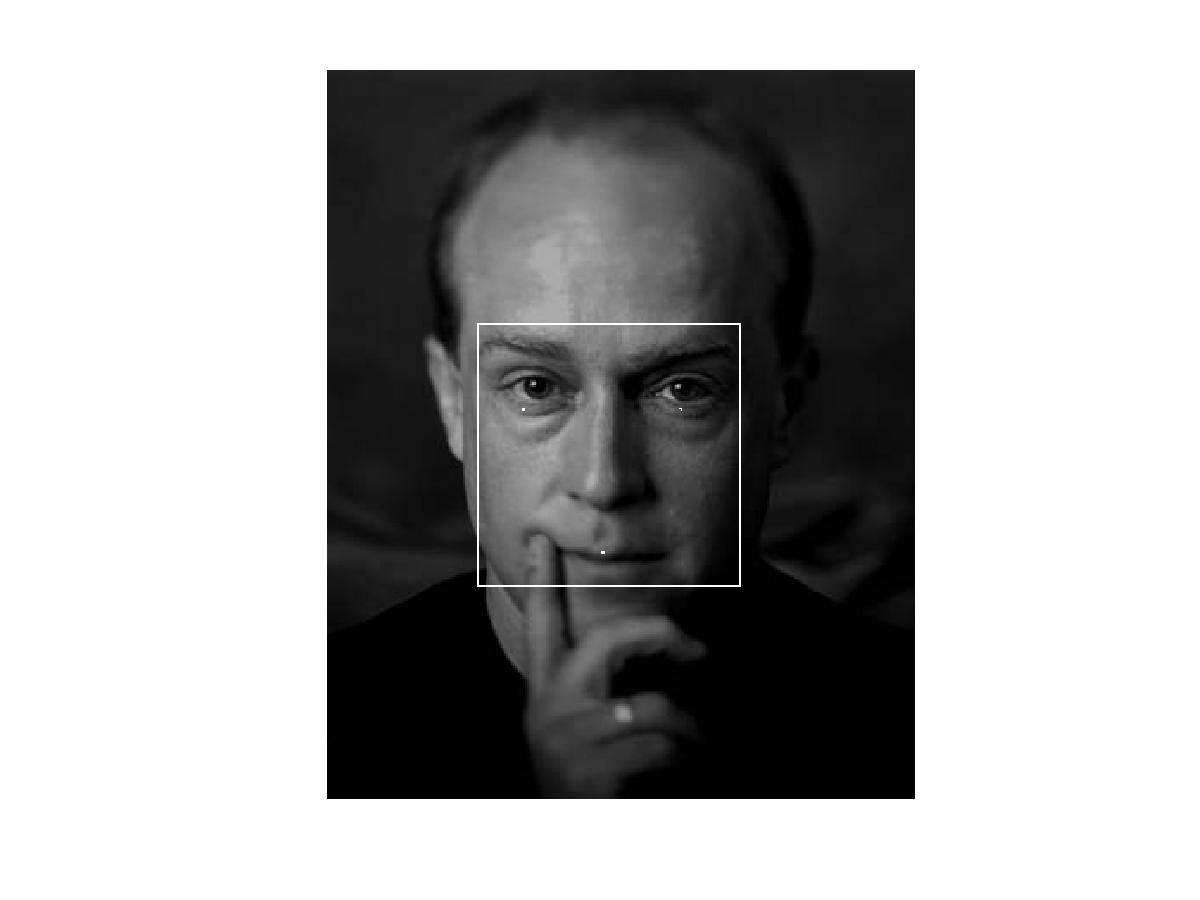
4. Knowing the location and size of the face, we compute the expected locations of eyes and mouth.

Implementation:

This part of the project was all written in Matlab. Following are the descriptions of the issues that are related with the steps of the algorithm, and a short description of the files and functions that take care of them. The files themselves are documented clearly.

Training:

1. Finding a best fitting transformation to a 20*20 box
This problem is solved straight forward. The function "alignfacesnew" receives the locations of the eyes, mouth and face size, and finds the required transformation. The function "get2020new" takes a set of faces and transforms them to the 20*20 box with the found transformation.
2. Preprocessing
The article suggests 2 kinds of preprocessing: Linear compensation for bad light conditions, and histogram equalization to sharpen the image.
Linear approximation finds a plane that is either closest to all the 3-D points in the image using Euclidean distance, or using light difference (i.e. look at the sum of the squared differences just in the light plane). Both options should normally give more or less the same results. We picked the first one which seemed more appropriate (though it costs more in computation time). To find the required plane we calculate the SVD of the matrix that hold the 20*20=400 points that we have, and take the vector that corresponds to the smallest singular value (and therefor is the normal to the plane we are looking for). This is implemented in the function "lincompensation", which also subtracts this plane from the given image, and returns the image without the lighting. In order to save function calls (which Matlab is very slow at) we replicated this code also into the face searching code ("look4faces_script", will be talked about later).
In order to avoid making histogram equalization,  on every box in which we look for a face, we decided to perform histogram equalization just once for every picture. and we do that on the whole picture together. So, we do this before the light compensation (which is performed separately on every input box that we give the network). This requires the image toolbox, which is not always present, and the line that does it can be removed, if needed, from the  "find_face_location" function that will be discussed later.
3. Adding random images to the initial training set
This, again, is solved straight forward. The script "creatrndpic" does this.
4. Training (and the network structure)
The network we used, is also described in the article. It has 1 hidden layer. The part of the network that include the input layer and the hidden layer, can be described as 28 networks put together. 16 net works look at the 16 5*5 boxes (in the 20*20 window), 4 networks look at 10*10 boxes, 6 networks look at over lapping 5*20 boxes, and the last 2 are again 5*20 boxes, one for the eyes strip, and one for the mouth. The network has only 1 output, and all the hidden units are connected to it. The network uses logarithmic sigmoidals as transition functions at both hidden and output layers. The structure of the network is saved in "net_structure".
We used back propagation with momentum, as suggested in the article, but had to rewrite the training and simulation functions, because the current Matlab functions could not deal with a network that is structured this way in a convenient way. The new functions "mytrainbpm" and "mysimuff" are used instead of the old ones.
Let us just note a few technical things. The multiple sub-networks are held in a 3-D matrix,  "W1l" - weights, 2-D matrix "B1l" - biases. This causes many of the values for the first 16 sub-networks to be zeros (because they have only 25 weights while the others have 100 weights, so 75 values are 0). While this takes more space, it makes the code much simpler, and saves computation time by reducing calls. The specific sub-networks are referred with the length index "li", that defines the different sub-networks, and their order. In order to further speed up training, we start by copying the specific windows of the data 26 times (one for each type of window, remember that 2 of the windows appear twice, so 26=28-2), and again let for many zeros to enter (this is actually like making  26*100/(20*20)=6.5 copies of the data). All this lets us complete 1000 training iterations over about 400 images in about a minute.
One last thing that is worthwhile mentioning,  is that we trained the network to return 0.9 on faces and 0.1 on non face images. We did that so that the values we train the network to return will not require intermediate node to have infinite values (the logsig is more "flexible" around outputs of 0.1, 0.9).
5. Bootstrapping non face images
In order to find a comprehensive collection of non face images, we let the networks look for faces in scenery images that we collected from the world wide web. A total of 48 such images were collected for training. Those areas of the images, where faces were falsely detected, were marked and used as non face examples for further training. This was done in order to help the network find the exact boundary between face and non face images.
We will discuss the search algorithm in the next section, but we would like to remark here that this is by far the most time consuming part of the training. Actually, taking out the search time, one is left with training operations that take at most 10 minutes (433 MHz, 64MRAM), while the repeated (8 times) search (for those 48 images) takes several hours to complete.
There is a small script called "makenewtrainingset" that takes the false faces that we found and the true faces data set, and makes a new training set by alternately randomly sampling pictures from the two sets (i.e. one random face, one random non face, etc.).

Simulation:

1. Separated searches
The first thing we do, as far as looking for faces goes, is to let each one of the 3 networks that we trained search for faces in the image. The immediate problem that arises when looking is that the number of 20*20 windows in an images rises as square of the length of the image. This results in having lots of different locations to look at (not to mention different scales and having 3 networks), and a very large computation time. We keep the simulation time as low as we could, we added an assumption, that a face in our problem should take at least 40% of the length of the picture (or the width, which ever is smaller). This enabled us not to search for very small windows. As a result of this we were able to search at a larger variety of scales, and currently the minimal difference between sizes of windows that we look in, is 12 pixels. In addition, assuming that the network has some flexibility with respect to translations, we look at locations that are 1/5 windows apart.
The script "look4faces_script" is responsible for doing each one of the individual searches, and it contains a copy of the light compensation algorithm to speed up it's performance.
2. Thresholding
Because our task was slightly different then the one described in the article (we only need to know if there is at least one big face in the image), we implemented thresholding in a slightly different way. We look at each of the positions in the image, and count how many faces detections were found in that spot (i.e. detections for which this point was a part of the window). If this number passes a threshold, we say that a face has been detected. The center of the face is found by looking at the mean of the locations that had the highest number of detections in them.
3. Fine tuning the scale
As an addition to the algorithm described in the article, we added a part that tried to find the scale with a greater accuracy. We did that by looking again at the location of the centroid that we found in the previous step, and search in it for faces, this time using a larger variety of scales. If the number of detections at this location is larger than a second threshold, we then return the average of the scales in which a faces was detected at that specific location.
All this fine tuning is done in the function "find_scale" that is just a minor variant of "look4faces_script".
4. Finding points of interest
The last part of the face detection, is finding the locations of the eyes and mouth. It is not clear to us why this would be needed for this video authentication project, so we just compute it and don't use it. Computing it is fairly simple because we have the predetermined locations in the standard 20*20 box, and we know the center and size (scale) of the window in which the face was found.
The function "find_face_location" (which is the only function that is called by the second half of the project) is responsible for calling the whole detection procedure. It uses histogram equalization, and calls the search functions "look4faces_script" and "find_scale". It is also responsible to do both of the thresholdings, and to return the points of interest. We didn't measure it's running time on enough pictures to give a good estimate, but it seems to finish working on fairly large images (300*400) in 15-30 seconds.


  Example of face detection :
 

On the left - an image of a face. The part of it that is surrounded by a white square is the detected face, and the three white dots are the approximated locations of the eyes and mouth (better seen when the picture is enlarged).
On the right - the same small window as it was given to the network for detection before preprocessing.


Final words on face detection:

It seems that this algorithm has 4 major deficits. First training with it takes a lot of time, especially if one wants to cover many non face images. Second, it is very important to cover many non face images. It seems like our 48 pictures (some of them where very large) are not enough to cover the worlds non faces. Third faces are usually not square, but rather long and thin, so picking 20*20 windows results in weird face transformations in step 1 of the training, that make detection later harder, because the sampled data doesn't look like the skewed faces that are received from stage 1. Fourth, 20*20 windows are just too small, and in many pictures it was quite hard even for us to say if there is a face in the window or not.
Hosted by www.Geocities.ws

1