| Me & My HTML | ||||||||||||||||||||||
 |
||||||||||||||||||||||
| Lesson 5. | ||||||||||||||||||||||
 |
||||||||||||||||||||||
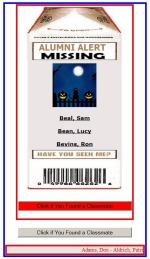
| Lesson 5 Picture | ||||||||||||||||||||||
| Home | ||||||||||||||||||||||
| Lesson 5 for Classreport.org Administrators | ||||||||||||||||||||||
| Email: | ||||||||||||||||||||||
| Lesson 5 To do this lesson you need to open Lesson 2 in HTML-Kit. Do a Save As to Lesson 5. 1. In the top marquee (the vertical marquee) find the tag, <center> with the ><marquee bgcolor=......> just after it. Put some space between them if there is not already. 2. I made a graphic for the top and bottom of the milk carton on Tinypic. You are using it on your website but I wanted you to know hot to put these together. There is one for the top and one for the bottom. The top is: <a ref= "http://tinypic.com" target="_blank"><img src="http://i38.tinypic.com/14c6tmp.jpg" border="0" alt="Image and video hosting by TinyPic"></a></div> Copy and past this in the vacant area you just made. the closing of the <div> tag fixes the space that exists without it. There is no division to close but it works. Select Preview and then return to the Editor. 3. There is one for the bottom. <a href="http://tinypic.com" target="_blank"><img src="http://i36.tinypic.com/98wsh4.jpg" border="0" alt="Image and video hosting by TinyPic"></a> In the bottom marquee (the vertical marquee) find the marquee closing tag, Just after it, put some space between them if there is not already. Copy and paste this in the vacant area you just made. Select Preview and then return to the Editor. 4. Somewhere in the middle of the list of names on the Vertical scroll, paste this: </font> <a href="http://www.coolholidaygraphics.com/halloween/" target="_top"> <img src="http://www.coolholidaygraphics.com/halloween/animations/animatedgif.gif" border="0"><br><br> <font face="verdana" size="2" color="black"> Select Preview and then return to the Editor. This step could be any graphic or even a photo that is saved on one of the picture servers like tinypic. Now we want to be notified if a classmate is found. We want to add a button below the display that will cause an Email to be generated. We can locate the button inside or outside the red box around the milk carton. The code we want to enter is: <FORM><center><INPUT TYPE="button" VALUE="Click if You Found a Classmate" onClick="parent.location='mailto:[email protected]?subject=Found a Classmate.'"></center></FORM> The Email address ([email protected]) will have to be changed to the one you want to use. The Button that you added is gray. The color attribute is missing. The attribute is: style="color: #000000; background-color: #ff0000" It will be added in the middle of the <input ... > tag, right after Classmate in the VALUE attribute. <INPUT TYPE="button" VALUE="Click if You Found a Classmate" These are not case sensitive. Many prefer to keep all attributes and tags in lower case. Select Preview and then return to the Editor. Save the Lesson 5. Lesson 5 has many uses and can be torn apart to make a series of buttons. I have made a series of buttons that covers everything from Site Suggestions to Just saying Hello. I put them all together so they are easy to find. Lesson 7 will cover a very similar situation, Registering and Linking to a Profile. A button could be used but it has been covered here. There the link tags will be covered. |