|
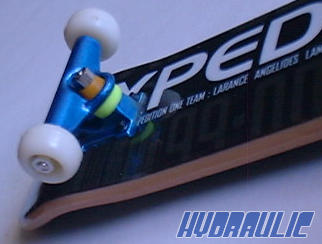
The
middle photo shows the green bushings mounted on an Element
Tech Deck. Note how the bushing sits. It doesn't buldge
out past the hanger and offers quite a realistic appearance.
I use the green bushings for 'street' fingerboarding and
for some outdoor stuff.
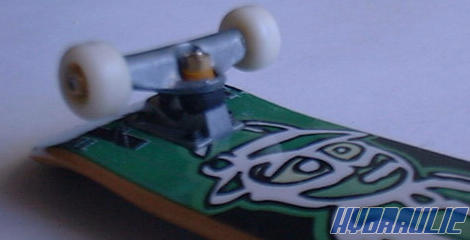
The
third photo shows some black bushings in use. While these
are not the stiffest bushing I make, they are stiffer
then the green, and much harder than the orange. I use
them for vert fingerboarding.
Many
message boards dealing with Tech Decks and other fingerboards
are littered with the same question... "How do I make
bushings?". Making bushings that perform better than the
stock bushings is not rocket science, it just takes a
little thought.. Experiment. Try different materials.
If
you are using stock bushings and want an inexpensive replacement,
try stacking some pieces of rubber band on the kingpin
to replace the stock lower bushing. How many people don't
have an elastic lying around?
Tried
the elastic band already? Want something that is going
to last a little longer and work a little better? Think.
Use your imagination. What do you have that is readily
available and might work as a bushing? The grips off of
an old fingerbike? An eraser? A cut up shock pad off your
old skateboard? A small rubber o-ring from the hardware
store?
Try
some different stuff. It's all going to work and it's
going to work differently for how YOU fingerboard. How
well it works is another story. If money is a concern,
work with the best you have. If that means your stuck
with stacking pieces of elastic, then stack pieces of
elastic. If that means you can afford to buy some of the
bushings offered by other fingerboarders, then buy those
bushings.
Some
tips for making your own-
1.
Find the material source (rubber band, shock pad, handlebar
grip, eraser, etc..)
2. Cut selected material to shape and/or size.
3. Make a hole in the material.(drill, small nail, needle,
etc...) What you use depends on the material chosen.
4. Mount finished bushing onto the kingpin in place of
the lower bushing.
5. Put the hanger, remaining bushing, and nut back on.
6. Go fingerboard with your new functional bushing in
place.
|