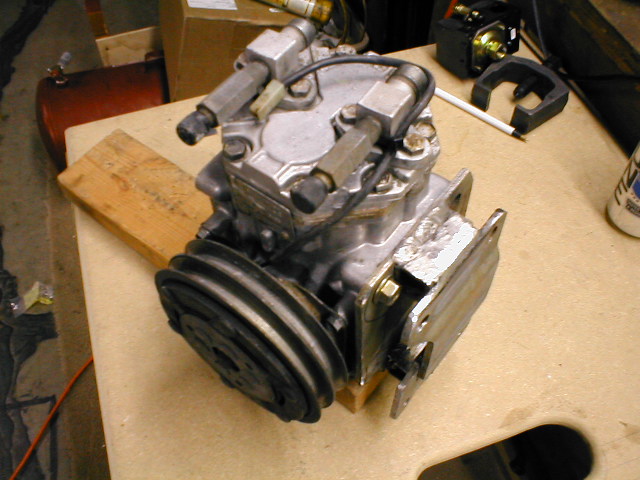
The first step is to remove the old freon and clean the suction and discharge ports. I removed the head just as you would a cylinder head. Loosen the bolts by alternating back and forth across the head, working your way around in a circle. You will tighten the head down in the same fashion, but don't overtighten the bolts (the head and case are aluminum) Sorry but I don't have a torque spec for the York, I just snugged the bolts tight. Once the head is off (this will take some soft tapping with a hammer or brass drift) you will see two stainless discs side by side. I didn't mess with these! I just sprayed around them and let them be. I turned the unit upside down and let the cleaner and gunk flow out. Once the head and interior parts were cleaned out, I sprayed some WD40 on the internals to keep things oiled for the initial start up.
The second step is to remove the fill plug on the side of the unit (mine had two...) and drain the old oil out. I simply placed the unit sideways on some blocks of wood and let it sit for a while. Once empty I refilled the unit with approx. 8 to 10oz of 10-30W oil. If you stick a coathanger rod into the fill hole with the unit on its side, you should see about an inch on the "dipstick". Put the fill plug back in and your ready to start making the bracket........ |