Tips and Tricks for oil changes: |
Tips and Tricks for adjusting the chain : |
Tips and Tricks for removing graphics |
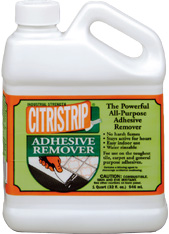 Now use a soft cloth and apply the Citristrip and wait 5-10 mins.- then wipe it off. You will
need to keep the cloth wet with Citristrip while wiping the adhesive off. I removed the rear number plates on my 00 CBR 929 in about 30 min. to an hour. I then added the Tape Works Graphics Kit, but that's another story.
Now use a soft cloth and apply the Citristrip and wait 5-10 mins.- then wipe it off. You will
need to keep the cloth wet with Citristrip while wiping the adhesive off. I removed the rear number plates on my 00 CBR 929 in about 30 min. to an hour. I then added the Tape Works Graphics Kit, but that's another story.
Tips and Tricks for Stripping and Polishing Rims : |
Tips and Tricks for Chain Alignment : |
Tips and Tricks on how to clean your leathers : |
Tips and Tricks for Heli Bars : |
 you retain the stock controls, etc. But you
do have to reroute the clutch cable. You need to remove the Right side plastic and remove the clutch cable and route it over the engine mount brace. My cable was under the brace and was not long enough. Well, it was but you will see how it rubs on the ignition if you don't reroute it. ( I am not the only person that has had this problem ) Also you will have to cut off the brake line brace on the reservoir. You will see a little tab that
sticks out and keeps the brake line from moving forward. This little tab will have to be removed so you can move the brake line 1/4" forward for clearance. These are the only two things you will need to do. Just bolt them on and attach all of your controls. etc. And Enjoy the new comfort. Good luck, you could buy them with the discount for around $200.00 or less.
you retain the stock controls, etc. But you
do have to reroute the clutch cable. You need to remove the Right side plastic and remove the clutch cable and route it over the engine mount brace. My cable was under the brace and was not long enough. Well, it was but you will see how it rubs on the ignition if you don't reroute it. ( I am not the only person that has had this problem ) Also you will have to cut off the brake line brace on the reservoir. You will see a little tab that
sticks out and keeps the brake line from moving forward. This little tab will have to be removed so you can move the brake line 1/4" forward for clearance. These are the only two things you will need to do. Just bolt them on and attach all of your controls. etc. And Enjoy the new comfort. Good luck, you could buy them with the discount for around $200.00 or less.Tips & Tricks Area
Scroll down till you find the tip you are looking for
Tips and Tricks For Blacked Out Turn Signals : |
Tips and Tricks For Bleeding Your Brakes
Bleeding Your Brakes
by Erika H. Bennett
- brake fluid
- a wrench to fit the brake bleeder on your bike
- a screwdriver to remove the brake fluid reservoir cap
- paper towels to clean up the spilled brake fluid
- a piece of clear hose line which will fit onto the bleeder
- a bottle or other "fluid-catcher" so you don't get brake fluid all over the garage floor
(JAN 1998) If you've got hydraulic brakes on your bike, you'll want to bleed them at least once a year. There are other times you'll need to bleed your brakes, such as after you work on them. But regardless of whether you work on them or not, yearly bleeding is a good idea. I'll take you through the process (it's easy) for a front brake.
You'll need the following materials:
Attach the hose to the bleeder valve and dangle the loose end into the bottle.
Open the brake fluid reservoir. Carefully remove all the old fluid and replace with fresh. Replace the cap on the resevoir otherwise it might squirt fluid.
You'll want to apply gentle pressure to the brake. Crack open the bleeder valve, and brake fluid should come out through the valve. Continue putting pressure on the brake lever until the lever hits the grip. Then close the bleeder valve and slowly release the brake.
Lather. Rinse. Repeat. (In other words, do this again. And again. And again.) As you repeat this process, you'll notice the level in the fluid reservoir going down. Don't let the resevoir empty completely. Always keep it topped up with fresh brake fluid. Otherwise it will suck air into your brake lines.
Keep step four going until the fluid coming out of the bleeder valve is the same color (a pale yellow) as the new fluid going into the reservoir. (old fluid tends to be darker) Additionally, you want to make sure that you get any and all bubbles OUT of the brake line, so keep bleeding until you see no more bubbles coming out of the bleeder into the hose.
When you're done, tighten the brake bleeder. Put the cover back ontothe brake fluid reservoir. Take a rope or bungee cord and lash the brake lever to the grip (with some pressure). Leave it this way overnight. This will help any remaining bubbles in the line escape to the top of the fluid reservoir. (An old racer trick is to do this before loading the bike onto the back of a truck for a nice, bumpy ride to the track. My friend Alan claims this is the best way to get the bubbles out.)
Wash any spilled fluid up immediatly with soap and water, especially off of paint since it will eat paint.
Ride, ride, ride.
1997
Tips and Tricks to Installing SS Brake Lines: GIMME A BRAKE (NOV 1997) This month, my husband (Matt) replaced his stock front brake line with a braided stainless steel line. Here's some information on brake lines, why you might want to swap yours, and how to go about it.
How does a front hydraulic disc brake work? When you want to engage the front brake, you squeeze the brake lever. This causes the master cylinder to move, which pushes brake fluid down the front brake line. The fluid puts pressure on the front brake piston(s) which causes the brake pads to press against the brake disc, which causes friction, which makes your bike stop. Why do I want to replace my stock rubber brake line with a stainless steel braided brake line? Well, it's
not a necessity, but it's an easy way to get more efficient braking. Most, if not all, stock brake lines are rubber. When you engage your brake the brake fluid puts pressure on the rubber brake line, which causes it to expand slightly. Any pressure that is being used to expand the brake line is pressure that is Not
being used to stop your bike. A braided stainless steel brake line won't expand as much as a rubber one; this makes for more efficient braking (and Matt claims there is a better, more precise "feel" in the braking, although I'm not sure I can tell a difference). How easy is it to replace my brake line? Ohhhh, this is an easy one. It took us less than an hour to swap out the brake line. You only need a few items to do the swap: Optional materials: Now let me explain how to swap your line.
There are a few things you need to know about brake fluid before you start messing with it: (1) it eats paint, skin, and anything else it comes in contact with, so be careful not to spill it on your tank, your hands, or your dog, (2) brake fluid is SUPER water-absorbent. When you're not using the bottle of fluid, CLOSE IT or it'll be ruined, and (3) don't re-use brake fluid. If you use "new" brake fluid to bleed your line, you can't catch it at the bottom and pour it back in the top. Once it's gone through your brake system and out the other side, it's OLD, so don't re-use it!
Now, start with your old line. Open the bleeder valve (check your manual if you're not sure where it is), attach a short hose, and let the fluid drain out of the line. As you're letting the fluid drain out of the old line, remove the cover for the brake fluid reservoir (the box-looking thing located somewhere near your right handlebar). Use some paper towels to sop up all of the brake fluid from the reservoir. Once the brake fluid is completely drained from the reservoir, you can
remove the brake line connection at the top. (When you do so, make sure you have some paper towels handy in case you need to mop up a leak or a spill.) Before you chuck your old brake line, check it and remove any rubber mounting thingies that might be on it. You'll want to swap those rubber thingies onto the new brake line, so you can firmly mount it . Now take your new brake line
(isn't it beautiful?) and attach it (with the NEW mounting bolts and NEW crush-washers which should have come with it) to the brake fluid reservoir. Don't tighten it just yet, but attach it loosely. Thread the brake line through the appropriate mounting areas (in other words, put the new brake line exactly where the old one was), and then bolt it onto the bottom mount (loosely - don't tighten it just yet). Take your torque wrench and tighten the two mounting bolts to spec. (The line on
the Hawk GT had to be tightened to 30 N-m; you should check your manual for the spec for your bike.) Once the two bolts are tight, you're ready to add the brake fluid. (There are some folks who actually make sure the new brake line is full of fluid before they put it in place. I have NO idea how they do this... if you're one of those people, drop me a line and tell me your secret - I'll pass it on!) Pour the brake fluid into the top reservoir, keeping it topped up while you bleed the brakes.
Finally, you need to bleed your brake line until there are no more air bubbles. Air bubbles in your brake line are BAD. They can be deadly. If there are air bubbles in your brake line, the best-case scenario is that your brakes will be very spongy, and the worst-case scenario is that they won't work at all. So bleed, bleed, bleed. And it's a good idea to let the bike sit for a day or two after the swap so that any bubbles you missed can work their way out on their own, and then
bleed the brakes again. Gimme a Brake copyright 1997, Erika H. Bennett
|

speed is just another way to say CBR 929 RR

About Us

Picture of the month will be posted here |


BEST PRICES

Trick Products