
Notes on the rough render.
This is exactly what the file looked like when I saved it out of Bryce. All the materials came directly from either the Poser model (altered only so that they worked in Bryce - e.g., the transparency mapping on her hair) or from the defaults in Bryce's Materials Lab. Some tweaking was done there - one thing to keep in mind when rendering in Bryce, if you want any sort of realism, is to set all ambient colors to black. There are those that say you should also set all ambient levels to zero, but I haven't noticed that this is actually too important.
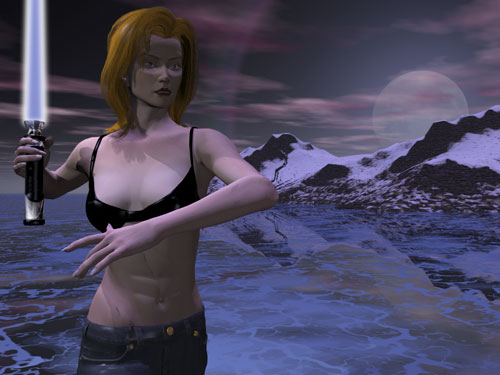
To forestall any complaints, I am aware of certain obvious flaws in this render. To my mind, the pose is just fine, and the character is not unnaturally thin or anything. The problems I see are these:
First, the shadow cast by the damn lightsaber on her right shoulder. It bugs me (light source should have eliminated it).
Second, the render overall is pretty damn dark, but I knew that I'd be taking care of that in the Post-render stage. And as an observation, I didn't do what I should have, and lightened it up first thing using the levels command in Photoshop. Though, considering how it turned out, I'm just as glad I forgot to do that. (One advantage of not being much more than an intermediate user of these programs is I still get to have happy accidents while working.)
And third - they do look an awful lot like bluejeans, don't they... one of the problems I've always had with Bryce on my machine is that my computer is too slow to render quickly enough to satisfy my, so I only do rough passes in smaller sizes before going to a final render, and in this case that final render left her pants well below the area visible in the Bryce workplace. If I'd realized, I would have gone with a more "latex" type of texture on her pants.