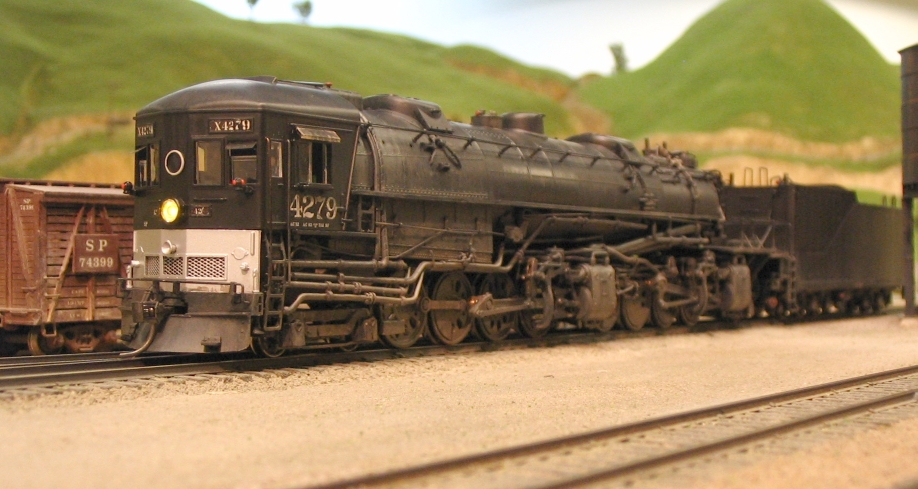
New Intermountain SP AC-12 No.4279 by Jason Hill at Caliente, CA on the La Mesa Club's Tehachapi Pass layout. April 2007
SP 4279 was the first engine I received and installed DCC in. I have opened it up and installed a 11.6K RPM Faulhaber motor in it. The engine can now make 45MPH. However, there is still too much gear noise. I have used this engine as my test bed for changing out the lead truck spring to a "whisker" type spring made from 0.030 phospher-bronze wire. I also filed a slot in the No.1 driver bearing in the frame to accept a spring package to increase the down force on the No.1 driver in an attempt to fix the derailing problems. This solution did work but was not easy to do.
SP 4233 was the second engine I started modifying. This engine was opened up and after diving in to the deepest innards of the engine, I swapped the first two gears in the primary gear tower to double the speed of the drive and cut the torque in half. This engine also now develops 45 MPH, while keeping the noise down to acceptable levels. I have not regaged this engine as yet.
Conclusion, I can modify the IM AC to run acceptably. However I am going to wait on rebuilding any more until we see what IM is getting in their 3rd run and if the problems that I've been discussing here are fixed.
I am writting this artical here on my page dedicated to what it will take to get these monsters into service. This will involve painting, weathering, DCC programing of CVs and lubrication of the various parts on the engine. Between various members of the La Mesa Club we will have about 10-12 of these new AC's coming in the mail with DCC/Sound installed by the end of March. I am very excited to see how they do on the Tehachapi Pass.
I decided to purchase this first model as a non-DCC model and install the new SoundTraxx Tsunami Cabforward chip in it myself. Out of the box it looks beautiful! The engine along weighs in at 1lb, 10Oz!!! I gave the first thing I did was set the engine on my old test track at home and make sure that the engine moves under analog control. No problem here.
The next step was to change the engine number from the factory avalible #4287 that we already have in service on the club layout, so that number is not avalible for use. I decided to model the 4279 as it looked in Colton, CA on March 6, 1949.
I used San Juan Decals. This was my first experience working with decals from that manufacturer. I must say they are the thinnest decals I have ever worked with. I ruined several '4's before I went back to the 'old' "right" way to decal by laying the backing and the decal onto the model and sliding the decal off onto the model. The decals are so thin they will fold up or tear being transfered on a #11 Xacto blade.
I did a light coat of weathering on the drivers and side rods, just to lighten up the color so the engine was not riding on a black hole of shadows under the boiler. I followed that up with some light lubrication of oil on the side rod joints and driver bearings on the frame. The engines are shipped with these joints dry so that excess oil doesn't spread around inside the clear display/protective packaging. So doing this BEFORE running or even breaking the engine in is HIGHLY recommended by the manufacturer.
ADDED NOTE: from later experience, check gage of all wheelsets on the engine and tender. Regage if need and place a dab of CA or LockTight on the press fit joints BEFORE adding lubrication. I just slipped the quartering on two drivers after regaging. It's OK now, but I'll do better next time...
The next day I went down to the Tehachapi Pass model and ran the engine from Ilmon to Tunnel 8 and back to get a feel for the engine in analog operation. After which I opened the tender and made a electrical drawing of the analog circuit board and which wires went to what pins connecting to the engine.
Once this was done, it was an easy 5 minute job to tin the decoder leads and swap over the wiring to DCC. I also hooked up the small speaker I had on hand. The engine is designed for two 1"dia speakers and even has a engineered in chambers to hold them. I will swap my little on for two 1" ones when I have the chance.
Programming of the SoundTraxx Tsunami chip took only about 3 minutes to do. Just setting the long address (engine #) and other club standard options to be able to run the engine.
I test ran the engine and started playing with the sound features. Last night I was able to get the engine to drift and work as it starts a train. This was easily done with the downloadable instructions on the SoundTraxx website.
New Intermountain SP AC-12 No.4279 by Jason Hill at Caliente, CA on the La Mesa Club's Tehachapi Pass layout. April 2007
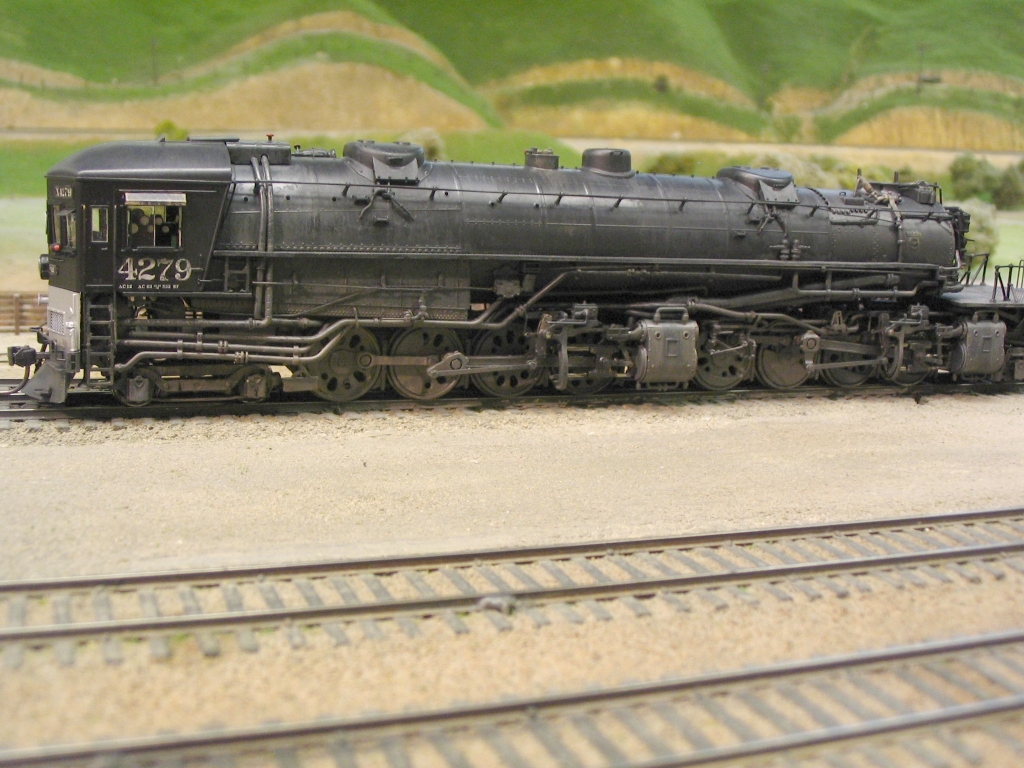
Left side of 4279 on the main track at Caliente, CA.
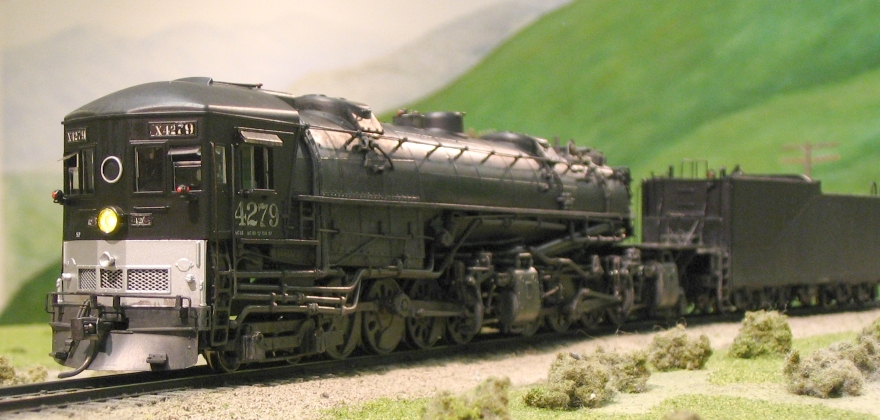
Light helper SP 4279 rolling Westward into Caliente, CA.
 Right side of 4279 running light west on the main track at Caliente, CA.
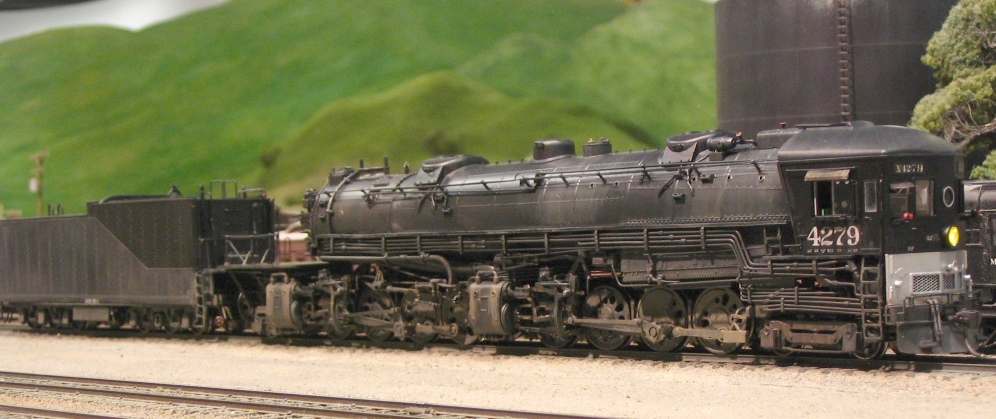
 More detailed photo of the right side of 4279 running light west on the main track at Caliente, CA.
The first thing I noticed was that the engine didn't move very fast, even in analog, it just topped out at about 2/3 throttle and would go any faster. Normally this would not be an issue, but it topped out at 25 MPH!!!
I opened the engine today and looked at the motor. I marked the flywheel and counted the turns of the motor for one turn of the drivers. The engine has a 47:1 gear ratio! That explains the great low end speed... and why I can do more than 25 MPH. David Willoughby and I figured out that the engine must have a motor with about 7500-8000 RPM max at 12V to get that speed. We figure that to make 60 MPH, the rated speed for an AC-7 thru -12 class engine, it would need a 16000 RPM motor.
Tomorrow I will call NWSL to see about a 16000 RPM motor that will fit inside the boiler weights of the engine.
The engine also seemed to not like certain parts of the layout's trackwork. I checked the wheel gage and found that the drivers are VERY tight in gage. I will work on regaging the engine tonight or tomorrow before doing any more testing.
Lastly, the headlight seemed a little on the greenish side of yellow, so I may replace with factory LED with my standard 3.0v Mini-Tronics bulb and resistor the next time I open the engine.
Continuing the effort to get the engine finished, I added a pair of crewmen to the engine when I had it apart looking at the motor. I painted out the RED class lamps on the front of the engine with Reefer Gray. I also did some finish weathering to bring the engine closer to the photograph of the engine I have. I added the engine number to the round front number plate above the headlight.
Regaged drivers today and didn't put a drop of CA on the joints of the wheels and Axels... DOH!!! The engine moved about 12" and slipped the quartering of the first, second, and forth drivers on the front engine. It took about 20 minutes to get the wheels regaged and quartered... Next time I'll know how to do that. Intermountain, if you are reading this, PLEASE check the gages on these engines coming in from your manufacturer on the next run.
I also finished reseting the CVs on the Tsunami so that the train indicators light up now. I think the next time I have the engine apart I will change the headlight to a 3.0V bulb and maybe the train indicators too. I will probably blankout the headlight engine number boards and use unlite decals on those... Decals are a real problem that small, trying to get the lighting to show correctly and not bleed through.
The search also continues for either a 16000 RPM motor or looking into making a new primary gear reduction tower to cut the gear ratio to a more reasonable 23:1 not the factory delivered 47:1.
I'll keep updating this as I continue to made modifications to this engine.
The three screws that hold the boiler top on are located under the steam turret, main steam dome, and superheater on the end of the smokebox. The front two are easy to remove, just grip gentely and lift the domes off. The superheater casting is burried under about five pipes that must be carefuly disconnected and pulled back. Also disconnect the hot water pipes from the hot water pump at the bottom of the smokebox. There are two screws located under the ladders of the cab. To reach them you must remove the front coupler and pilot and front silver panel of of the cab front. This part sounds worse that it is. The cab is still attached by the wire bundle for the five LEDs in the cab. So be careful not to break any of them unless you are going to relight the engine.
Once the boiler top is loose, you can remove it leaving the cab, lower portion of the boiler, and running gear. Three screws hold the top boiler weight to the bottom one. Remove these three screws. The wiring for the motor and lighting run along the top of the top boiler weight.
I have not removed the top weight on my engine yet, but was able to see everything I needed to before the "open heart" to replace either the motor or main gearbox. I will carefully remove the wires by unsoldering them from the motor and cutting the factory lighting wires, as I will replace the lighting system.
Once the wires are clear the top boiler weight should come off easily. The motor is in the fire box and just forward of the fixed cylinders is the main gear tower. I am not sure how the gear tower is secured into the lower boiler and frame drive shafts to the wheels.
At any rate, there is the basics of how to get into one of these engines.SP GRAY DECALS for steam engines by San Juan Decals
These are what I've ordered for the NEW Intermountain Cabforwards!