Click on any photos to show larger photos.
Based on Atlas/Kato models.
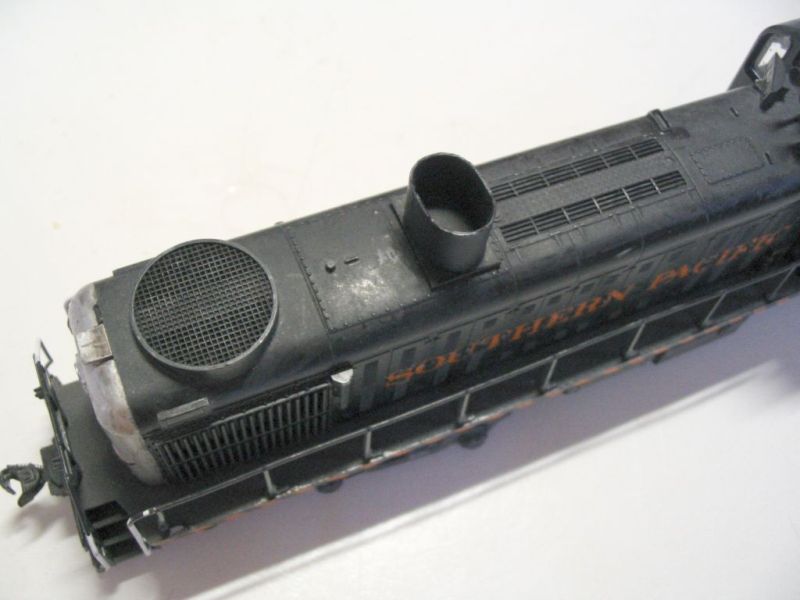 SP 5301 3/4 view
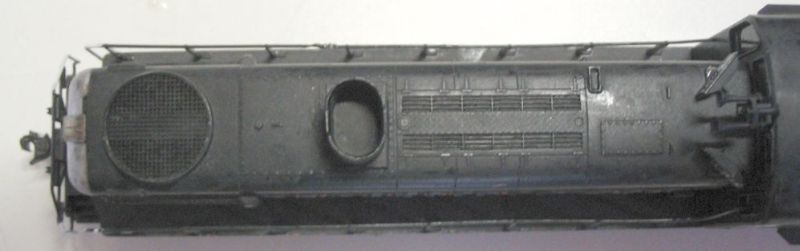 SP 5301 top
My estimates come from photos, mainly from Strapac's Alco book. Also adjusting the scaling to fit the Atlas/Kato models the best.
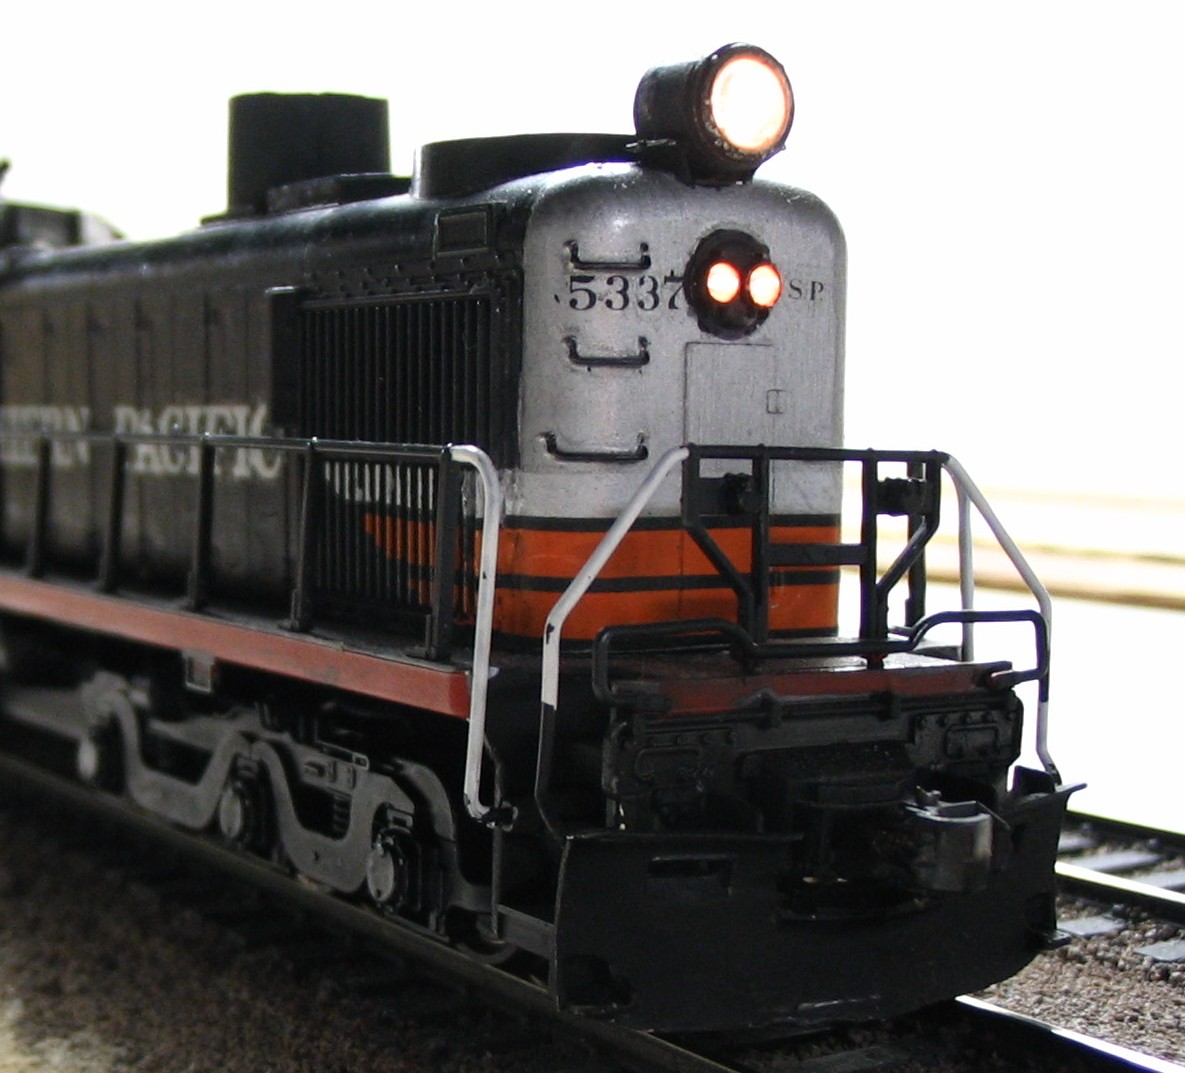
Here are some photos I just took of the top and 3/4 view of SP 5301 and SP 5337. There are one view each from the top so that you can see how I laid it out... pictures are worth 1000 words!
Basically instead of trying to controllably crush a tube into having flat sides, not likely to work. I cut Evergreen 3/8" 0.030" thick tubing in half and spliced in a flat strip of 0.030" thick styrene. My stacks are nominally 0.480 (3'3") wide and 3/8" (2'6") long. From photos they should be about 0.350 (2'3") high.
Also note the fact that the entire stack is mounted on a flat plate base. This base is 3" above the center of the hood and 6" above the outer edge of the hood. This plate should be 4' wide (just inside the rivet rows on the top of the hood) and 2'3" long.
The engines are being finished out with Cal-Scale #290 number boards, Cal-Scale #312 Markers, 3 chime horns (I don't remember the type or part number), and the 5336-5339 group has 2 modified Details West-108 SP 'Barrel' headlights.
 SP 5306
SP 5305-5307 are standard DF-115 but setup as duel-control double ended engines for use on branch lines with no turning facilities. To model this variant, add second set of train indicator/number boards on the short hood end.
Based on Atlas/Kato models.
 SP 5301 3/4 view
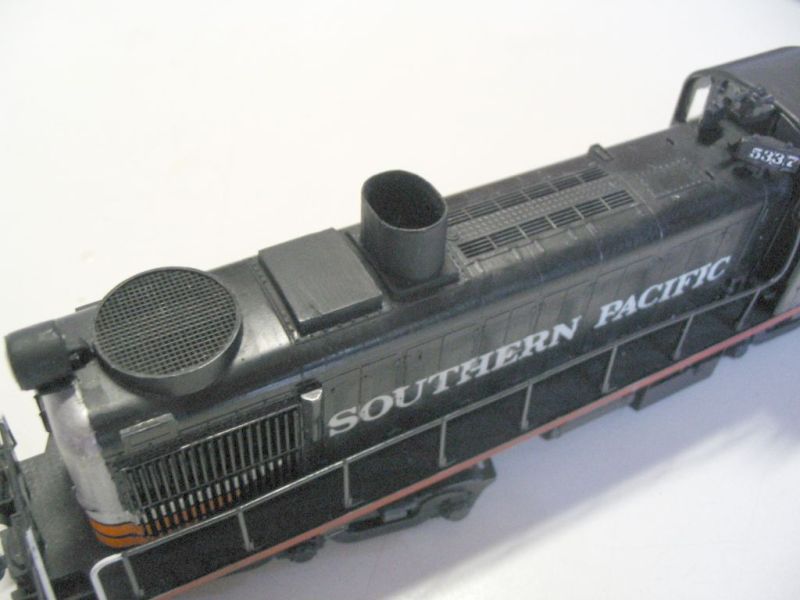
 SP 5337 top
This model is basically the same as the DF-115 shown above. However, the 5336-5339 group had (what I remember was shown as a expansion tank) that extended out of the roof between the radiator fan and the stack. I modeled this with two layers of 3" styrene formed to the curvature of the roof. This tank should be 3' long and 3'9" wide.
These four units had the large SP "barrel" Mars headlights mounted above the dual-main headlights. To model this, cut into the sand filler hatches at the top of the hoods about a scale 6" and cut away the bottom of the Details West castings to the level just above where the mounting pin is located. Then file the casting until the last horizontal flat area of the casting is able to fit into the top of the hood. Bevel the cut in the hood to mate to the angles of the casting. Before mounting drill out the casting and drill wire holes into the top of the hoods if you are planning on lighting the Mars lights. After painting, I used ACC to glue the castings on. If you are lighing the casting use white glue, or another non-crazing glue to mount a MV #11 lens with the backing removed to the casting. Once the glue is dry, slide the bulb in and put power to the bulb, before fixing the bulb in place move it in and out of the casting to find the focal lengh of the the lens/bulb combination. Once the bulb is focus, then glue it in place.
These lights look awesome when lit and the room lights are turned down!
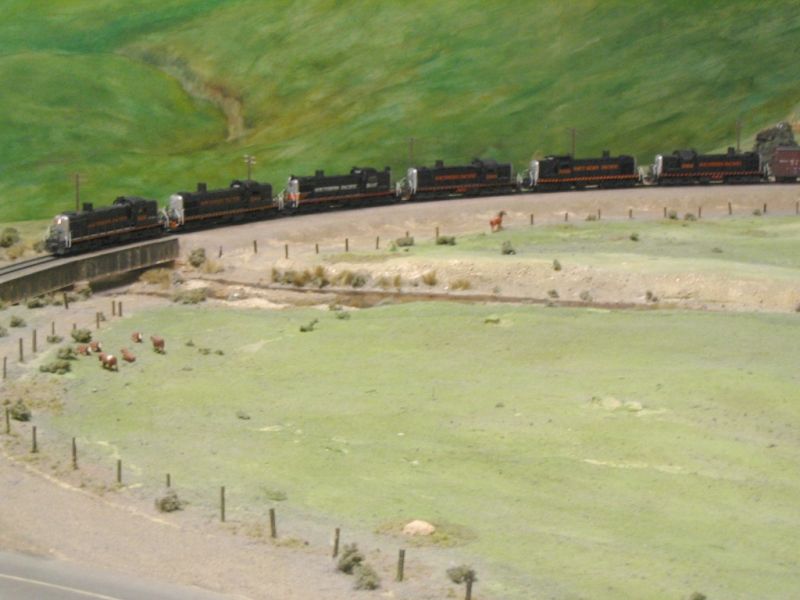
Super detailed SP RSD-5 models, for those that want to get them absolutly PERFECT! I'll live with the KATOs, they'll last better that what I've heard about the old HobbieTown Drives on the Tehachapi.
Athearn Genesis
ATSF 261 LABC
I modeled the ATSF 261LABC from a set of 200LABC by Athearn Genesis models. The first step was to remove the dynamic brake fan slots and replace it with a 36" fan from a Hi-liner kit. Note; now that Athearn has released the models of Santa Fe blue freight scheme with 36" fans this step is not nessicary. I then removed the side grills. Next, I cutup and painted sections of the "chicken-wire" grills from my other set of SP DF-1s and mounted them into the openings between the blank panels on the 261LABC.
After this minor surgery was done it was a simple matter of removing the numbers and replacing them with the appropriate numerals 261 in the numberboards and 261L,A,B,C as required on the yellow strip on the rear side of each unit.
The final, optional, modification I made was the removal of the "cigar-band" herald across the front of the A-units. I wanted the earlier "cat-whisker" and herald. Once I removed the "cigar-bands" I used one of the darker yellow "cat-whisker" decals from the Micro-Scale sheet to finish the engines.
By Sunset
Over the years I have picked up 4 of Sunset's SP F-3,4,5 class 2-10-2s. Most were the 3661 version and I have renumbered 2 of mine to replicate the other engines 3682 and 3696. These three engines have not had super detailing parts added but I will say that there are some modifications that are needed to this basic engine BEFORE putting them into service. First off, add weight to the engine. The engines come in the box unweighted. I removed the boiler from the frame and then the smokebox front from the boiler.
Next I filled the front of the boiler, ahead of where the grear tower is above the forth driver. On one engine I added weight until I could just squeek the headlight wires by, I decided that that engine is pushing the limit on how heavy I should make them. The next two I built I weighted them a little more conservitively.
Don't expect your engine to be ready for service yet. I found that on all of the engines I worked on I had to fil away about 1/32" to 1/16" off of the bottom of the framerails above the pilot wheel so that the flange of the wheel didn't short into the framerail. Yes you will loose some very nice details there, but if you want a good running engine that worn't short on curves, then you need to break so eggs!
After all of this your engine should be running nicely. I then weather and DCC my engines. We did have some issues start cropping up with in a year or so of putting some of these engines into service. Two of the engines that we own had the siderods litterly cut the siderod screws in half. 3682 had two of these screws and 3680 (not mine) had (I think) three bad screws. 3682's broke as we tried to remove it. We finally got the screw out and found a metric replacement. The engine's back in service and hasn't had any more trouble.
The T&NO 910 was the first of these engines I bought, I swapped tenders around and found a good picture of this engine working the San Joaquin Valley in 1952-53. May of the later F-5s were transfered to the T&NO by 1950. But 910 was transfered back to the Pacific Lines for about a year before being renumbered to a unused number, 3770.
By Athearn Genesis
SP 6150, 8050, 8051, 6151
I bought these engines from the first run of SP "Black Widow" F's that Athearn Genesis produced. That first run was the DF-1 class "chicken-wire" grilled units. The next class the DF-2s had more that ten sets regularly assigned to the Tehachapi Pass. 6150-6159 were regulars with the 6140's showing up occationaly.
The conversion was not quite as easy as the ATSF 261LABC set I did at the same time for the club. Frist, I had to remove all of the "chicken-wire", the B-units were much easier. The A-units had the "chicken-wire" down around the portholes. I ended up filling the holes behind where the CW was and using Cary louvers to model the later style of side panel. The other way to do it, and I didn't want to ruin the perfectly good painted shells would have been to remove the phase I sides and replace them with ones from my Hi-liner kits... I think it can out OK.
The dynamic brake slots are correct for the DF-2s as delievered. Later on some of them recieved the 36" fan as the dynamics were replaced.
Within the first couple of years of service and about the same time as the 1949 F-unit renumbering, extra roof top grabirons and sunshades began showing up. I decide to add these to most of the engines in my care. A-line etched sunshades and styrene strip work well for this. The grabs were bent from 0.020" phospher wire and glued across the top of a short piece glued in the middle of the long rooftop grabs. The grabs above the front windows were also bent to fit.
Again, new numbers to reflect the new class of engine, and some typical weathering. Mostly grays along the roof from the hot So. Cal. sun and straight black around the stacks. Lighter tans and gray along the trucks from the hours of sanders kicking up dirt and grit. During the early years SP did a good job of keeping the sides and noses of their F-units clean and shinny, so I gloss-coated those areas.
Cabforwards by Intermountain
By Stewart
By Stewart
By Hallmark
Super looking models by Rob Sarberenyi using San Juan Decals.
End of Page