 |
|
|
|
|
|
|
|
|
|
|
|
|
|
|
|
|
|
|
|
|
|
|
|
|
|
Tie Rod Flip |
|
|
|
What is it: A modification that moves your tie rod and drag link to the tops of the steering knuckles.
Who will benefit: Anyone with a 76-86 CJ in a Spring Under Axle configuration that is lifted 2.5" or more.
Why do it?: Helps restore steering geometry without a drop pittman arm. Also gets steering linkage out of the way of potentially damaging trail obstacles.
Cost: $30-$220 plus shipping. If you can borrow the reamer, all you need is $30 worth of sleeves. If you're replacing all rod ends and steering linkage, it will run you quite a bit more. |
|
|
|
The CJ steering system is fairly straightforward, but since the tie rods hang below the knuckles, they run the risk of damage from obstacles on the trail. More importantly, if you've lifted your CJ using a spring-under-axle lift kit, your drag link is probably no longer parallel with your tie rod, resulting in what is known as bump-steer. Bump steer occurs when the suspension compresses and the wheels suddenly turn to the right due to the drag link being on an angle. With the drag link and tie rod parallel (or nearly parallel) to each other (as they were in stock configuration), this effect is all but eliminated. With less than a 2.5" lift, you may not be able to use the tie rod flip, as your tie rod will actually be above the drag link, since the rod end at the Pitman Arm does not get flipped. With a 2.5" Rancho spring lift and a 3/8" Currie shackle lift (almost 3" total for those of you unable to mix decimals and fractions) it turned out almost perfect.
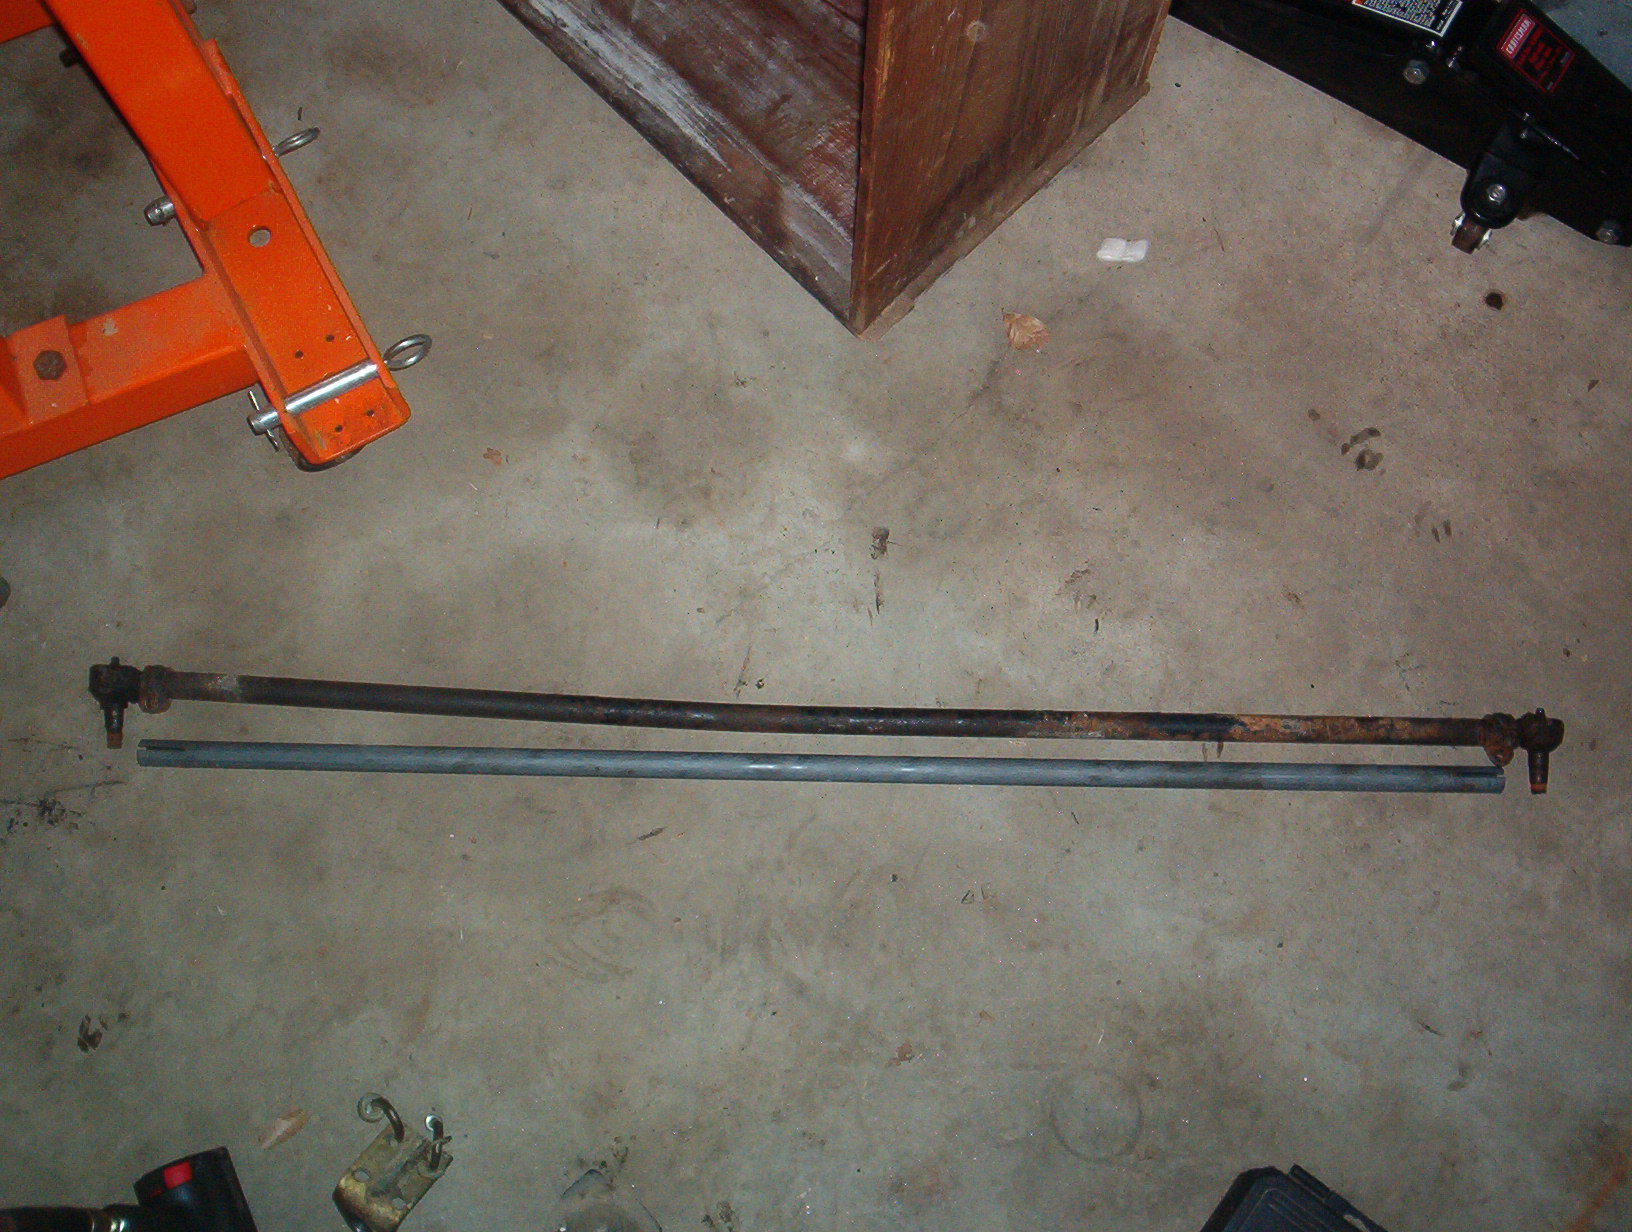
I purchased my tie rod flip kit from OK 4WD, although I only purchased the kit that included the reamer, sleeves, rod ends and drag link-- I should have gone ahead and gotten a tie rod from them, too. (See Picture 1). I later had 4 Wheel Drive Hardware send one out to me.
The supplied installation instructions pretty much covered everything, but I did find that the sleeves needed to be tapped into the bottom of the knuckle once you're done reaming which the instructions are a little vague about. Some guys just use the nut to pull the sleeve up into the knuckle-- I chose to tap them in with a small hammer. Other than that, everything is pretty straight forward.
Sorry there are no "before" or "during" pics-- I get excitable with a new project and forget about the camera sometimes. If you want to see a before pic, go look at yours... : ) Good luck!! |
|
|
|
 |
|
 |
|
|
|
|
|
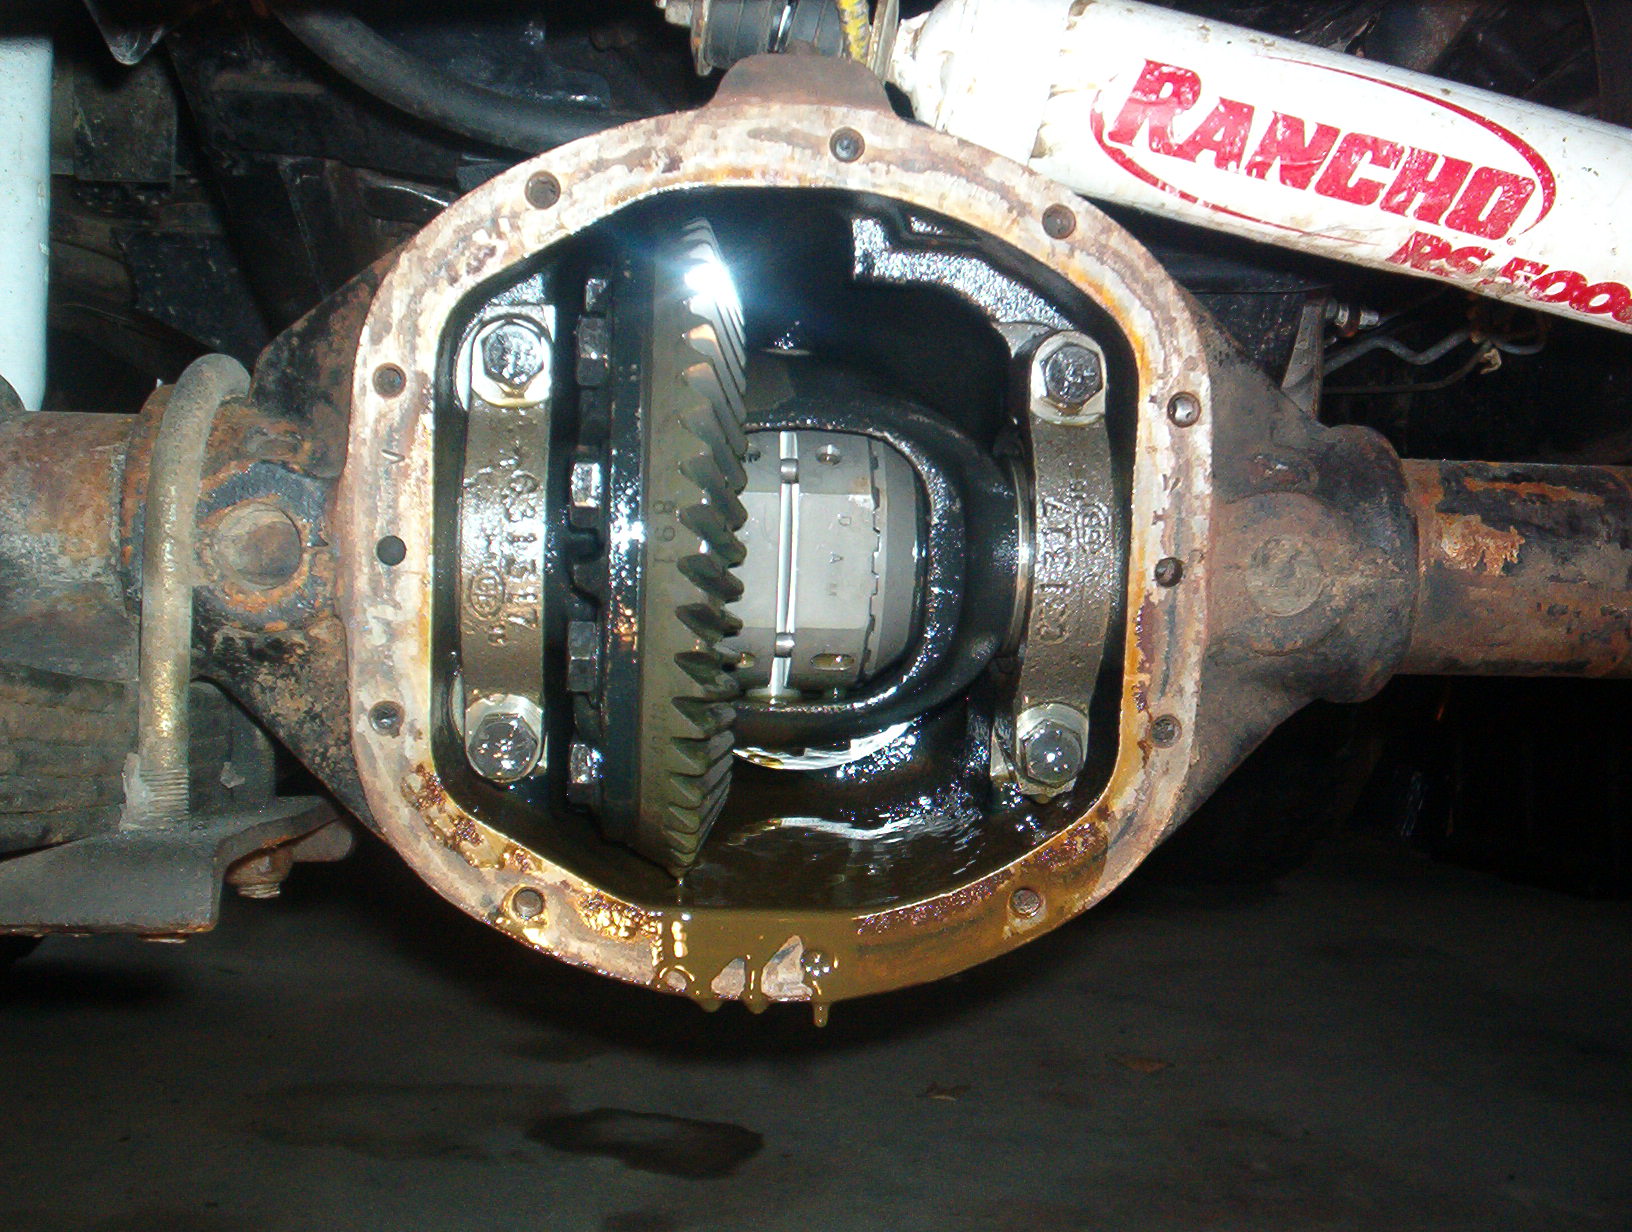
While the tie rods were out of the way, I chose to replace the front differential fluid and check for damage or wear on the Lock-Rite. |
|
|
Picture 1: Was it time for a new tie rod? Yes, I think so. |
|
|
|
|
|
|
 |
|
 |
|
|
|
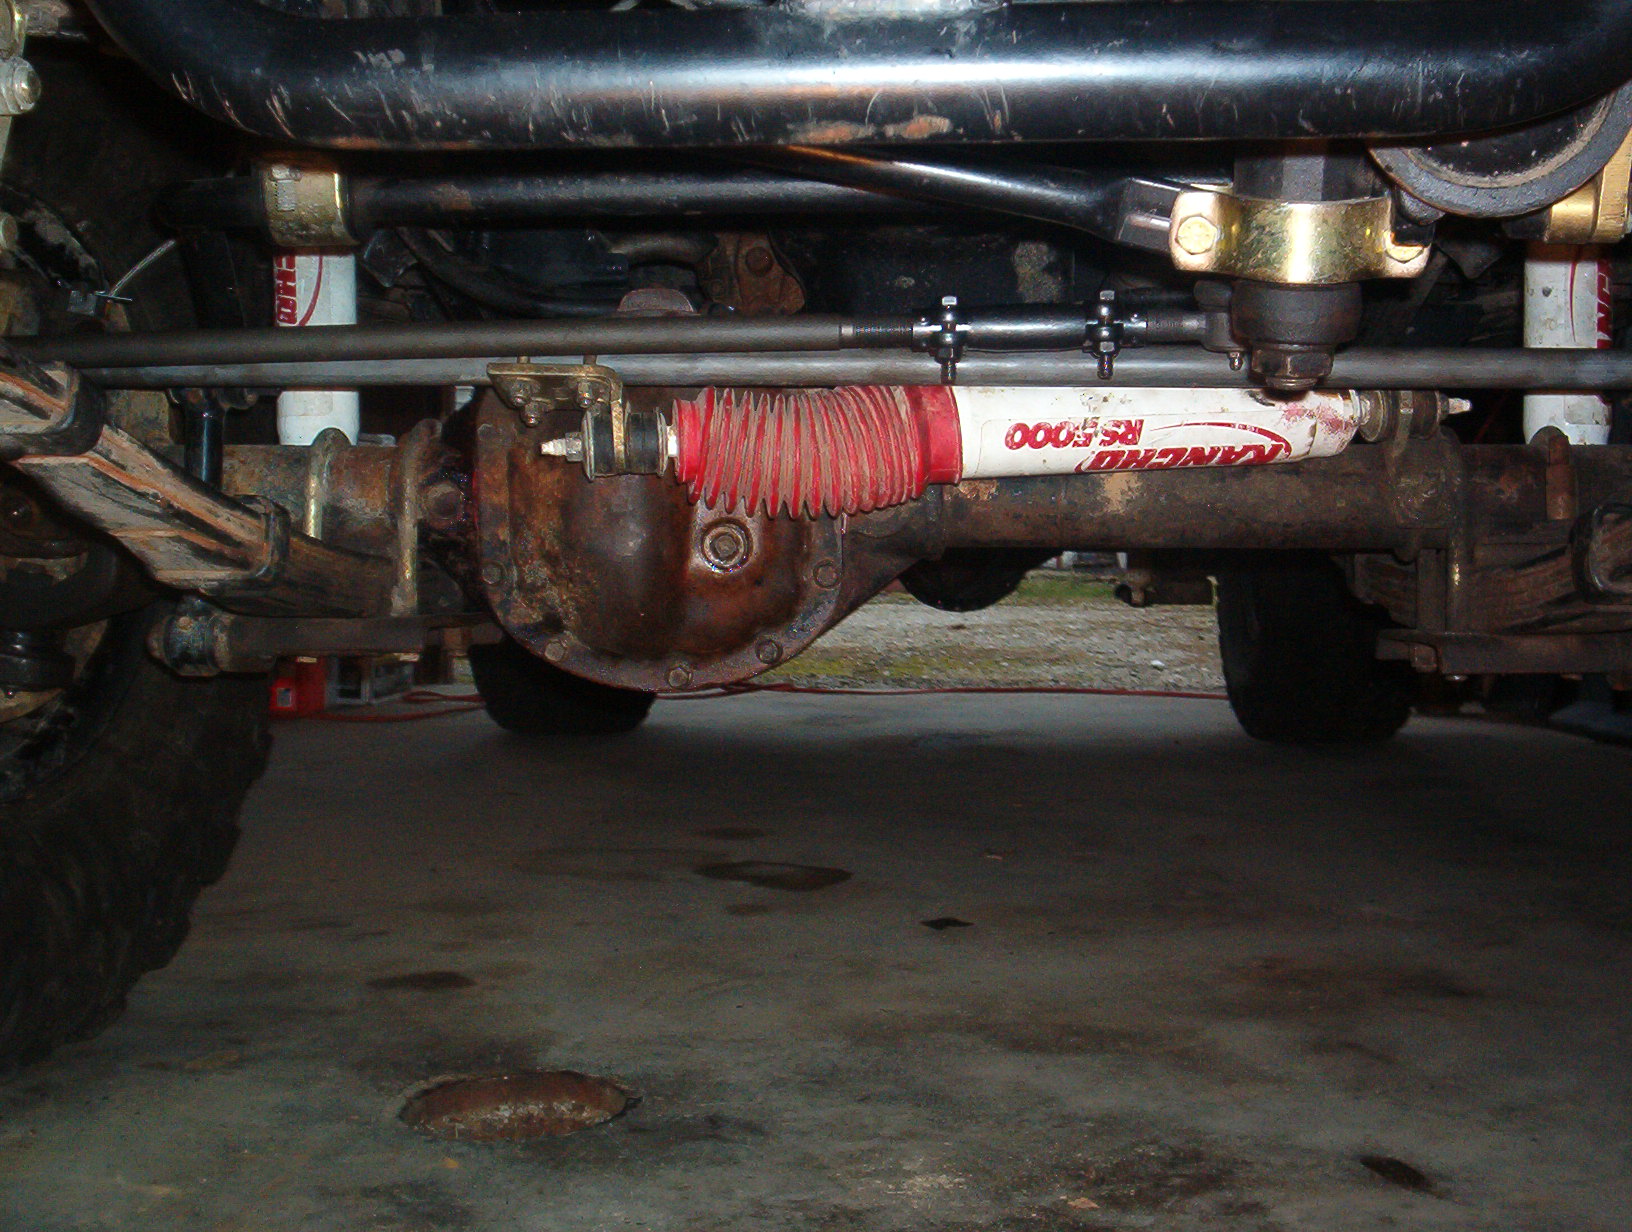
After everything is torqued to spec, you can see that the linkage is nearly parallel and well above the axle centerline. . |
|
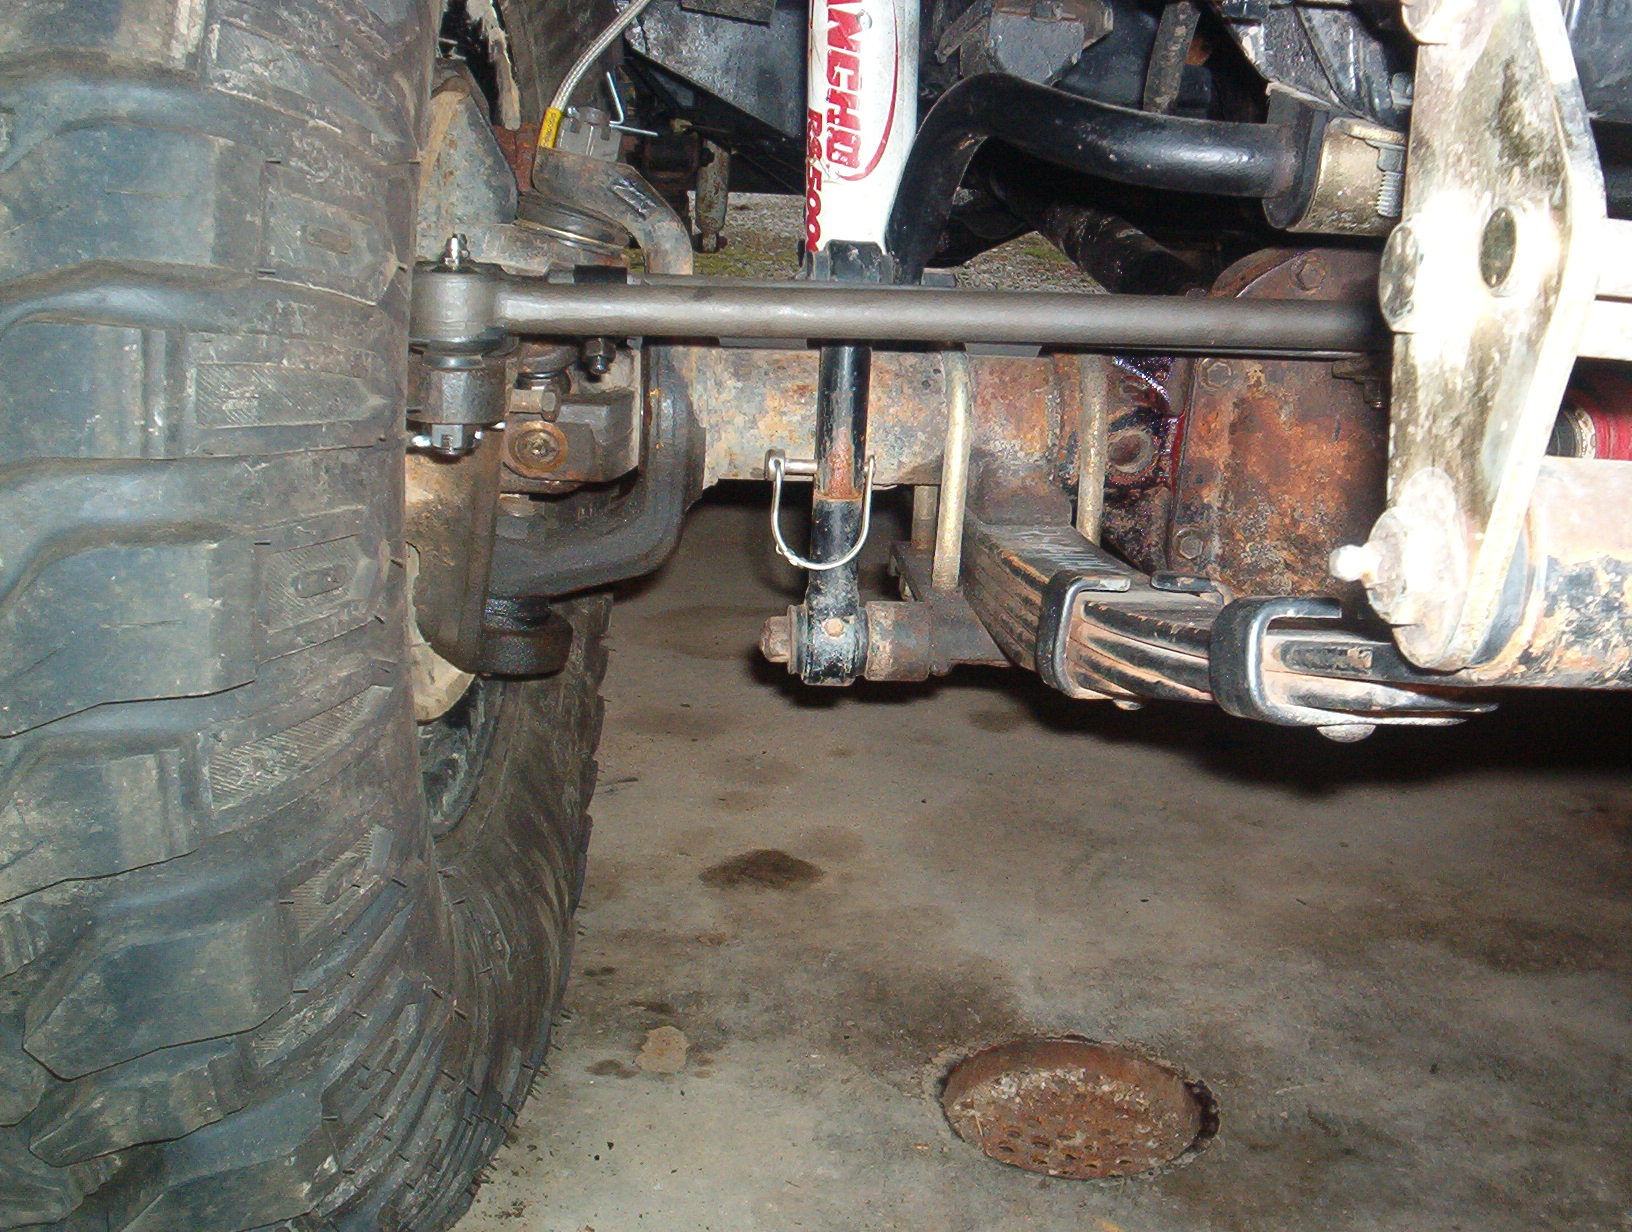
Another shot of the altitude change in the linkage. |
|
|
|
|
|
Back |
|