 |
|
|
|
|
|
|
|
|
|
|
|
|
|
|
|
|
|
|
|
|
|
|
|
|
|
|
|
|
|
|
|
|
|
HALLOWEEN HALL |
|
|
|
BOB THE ORGANIST |
|
|
|
 |
|
|
|
For the last movement is for the jaw, the hinge is easily made by drilling a hole through the jaw bone and into the skull. Use a drill bit that is larger than the screw shank to go through the jaw bone and a smaller one to make the pilot hole in the skull. This will let you anchor the screw in the skull but still let the jaw bone swing up and down. I used a 1 1/2 inch long #10 sheet metal screw painted white on the end. Now remove the springs, nuts & bolts that held the jaw to the skull, the jaw bone should swing freely if not open up the jaw bone holes until it does. |
|
|
|
|
|
 |
|
|
|
 |
|
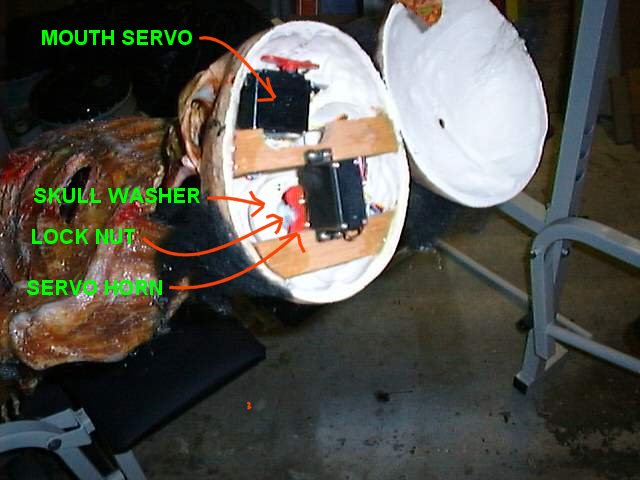
Now lets add the first servo motor, this one is for the mouth movement. I use a
CS-60 Hobbico servo from Tower hobbies. These are small, have plenty of torque and run about $9.95 each. Start by selecting the two bladed horn this will be used to run the push rod down to the mouth. To mount it I used a 1 inch corner angle support and drilled two mounting holes for the servo and one extra hole to mount it to the skull, then used two nuts and bolts off of bucky that held the springs to skull to attach it to the angle. Now use a dremel tool to make a hole into the nose cavity from the inside of the skull and roof of the mouth so the push rod has a place to go through down to the front inside of the jaw bone. To make the push rod you need a coat hanger wire about 6 inches long. Put a hook on one end, this goes through the servo horn hole. Now mount the servo into the skull using two screws that came with the corner angle make sure that the servo motor gear is turned all the way to the right when you are looking at it from the top and the horn is straight with the servo motor body. To anchor the servo wire into the jaw bone I drilled a hole about the same size as the wire behind the teeth, down through the jaw bone and out the bottom to match the angle of the push rod coming down through the nose. To lock this end I used a sheet metal screw drilled into the hole for the wire on the inside of the jaw bone, leave this wire long for now it should be sticking out of the jaw bottom. This lets you make some adjustments when you program the motion of the jaw later on. |
|
|
|
|
|
|
|
|
|
 |
|
|
|
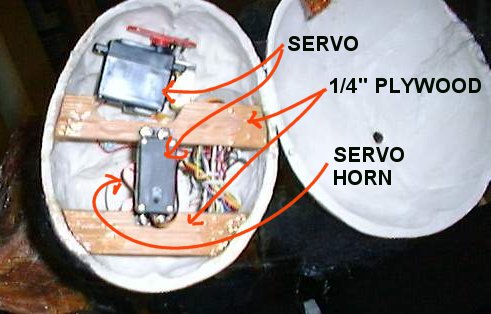
For the side to side head movement You need to epoxy the servo horn to the bolt that is coming through the skull. I used the 4 blade horn for this to give me the most amount of gluing surface. I used a lock nut on the top of the spine bolt so I had something to glue to. After the epoxy has set up I used the 4 screws that came with the servo and screwed the wings down into the hardened epoxy under the wings and then added more epoxy. Don't get any into the center hole as this is used for the servo motor gear. After that set up I cut two pieces of 1/4" plywood about 1 inch wide to serve as a mounting bracket for the motor. To make these I put the servo motor on the horn and laid the strips across the ends of the servo and eyeballed the inside edge of the skull. Then I drew a line and cut them with the band saw until they fit under the mounting holes on the servo motor. Then I centered the gear on the servo to the horn mount and screwed the servo into the plywood strips and epoxied the edges to the inside of the skull. This way if you burn out the servo you can easily replace it. It doesn't need to be screwed to the horn because the wood strips hold it down in the hole. When it's mounted you should still have enough room to put the top of the skull back on again. The skull should now be able to swing from side to side if not you have to adjust the servo so that it's centered when the head is looking foreword. Now drill a hole into the base of the back on the skull for the control wires to go through. It needs to be big enough for a piece of category 5 wire and a speaker wire, a power and ground wire I made it about 3/8". |
|
|
|
|
|
|
|
|
|
 |
|
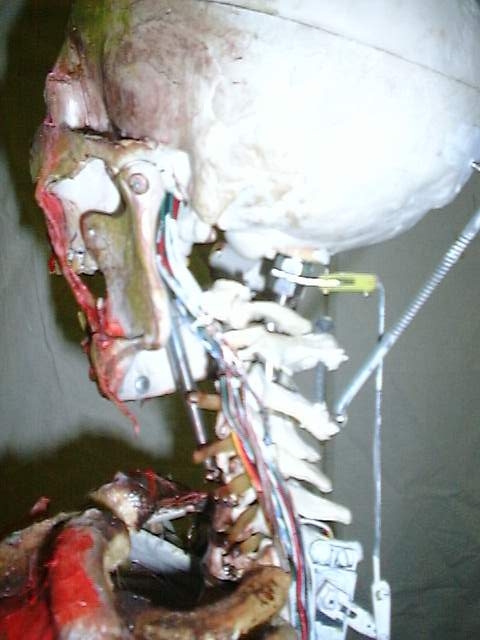
For the last servo motor on the neck I mounted it to the back vertebra. I cut off the 7th & 8th bone protrusions and put the servo there. I screwed it to the 6th vertebra and used a wire tie on the bottom mounting holes and pulled it tight to the back bone. Then I
mounted a push rod that I made from servo rod material from tower hobbies and two end connectors to control the neck movement one goes to the alum. plate you made in the neck hinge assembly and the other goes to the servo horn. I had to add springs to help the servo move the skull because of the weight you could use a bigger servo instead. The other adjustment screw in the back on the vertebra is for the spring tension on the skull to make it move smoothly. |
|
|
|
|
|
To finish him off I wired up the servos and programmed my OOPic chip. This took over 2 months to do as I had to learn how to program the micro computer chip. If you would like to learn more about this part go to the OOPic web site and look over their material I have a link in the links section on the left. All of the wall wart transformers are located in the organ back shelves and hook up to wire connectors under the bench, the speaker for his voice comes from a digital recorder from radio shack that I hooked up to a wire on the mouth servo horn and contacts a spring that I took off the jaw to trigger it when the
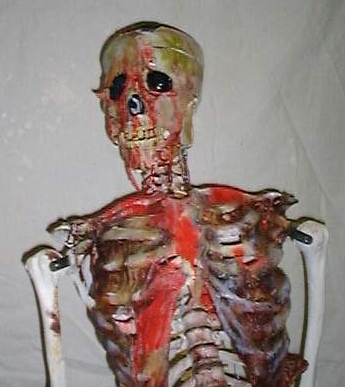
mouth opens, he laughs like the crypt keeper from HBO when it hits the wire! The speaker itself is a powered computer speaker that sits in his lap inside of a plastic bag I also installed red LEDs in the eye sockets that are also controlled with the OOpic controller to blink off and on. The costume he has on is a Halloween costume I had left over from the bleeding chest that got a hole in the chest piece but the costume works great on Bob to see his ribs. To finish the skeleton I used cheese cloth and liquid latex over the bones with a covering of walnut stain wiped off and red paint for the blood. I then sprayed the whole thing with a clear coat so it would be able to take the weather. |
|
|
 |
|
|
|
|
|
|
 |
|
|
|
BACK TO PROJECTS |
|
|
|