Camouflage Painting Notes excerpted from the TB:
All military vehicles and equipment have characteristic
shapes and shadows. These shapes and shadows contrast with the material
surroundings and make the object stand out. Pattern painting using wavy,
irregular patches of camouflage colors does much to break up the characteristic
shapes of the equipment by reducing contrasts with sod and vegetation,
pattern
shape, and placement. Patterns have been designed
for each type of vehicle to cut off sharp corners, avoid straight, vertical,
and horizontal lines, and extend shadows in shapes similar to natural features
and vegetation; however, the accuracy with which the pattern is applied
completely determines how well the pattern camouflages the equipment.
The black bands, located at the visual center
of each side in a pattern, are the key to the three-color camouflage systems.
These bands must be in the correct place and
must be the correct width. To ensure correct placement and width,
each
pattern has between 10 and 25 critical reference
points. Critical reference points are based on fixed features on
the item and are reflected on the vehicle pattern.
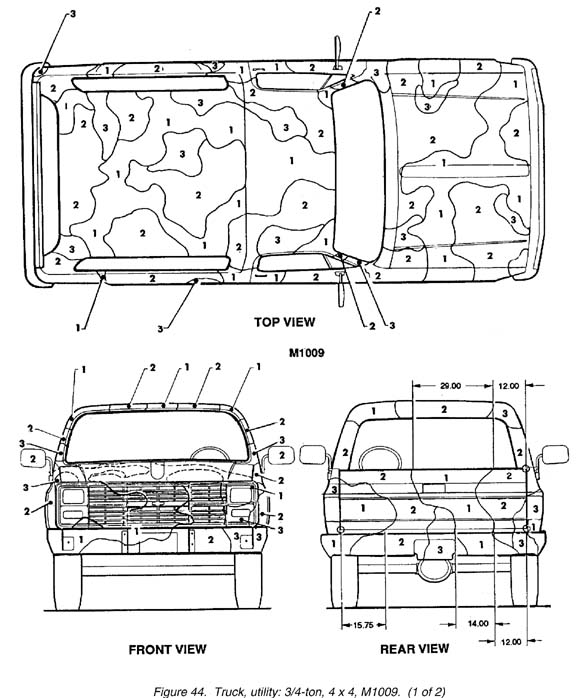
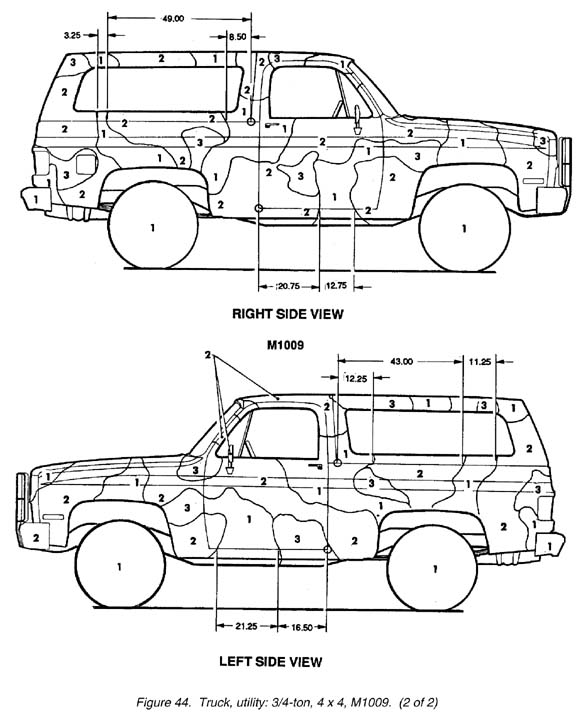
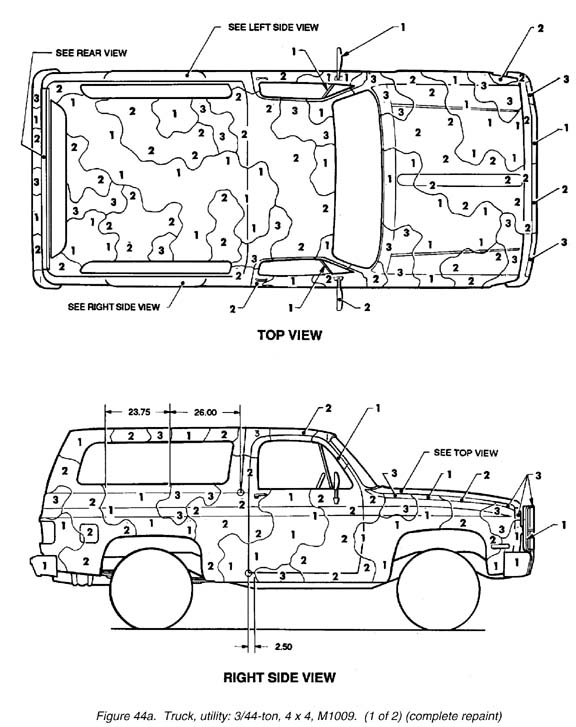
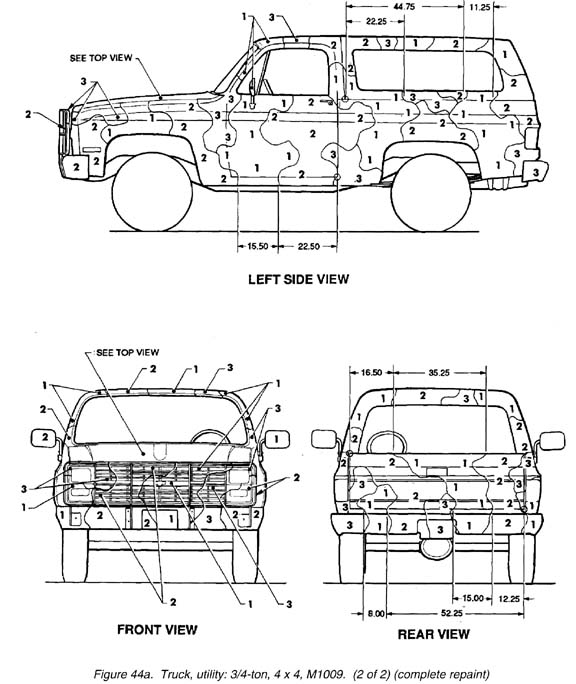
All dimensions are listed in inches. All dimensional tolerances are
limited to +1.00 inch.
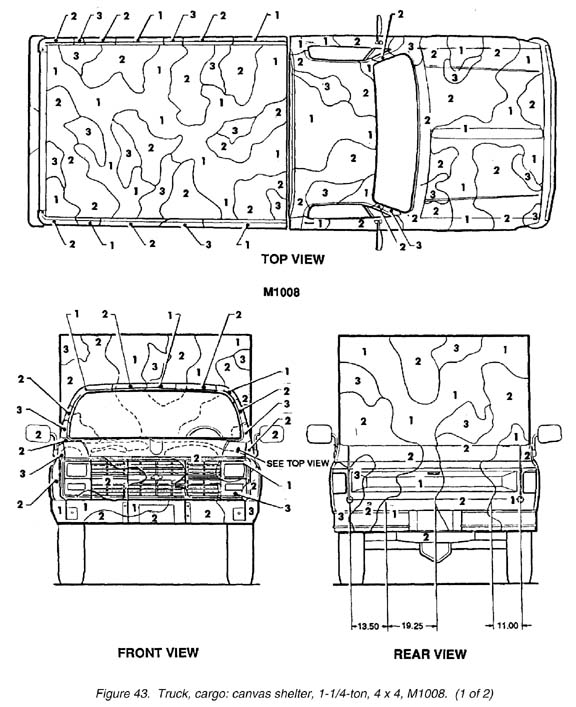
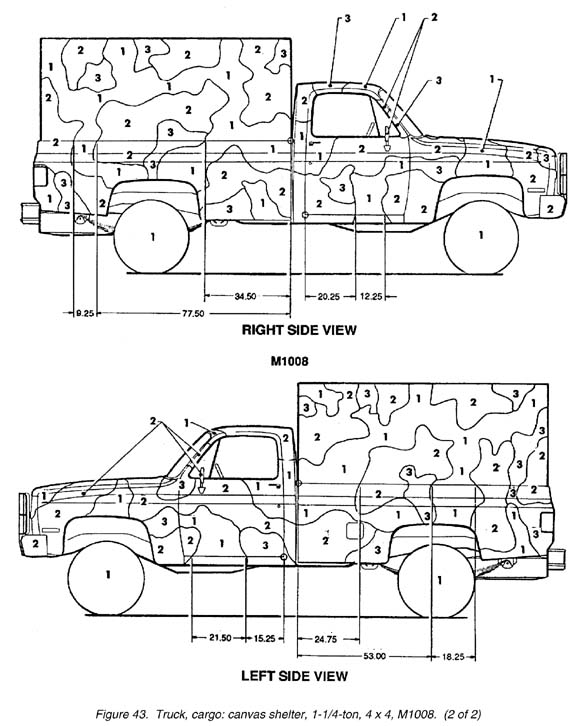
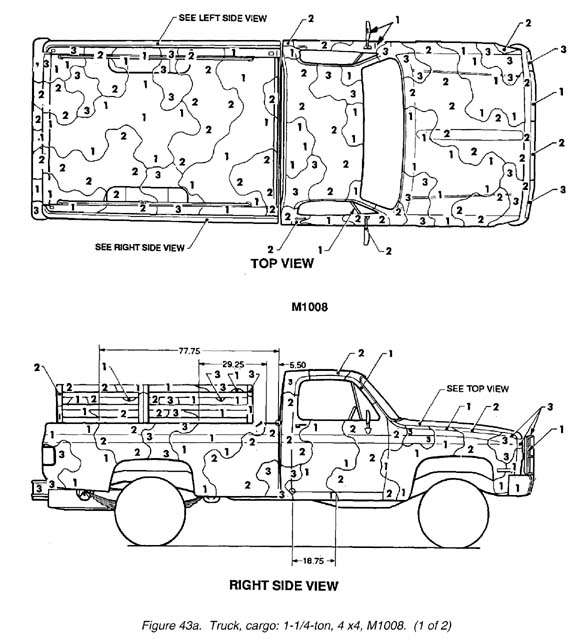
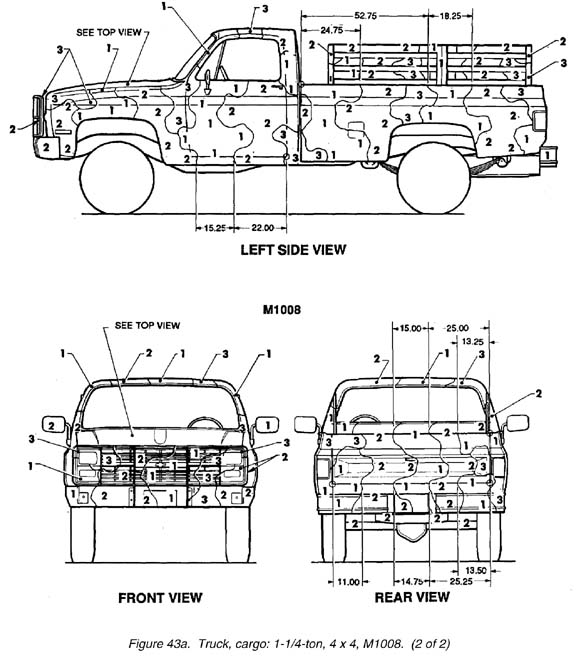
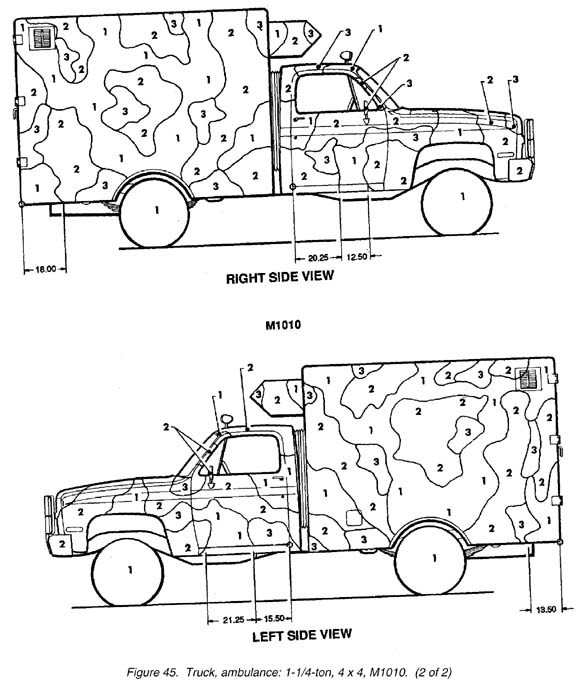
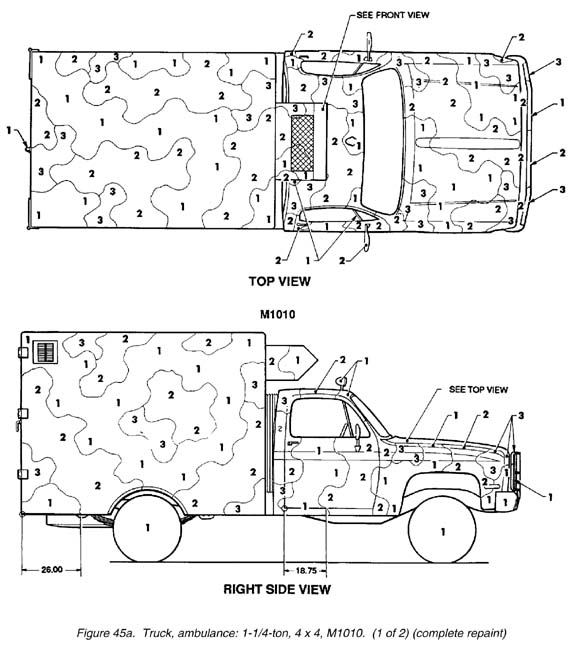
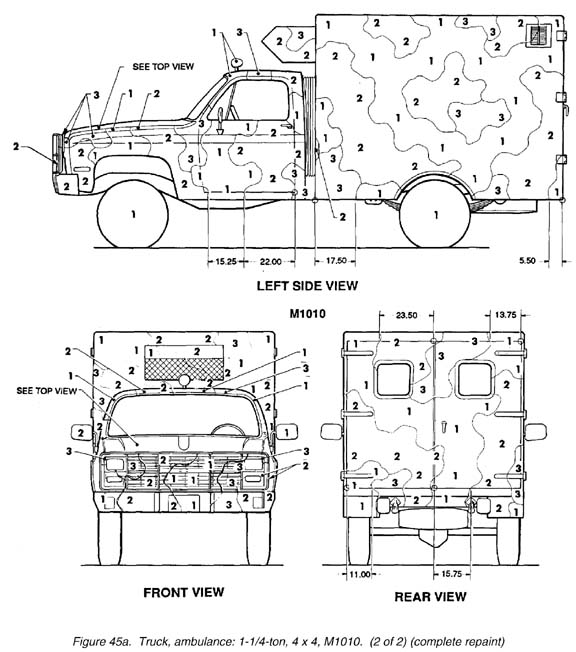
These patterns are of the "color by number" format. In this format, 1=Black (37030), 2=Green (34094), and 3=Brown (30051). The numbers in the parenthesis reflect the FS color numbers, and are the colors used in the current "383" NATO camouflage colors.
Additional painting tips...
I have found that printing out the below patterns
and then using a copier to enlarge the pattern needed for each side of
the truck onto an overhead transparency works great. This way you
can use an overhead projector to very accurately transfer the pattern to
the vehicle. You may find that you will have to place the projector
some distance from the vehicle, this can result in distortions, at least
it did when I tried it. A solution for this is positioning the projector
towards the front or rear of the truck, and aligning the projection on
that half, tracing it out, then proceeding to do the other half.
On the top of the truck, I have no idea how to do this other than eye-balling
it, or stringing up an overhead projector in the rafters to shine down
on the truck.
And now onto the patterns...
M1008/M1028
Original
Pattern (1/2)
Original
Pattern (2/2)
New
Pattern (1/2)
New
Pattern (2/2)
M1009
Original
Pattern (1/2)
Original
Pattern (2/2)
New
Pattern (1/2)
New
Pattern (2/2)
M1010
Original
Pattern (1/2)
Original
Pattern (2/2)
New
Pattern (1/2)
New
Pattern (2/2)