
 COMPOSE AND COPY THE FILE |
First, compose the file on a 120dpi. |
 MAKE A MASK |
Next, Make another layer and rename it as MASK. |
 |
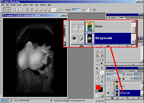 |
Copy the original artwork that you've composed and then rename it as GRAYSCALE. Then, press
SHIFT+CTRL+U to desaturate your grayscale layer. Retouch the image to your liking. Try to imagine
you are doing a charcoal drawing. Dark to light. Shadow to Midtone to highlight. If you need to use some
FILTERS, do so. It depends on how you would come up with a smoth grayscale transition.
 ADD LAYER FOR COLOR |
Add another layer once you finished |
 USING COLOR RANGE |
Use ALT+S then press C to get the range |

|
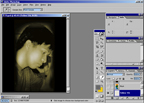 |
After you finished the color range, automatic selection would appear. Press ALT+E and then press L.
In CONTENT USE box, put BACKGROUNDCOLOR, BLENDING put NORMAL.
And on OPACITY it would depend on you.
 ADD MORE COLOR |
Add another color that you prefered. |
 PUTTING UNDERBASE |
Copy the grayscale layer and rename it Set INPUT to 80% on |