 |
| Hard Candy Wreath (adult help will be needed, some steps may not be suitable for younger girls) What You Need: 1 coat hanger, Approximately 30 pieces of assorted, wrapped hard candies, suckers, etc., Approximately 30 pieces of colorful curling ribbon, cut into 8" pieces, Wire cutters, Pliers to bend the hanger, Masking tape, A dull pair of scissors to curl the ribbon How To Make It: Unbend the hanger and cut it in half (this will be enough for 2 kids). Bend the 1/2 hanger into a circle leaving about 4" at the top to make a hook. Twist the end to make it look like a circle with a hook on it. Cut your curling ribbon into 8" pieces. Fold your ribbon in half. In the middle of that ribbon tie one piece of candy. Tie it on the end of the candy where the paper twists. Now tie the candy with 2 knots tightly on to the hanger. Tie the candy right next to the wire to help cover it up. Use the scissors to curl the ribbon on each end. Repeat the process for all your candy pieces. It might take a few more or less than 30 depending on the size of each candy. Suckers should be tied close to the head. You may add a ribbon on the top to cover the hook if you want. Some people also tie on a pair of scissors so people can eat the candy when they visit. |
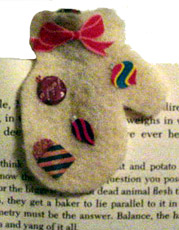
| Mitten Bookmark This project is EASY to do. What You Need: Felt in any color Pattern (see below) Felt marker Scissors Glue Curl Hair clips (with spring) Stickers, glitter, glitter paint, ribbon, etc. Wax paper How To Make It: Print out the Mitten Bookmark pattern. Cut out the pattern. Use the marker to trace around the pattern 4 times on the felt. Cut out all 4 pieces. It will take 4 pieces of felt to make one bookmark. Important: Be sure to lay all mitten pieces with the thumb part facing the same way! Lay the mittens out in front of you. Take the 2nd and 3rd mittens and cut off the top band of the mitten. This step is done so the 2nd and 3rd mitten pieces will fit inside the hair clip and let the mitten pieces on the top and bottom line up. Lay the 1st mitten piece on the wax paper. Spread glue on the mitten piece. Spread glue on another mitten piece on the underside (so it will match up with the 1st mitten piece). Lay the hair clip on top of the 1st mitten piece. (The top of the hair clip (spring part) goes at the top of the mitten where you would put in your hand.) Open up the clip and hold it open. Lay the second mitten piece, already glued, on top of the hair clip. Make sure the mitten edges are even. Place a double layer little piece of wax paper on top of the 2nd mitten piece and close the hair clip. Take the 3rd mitten piece, taking care to note which side of the mitten you need to put glue on, and add glue to the top of the mitten. Open up the hair clip and hold open. Insert the 3rd mitten piece on top of the wax paper and make sure the sides of it align with the mitten below. Close the hair clip. Take the 4th mitten piece and add glue to the underside of it and lay it on the very top of the hair clip. Make sure the sides of it align with the mitten piece below. Let dry overnight. Let the child decorate their mitten with stickers, glue & glitter, tiny ribbon bows, etc. Remember this bookmark goes inside a book so don't add anything dimensional. Help the child wrap it up and give it as a gift! |
|
| Winter Crafts |
| Snowman Necklace or Ornament SUPPLIES NEEDED: White glue (like Elmer's glue) Paper clip Waxed paper Scraps of construction paper: black, and orange A hole punch (for cutting eyes, and buttons) Scissors Googly eyes (from a craft store) - optional Tiny buttons - optional 2 very tiny twigs (for arms) String or yarn (for hanging it) Working on waxed paper, spread 2 or 3 blobs of white glue in the shape of a snowman. Unfold a paper clip into a V-shape (to use as a hanger). Cut a tiny hat from black construction paper and put it on the snowman on top of the paper clip hanger. Put the ends of the paper clip into the glue at the top of the snowman. For the snowman's eyes, use black paper circles cut with a hole punch, or use googly eyes. Put the eyes on the snowman. Add a tiny orange (carrot-shaped) nose. Add a few paper buttons (or small real buttons) down the front of the body. Let the glue dry - it will take a few days. When it dries, the glue will become transparent. When it is completely dry, peel it gently off the waxed paper. String the snowman on some yarn for a cool necklace or use a shorter string to use as an ornament. |
 |