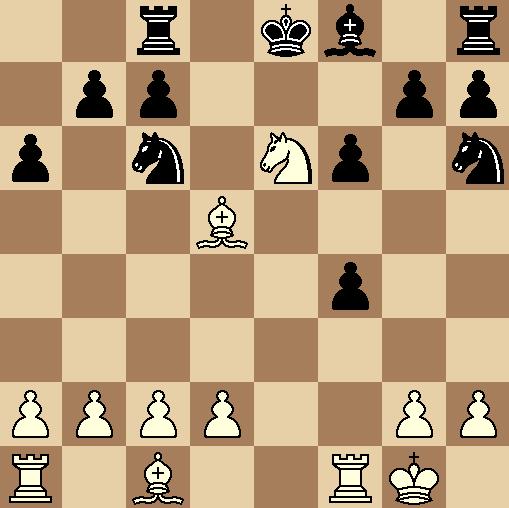
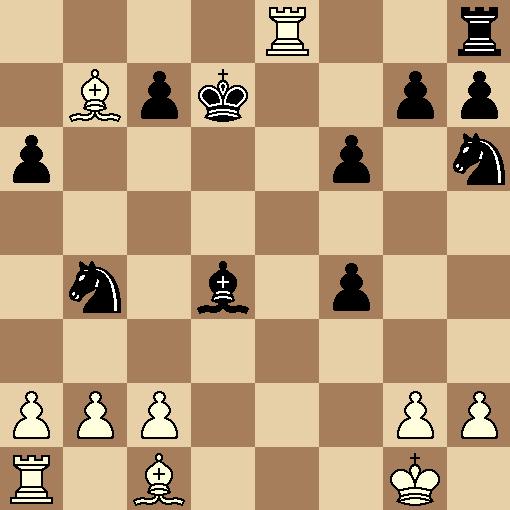
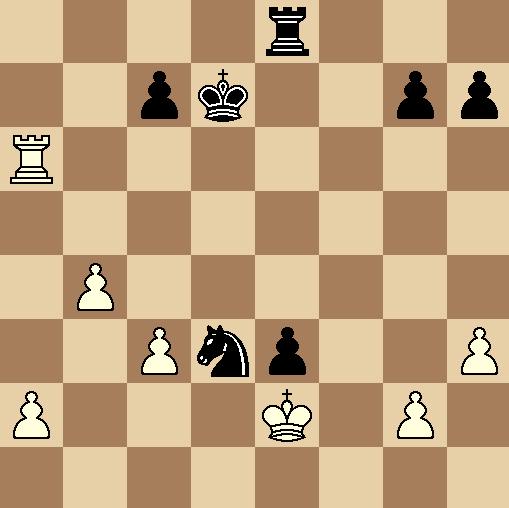
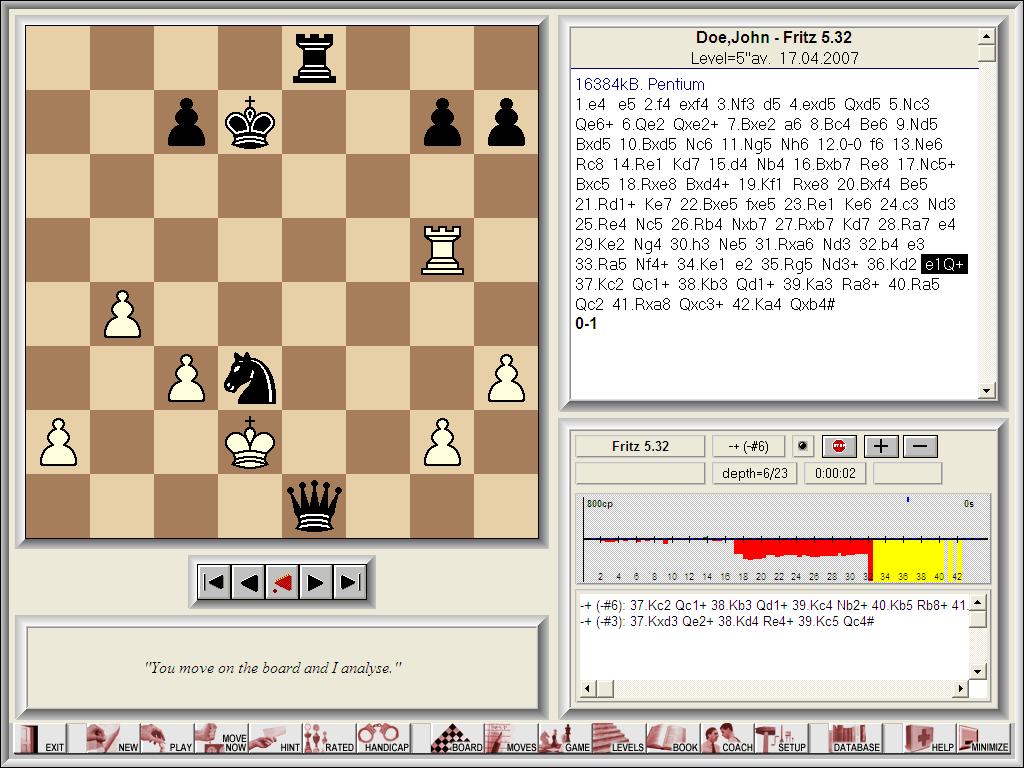
| Annotations by Gerald Roberts Before going in to this game, Cloys was 5/5, while Joe Riegsecker was 4.5/5. Cloys did not have a rating at the time, but when the supplement finally included his name, it turns out he was a class A player! I thought this would be an instructive game for a few reasons. First of all, it was played in the final round of a big tournament with prize money on the line. Second of all, the game demonstrates two very important ideas: trading pieces when up material and how to utilize an in-between move. The opening is the King's Gambit Accepted, so obviously the game is tactics-crazy from start to finish. Enjoy! Nashville, TN, Tennessee Open, 9/1972 King's Gambit Accepted, Abbazia Defense (C36) J Cloys J Riegsecker 1. e4 e5 2. f4 exf4 3. Nf3 d5 4. exd5 Qxd5 5. Nc3 Qe6+ The time that blacks wastes moving with his queen is compensated for by the fact that he has an extra pawn. Supposedly, a pawn is worth about 3.5 tempi, so I think black is just fine here. 6. Qe2 Qxe2 7. Bxe2 a6? 8. Bc4 Be6? I'm a bit skeptical of black's last two moves. There's nothing flat out wrong with them, but they seem too passive. I though the idea of the ...a6 maneuver was to chase a c4 bishop out with a following ...b5 pawn push, but that didn't happen. I know that Joe himself plays the king's gambit, which often involves sacrifices at f7 with the all-powerful light-squared bishop, so perhaps he wanted to avoid that at all costs. On the bright side, an immediate exchange at e6 would fix black's pawn structure. 9. Nd5 Bxd5 Fritz prefers for black to complete his development here with 9...Bd6 10. Bxd5 Nc6 Very bold. Black is willing to accept a weak pawn structure with Bxc6 for an extra pawn and the elimination of the troublesome bishop. That exchange doesn't happen, but I think it was probably the most critical test of black's game. 11. Ng5 Nh6 12. 0-0 f6 13. Ne6 Rc8 (see diagram) Black looks like he's in trouble now. The pawn at f4 is as good as gone, he's undeveloped, and now the white knight is in his face. 14. Re1 Threatening all kinds of nasty discoveries along the e-file. 14...Kd7 15. d4 Nb4 Continuing his titanic struggle to bring down the light-squared bishop. 16. Bxb7 Re8? (see diagram) The wrong follow-up. Black would have been best with Rb8, putting pressure along the open file with the rook and the c2 square with his knight. The likely exchanges to follow would leave black in a roughly equal position. Also interesting is the immediate 16...Nxc2!? The text move, if followed up correctly, should leave white with a superior game. 17. Nc5+?? A simple miscalculation. White has the right idea of opening up the file between the rooks, but goes about doing it the wrong way. Perhaps he though he could follow up with 18. Bc6+, chasing the king from the defense of the e8 rook and getting the rook for two pieces (not the best thing in the world), but the c6 square is covered by the sneaky b4 knight. Best here would have been 17. Nxf8+, but even then, it looks like white's most serious threats are over. The text move looks alright at first, but overlooks a powerful move by black a few moves down the line. 17...Bxc5! 18. Rxe8 Bxd4+!! (see diagram) Yes, the all-powerful in-between check! If black hadn't played this brilliancy, the game might have gone 18...Rxe8 19. dxc5 Nxc2 20. Rb1 with a roughly equal position. White most certainly overlooked this move when he played Nc5+ on move 17. 19. Kf1 Rxe8 20. Bxf4 Be5 21. Rd1+ Ke7 22. Bxe5 fxe5 White makes a poor strategic decision here. His attack is over, he's down in material, and yet he trades off one of his only attacking pieces. He must still be in disbelief and shock over 18...Bxd4!. 23. Re1 Ke6 24. c3 Nd3 25. Re4 Nc5! Black could have gone pawn hunting here, but the text move is especiallly nice. For all my students out there, this is what I mean by trading down when up material. Black now gets to trade off one of white's few remaining pieces, and with tempo! 26. Rb4 Nxb7 27. Rxb7 Kd7 28. Ra7 e4 White has no counterplay here. Black's last move shows that he is in charge of the position now. Why white doesn't resign here is beyond me. 29. Ke2 Ng4 30. h3 Ne5 31. Rxa6 Nd3 32. b4 e3! (see diagram) Pretty simple idea if you've seen it before, but the way black teases white with his knight en prise is aesthetically pleasing. 33. Ra5 Nf4+ 34. Ke1 e2 35. Rg5 Nd3+ The position is mate in eight, if you care to work out the huge sequence, but I'll show the end of the game to give you a head start. 36. Kd2 e1=Q+ (see diagram) WHITE RESIGNS 0-1 Again, this game just goes to show how important fundamentals can be in chess. White had some decent attacking possibilities, but due to his weak analytical skills and ensuing blunder, black's sound understanding of how to win a won game prevailed. Oh, and in case you were wondering, the rest of the mate would be as follows: 37. Kc2 Qc1+ 38. Kb3 Qd1+ 39. Ka3 Ra8+ 40. Ra5 Qc2! 41. Rxa8 Qxc3+ 42. Ka4 Qxb4# 0-1 |
 |
| after 13...Rc8 |
| after 16...Re8? |
| after 32...e3! |
| after 18...Bxd4+!! |
| FINAL POSITION after 36...e1=Q+ |
 |
 |
 |
 |
 |
 |
 |
 |
 |
 |
 |
 |
| Copyright 2007. All Rights Reserved. |
 |

|
 |
 |