Putting on Tips
use of your new arrows. If their use changes later you can even change the
tips pretty easily.
For SCA target archery we're going to go with field points. These are
available in sizes to match the three common shaft diameters and different
weights to fine tune the set-up. For these arrows we're going with 11/32",
125 grain points.
No matter what tip you choose or what glue you'll use, the tips must be
cleaned before they are glued on. Very few glues stick well to oil and
grease that may be in the tips and improper cleaning or no cleaning is a
leading factor to leaving tips inside the target bale. Lately I've been
using Simple Green to get the gunk off and then a quick wash in acetone or
denatured alcohol to remove residual Simple Green. I find this easier than
working with just one of the solvents alone. Your mileage may vary. Cheap
cotton swabs clean out the inside and a rag takes care of the outside.
You've got two choices for glue: hot melt or epoxy. If you go the hot melt
route, either get a specialty hot glue like Ferr-L-Tite from an archery
supply catalog ($2 to $3) or go to Home Depot and get the yellow high
strength hot melt glue in the tools section. The white hot glue sticks from
the craft store may be 10 for a $1 but they aren't up to this task. You'll
also need a heat source. An alcohol burner is pretty good but you can also
use a propane torch, camp stove, kitchen range, etc. Just be sure it's a
clean flame, candles make too much soot. Pliers to hold the hot tip and a
piece of scrap wood should finish out the tools.
I'm not going to go into how to use hot melt glue because I don't like the
stuff. Lots of archers use it and it's what's been traditionally used on
tips for many years. I got tired of dodging dripping molten glue and
handling everything with pliers, now I use epoxy and it's been working
great.
5 minute epoxy works very well and is easy to find just about everywhere.
I've gone to a 12 minute epoxy that I get from a local hobby store so I have
a little extra working time. Just like the hot melt glue, tips can be
removed and replaced by heating the tip to break the glue bond. Epoxy needs
a bit more heat to break the bond than hot melt but it will work just fine.
After mounting the tip, give it a little spin to assure that it's on
straight with no wobble. If it wobbles, adjust as necessary so it doesn't.
So, give your tip's glue time to cool or cure and you've got your arrow all
ready to shoot!
First picture shows a small selection of points that are available. Top
left is a Judo point for roving or small game shooting, those arms keep it
from sliding beneath the grass. The flat one at the left is a trade point,
these are suitable for primitive hunting arrows and are tied on with sinew,
plant fiber, or a modern equivalent. Next to the right is a blunt, two
target points, and a hunting broadhead. For SCA use we'll be using the
target tips. But it's good to be at least somewhat familiar with the other
types out there.
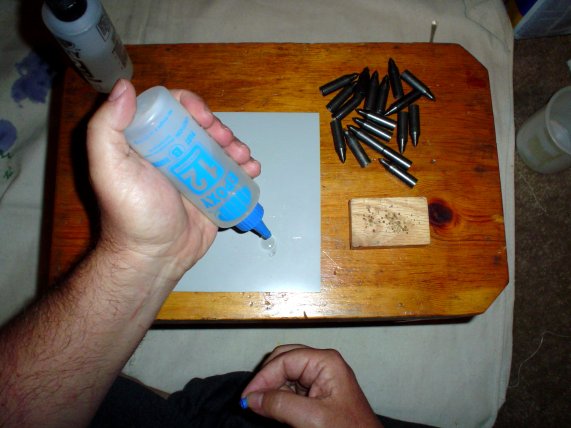
Look at the junk that's come off the points as they get cleaned! It's a
good example of why points must be cleaned before mounting.
12 minute epoxy, good stuff. As you can see, mixing it and applying it is
pretty easy and straightforward. Press the tip on, wipe off any extra glue
that squeezes out, and set aside for the glue to set. Don't forget to check
that the tip is spinning clean and not off center.
