


TEXTURED WALLPAPER
Welcome to a very exciting lesson using Photoshop 7.0! Let us have our materials ready.
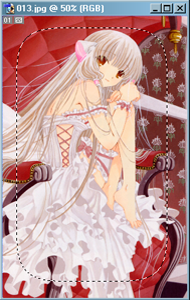
- Have your Photoshop 7.0 opened and create a new document with the dimensions of (your screen resolution- we will be using mine for default preference) 1024 by 768 pixels. Open up the image you want to use as your base. We will have to resize the image's length to fit the blank document better. Use the Rectangle Marquee to select what you want to stay and go to Image>>Crop.
- After you have cropped the image, go to Image>>Image Size. You will need to resize the image's length once again to fit the blank canvas better. Resize the length to the next hundreds (e.g.: My image was 718 pixels in length- I will resize it to 800 pixels).
- Take the Rectangle Marquee once again and this time, select inside the image.
Then right click and choose Feather. Feather the image by 50 pixels. The marquee's
border should look like this.
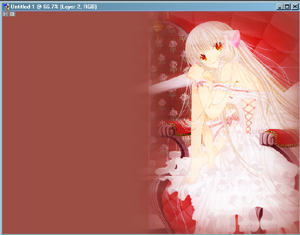
- After that is done, hit Ctrl+C together and go to your blank document. Hit Ctrl+V on it. The image should be pasted onto the document. Now you can position your image anywhere before we go any further.
- Once your image has been positioned, take the image layer on the Layers palette and right click to Duplicate the layer. Change the "Normal" setting to Overlay. Then go to Filter>>Blur>>Motion Blur. Make sure your Angle setting is 0, and the distance is 150 degrees. Hit Ok.
- Now create a new blank layer on top of the Background layer. Take the eye dropper
tool and pick the darkest color out of your image. Use the Paint Bucket tool to
color the whole background with the color of your choice.
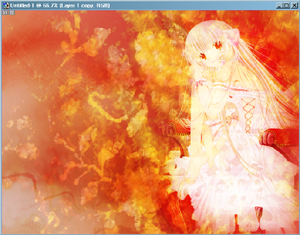
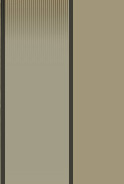
- Now pick out 2 textures to work with. Once you have them picked out, paste both of them at the very top of your Layers palette. Change the settings to "Overlay" (from Normal). Add textures, brushes, grunges, etc. as desired.
- When you are finished, go to Layer>>Merge Visible. Voila. You now have another
masterpiece completed.
About
Name: Lisa L.
Birthdate: February 4, 1991
Horoscope: Aquarius
Birthstone: Amethyst
Element: Wind
FEATURING...
NAVIGATION
Credits
Copyrights & Credits
THE OTHER WORLD © Lisa L.
Brushes & Textures © Ivy Tran
Designed by Aethereality.net