Funny Bunny Face

Funny Bunny Face |
|
| 1. Download the zip file containing the selections, color palette, & bow tube here. Unzip & save to your hard drive in a specific folder named "Funny Bunny Face." |
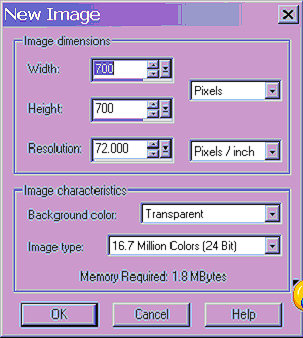
| 2. File>New>New Image |
 |
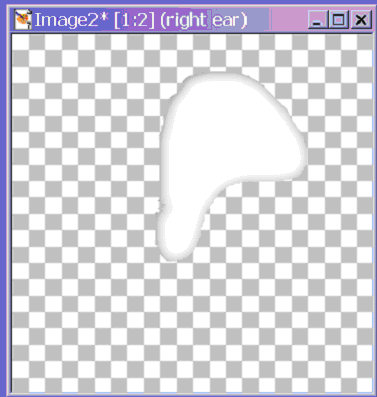
| 3. Layers>New Raster layer name this layer "right ear." |
|
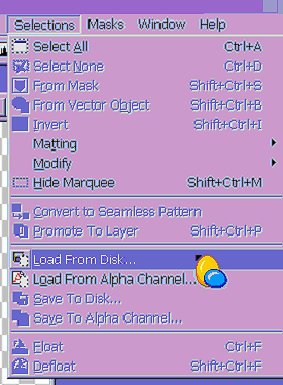
| Go to Selections>Load from disk & load "right_ear.sel". You do remember where you unzipped the selections � right? |
 |
| You should see this: |
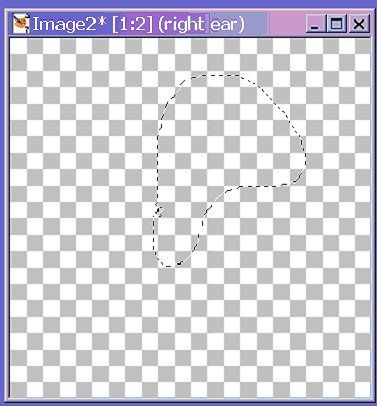 |
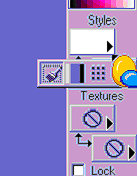
| Set your foreground color to white and your background color to #808080. Alternatively, you can click on the correct color to make things quicker if you download the "funny_bunny_colors.jpg" file. Rather than typing in the color hex#, just use the eyedropper tool & first click on the foreground or background box, then click on the color you want to change to. Remember to go back to activate your bunny window (by clicking on the title bar) afterward or you will end up working on the color chart window. The top box on the right is the foreground color. The bottom box is the background color. Click on the small black arrow, then on the paintbrush for "solid color." |
 |
| On the left side click on the "paint bucket" tool. |
 |
| Then click inside the "ear" to flood fill with white. |
 |
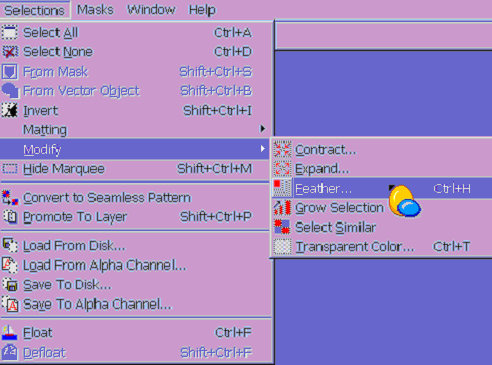
| Go to Selection>Invert. |
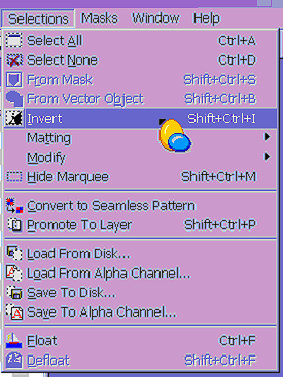 |
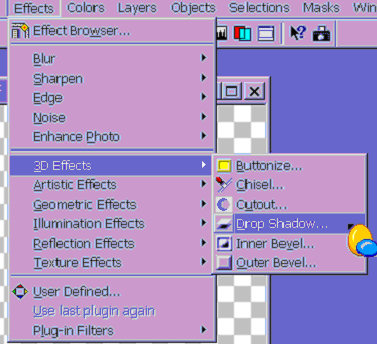
| You should see a line of "marching ants" around the ear and around the
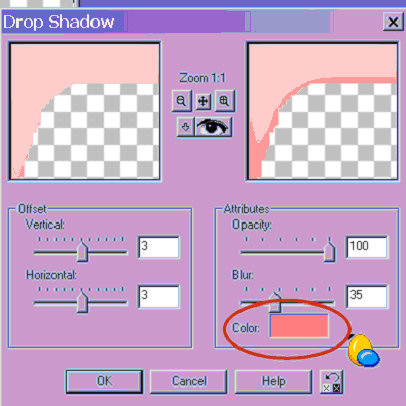
inside of the box. Go to Effects>3-D Effects>Drop Shadow. |
 |
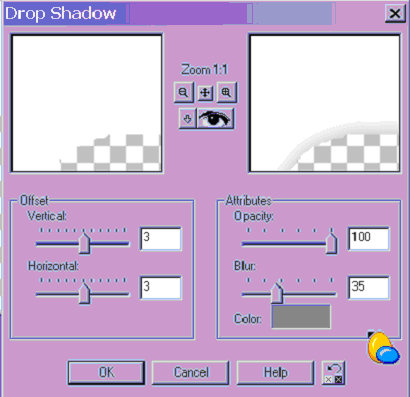
| Use the settings vertical=3, horizontal=3, opacity=100, blur=35, color #808080. |
 |
| Go to Selections>Select None. |
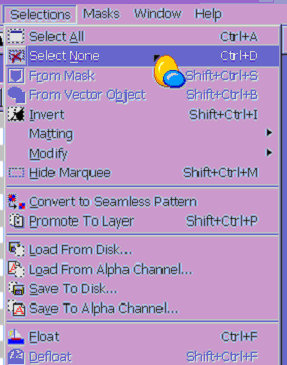 |
| This is what you should see now. |
 |
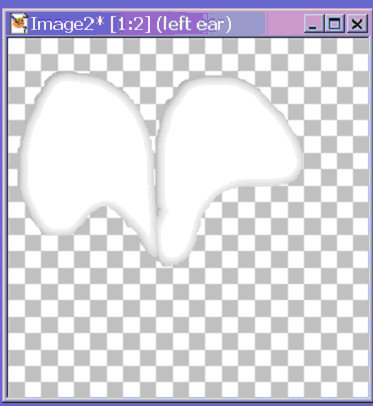
| 4. Layers>New Raster layer. Name this layer "left ear". Selections> Load from disk & load "left_ear.sel". Repeat all steps as for right ear. This is what you should see now. |
 |
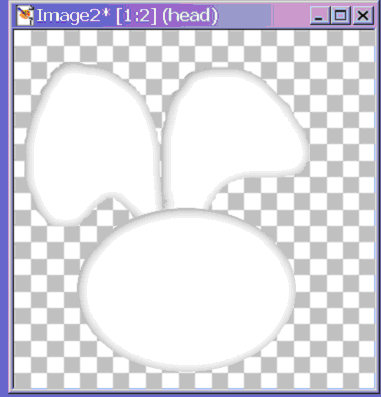
| 5. Layers>New Raster layer. Name this layer "head". Go to Selections> Load from disk & load head.sel Repeat all steps as for right ear. This is what you have now. |
 |
| 6. Open layer pallette & highlight "right ear". If you don't see the layer palette, click on View to put it on the desktop. |
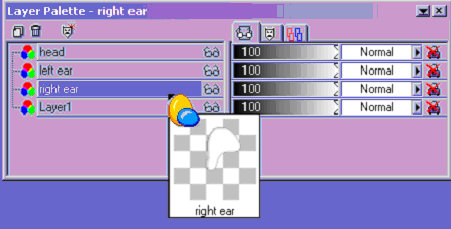 |
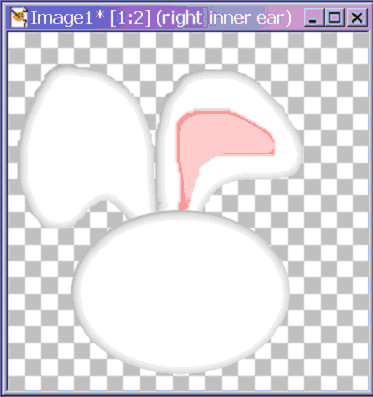
| Go to Layers>New Raster layer name this layer "right innerear" Selections>Load from disk & load "right_innerear.sel". Selections>Invert. |
| Effects>3-D Effects>Drop Shadow>settings vertical=6, horizontal=6, Opacity=100, blur=35, color #FF8080 |
 |
| Now go to Effects>Blur>Gaussian Blur. |
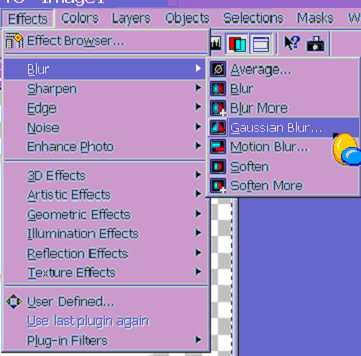 |
| Set the radius to 3.00. |
 |
| Selections>Select none. This is what you should see. |
 |
| 7. Open layer pallette & highlight "left ear" Layers>New Raster layer. Name this layer "left innerear" Selections>Load from disk & load "left_ innerear.sel" Repeat all steps as for right innerear. |
|
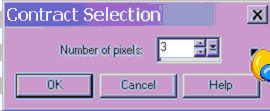
| 8. Open layer pallette & highlight "head" Layers>New Raster layer.
Name this layer "eyes" Go to Selections>Load from disk & load right_eye.sel
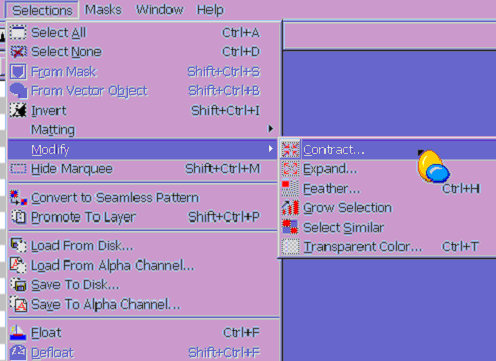
Flood fill with #808080. On same layer, Selections>Load from disk & load right_eye.sel Selections>Modify>Contract> number of pixels 3. |
 |
 |
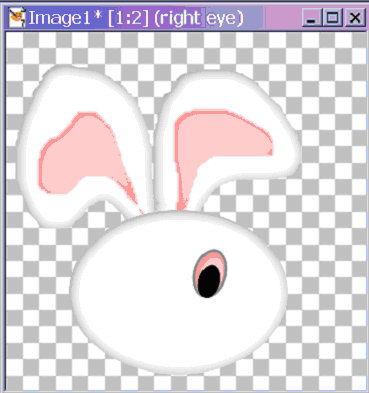
| Flood fill with #FFC0C0. Selections>Invert. Effects>3-D Selections>Drop Shadow>settings as for innerear. Selections>Select None. On same layer Selections>Load from disk & load right_pupil.sel Flood fill with black. Selections>Select None. |
 |
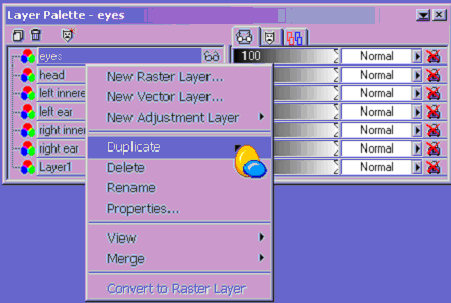
| Open layer pallette & right click on eyes layer. Duplicate this layer. |
 |
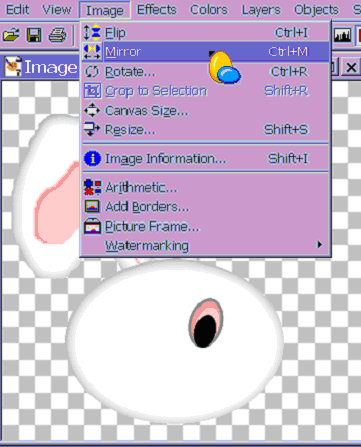
| Image>Mirror. |
 |
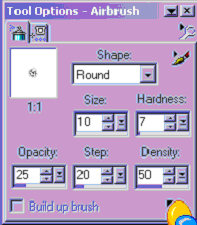
| 9. Layers>New Raster layer Name this layer "eye highlights" Choose Airbrush tool. Then click on the Tool Options Palette on your desktop. |
 |
| shape=round, size=10, hardness=7, opacity=25, step=20, density=50, color-white |
 |
| Spray on highlights in both pupils using picture as guide. It's easier to do if you magnify the image. |
 |
| Go to Effects>Blur>Gaussian blur> radius=3.00. |
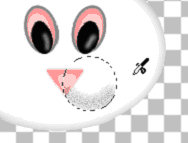
| 10. Layers>New Raster layer Name this layer "nose." Selections>Load from disk & load nose.sel Flood fill with #FFC0C0. Selections>Invert Effects>3-D Effects>Drop Shadow same settings as for eye Effects>Blur>Gaussian Blur> radius=3.00 Selecttions>Select None |
| 11. Layers>New Raster layer Name this layer "right snout." Selections>Load from disk> & load right_snout.sel Click on air brush tool -- settings shape=round, size=50, hardness=7, opacity=25, step=20, density=50 Foreground color #808080 Spray bottom 1/3 of selection as in picture. |
 |
| Effects>Blur>Gaussian Blur> radius=3.00 Selections>Select None Right click on "right snout" layer. Duplicate this layer. Image>Mirror |
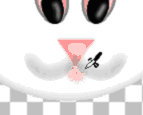
| 12. Click on "nose" layer. Layers>New Raster layer Name this layer "mouth" Selections>Load from disk> load mouth.sel Airbrush tool -- same settings as for snout Foreground color #FF8080 Apply color only in small area between snout sides (see picture) |
 |
| Effects>Blur>Gaussian blur> radius=3.00 |
| 13. Click on "head" layer Layers>New Raster layer Name this layer "right eye shading" Selections>Load from disk> & load right_eye_shading.sel Airbrush tool -- same settings as for snout. Foreground color#808080. Spray, using picture as a guide. |
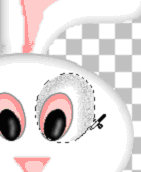 |
| Effects>Blur>Gaussian blur> radius 3.00. Select None. Right click on this layer & duplicate. Image>Mirror |
| 14. Click on "copy of snout" layer Layers>New Raster layer Name this layer "cheeks" Selections>Load from disk> load right_cheek.sel Selections> Modify>Feather number of pixels=29 Flood fill with #808080 Selections>Select None Right click on "cheeks" layer & duplicate. Image>Mirror |
 |
| 15. Layers>New Raster layer Name this layer "whiskers". Click on Draw tool |
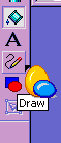 |
| type-single line width-4 line style- #1 default solid |
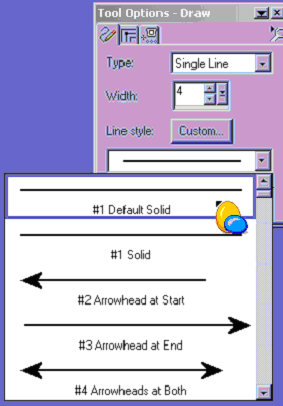 |
| Foreground color should be black. Draw whiskers as desired. Selections> Select None after each line. Right click on "whiskers" layer & duplicate. Image>Mirror |
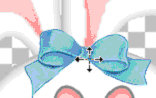
| Layer>New Raster layer Name this layer "bow." File>Open "bunny_bow.tub" Edit>Copy Edit>Paste as new layer. |
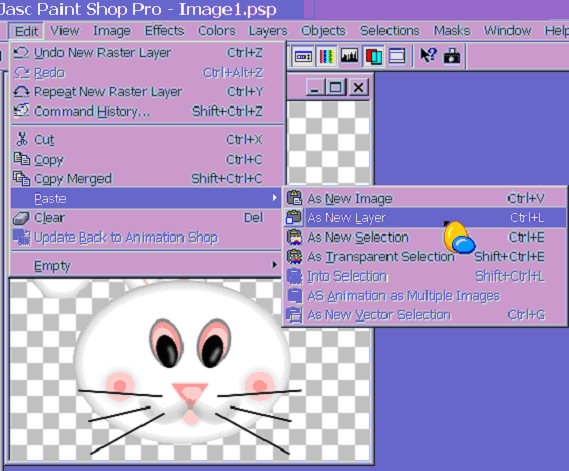 |
| Then move to desired location. Select None. |
 |
| 16. Click on "head" layer. Choose Smudge tool. |
 |
| In the Tool Options Box, be sure to click on the second tab & have "smudge" in the drop-down box |
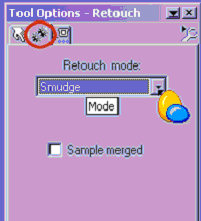 |
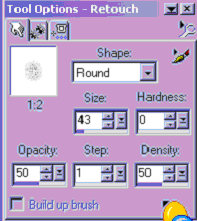
| shape-round, size=43, hardness=0, opacity=50, step=1, density=50 |
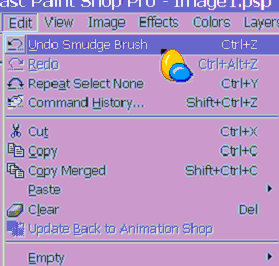
 |
| Draw lines outward from head to create fur-like texture on outline. This may take some playing around until you get the effect you want so the bunny looks furry. To do over, click Edit>Undo Smudge Brush |
 |
| (Hint: it may help you to click on layer 1 and flood fill with black. You can right click on this layer & delete it later.) |
 |
| 17. Click on "right ear" layer. Choose smudge tool and repeat as for head. |
| 18. Click on "left ear" layer. Choose smudge tool and repeat as for head.. |
| 19. If you wish to add your name, click on the "head" layer, then add a new layer called "signature". Click in a blank spot on the background. |

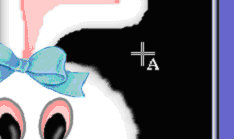 |
| Choose a font you like at a reasonable size with the fill color something compatible. Be sure to click on Standard test, check vector and antialias. |
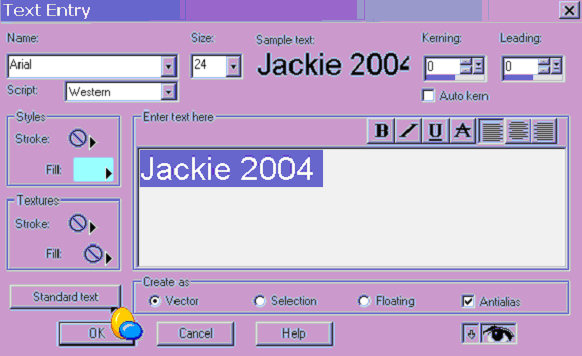
|
| You may have to move your name to get it in a good spot. Use the Mover tool. |
 |
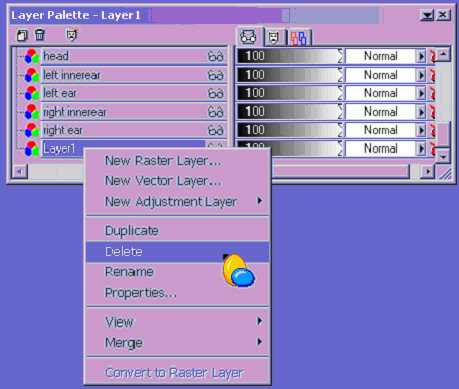
| 20. Right click on the very first layer (the black one) and delete it. |
 |
| Go to layer pallette & click on the glasses to put a red x on them to hide the signature layer. |
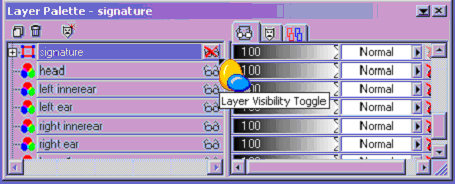 |
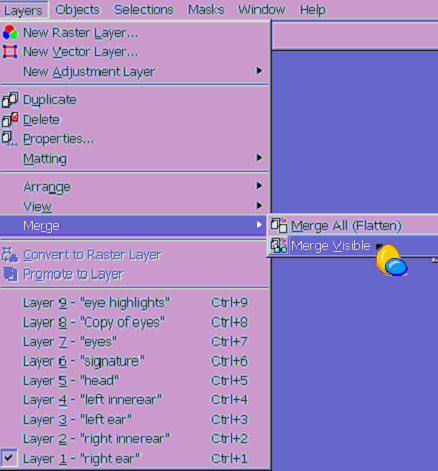
| Layers>Merge Visible. |
 |
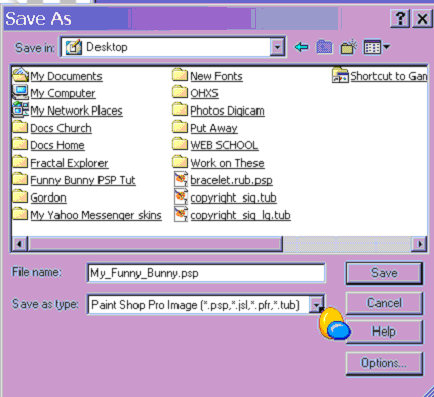
| Go to layer pallette & click on the glasses again to remove red x. Your name will reappear. File>Save as> name your file and save as PaintShopPro image (.psp) |
 |
You did it!!! |
This "Funny Bunny Face" tutorial was written
on 6 April 2004 |
 |