| HOW TO ADAPT A PRINCESS LINE BODICE TO ADD A SHAPED WAISTLINE AND BASQUE (Front piece) This is funnily enough, not as hard as it looks. Have a look at this: |
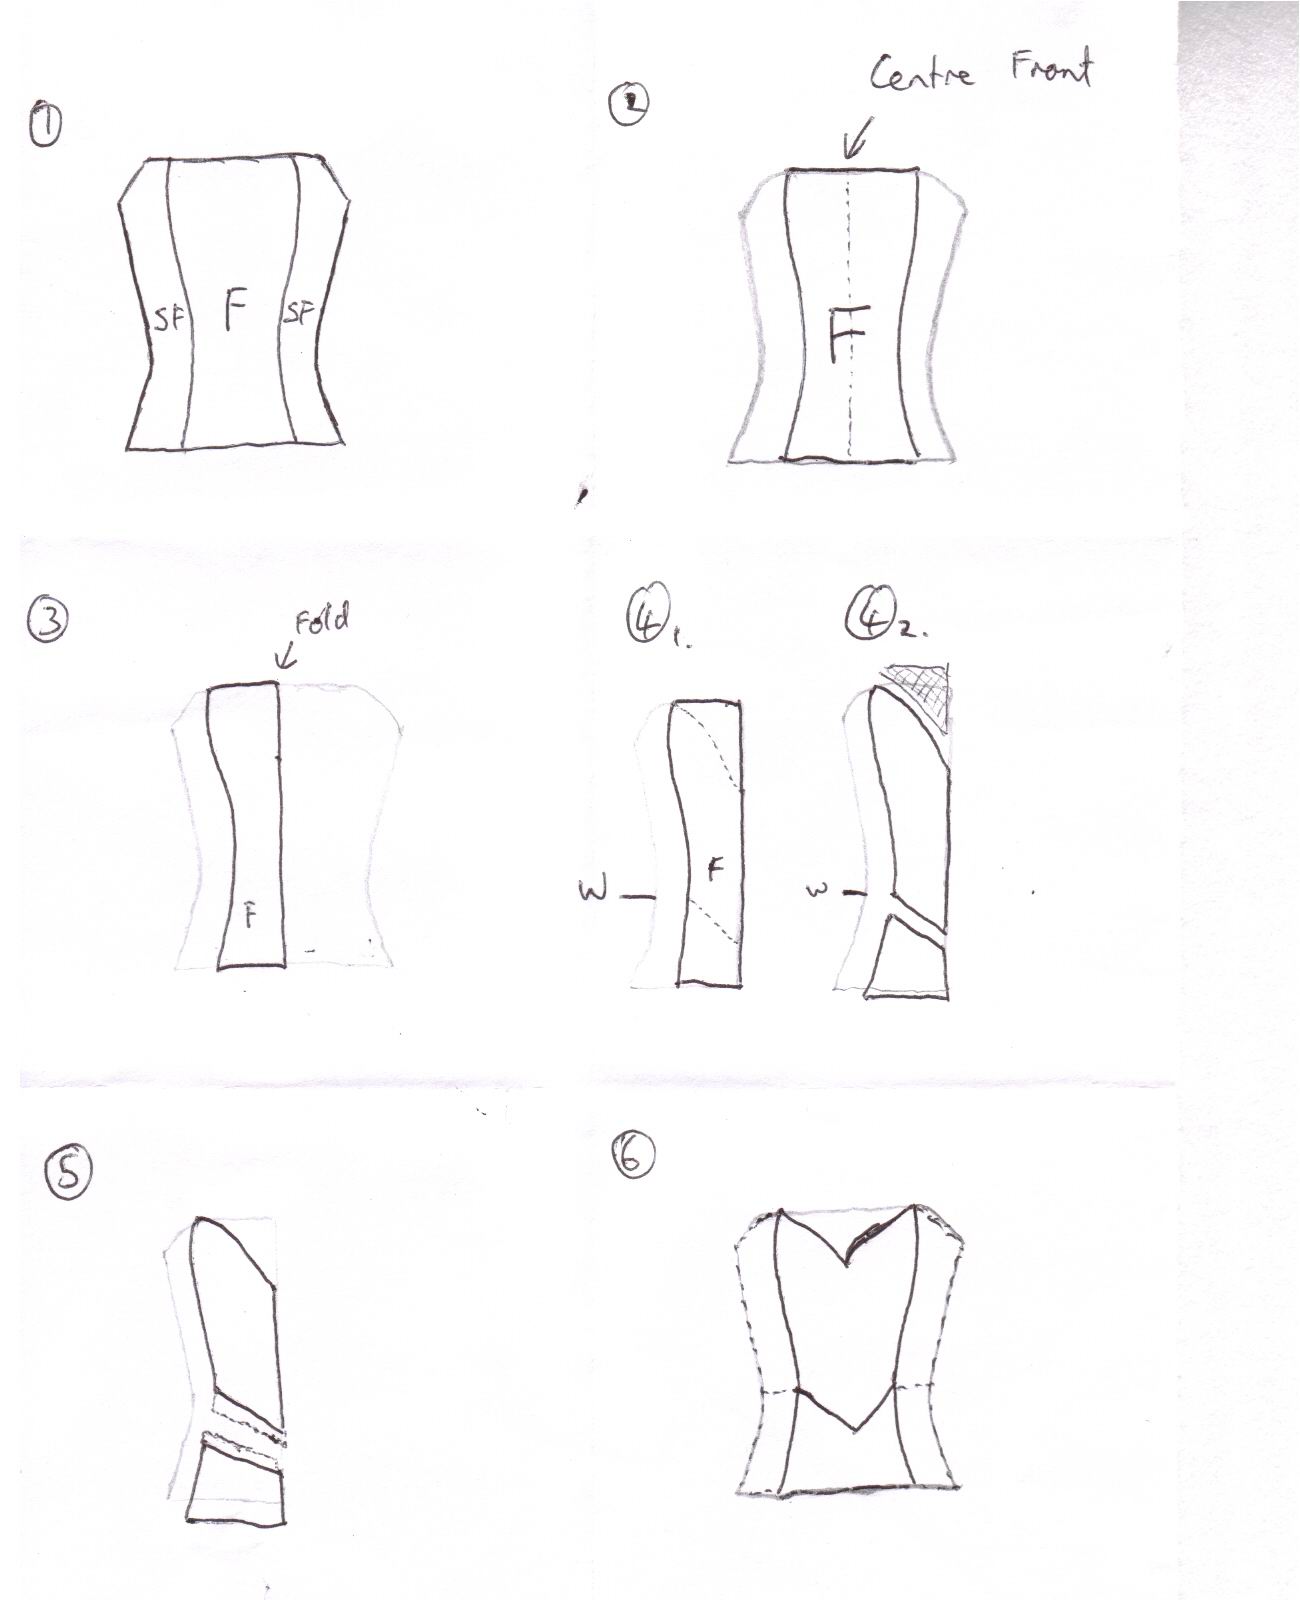 |
| 1) This is your regular princess line pattern. Note the SF (Side front) and F (front). |
| 2) Your pattern piece may or may not appear as the shape outlined in black. If it does, note the Centre Front line- you'll fold this in a minute |
| 3) If your Front pattern appears like this, you already have a fold line. If your F piece appeared line Image 2, please fold it on the dotted CF line now. |
| 4) With a pencil, mark out where you want the neckline to come down to. You will also start shaping the waist- find the natural waist on the pattern, then cut, angling downwards. Discard shaded piece, or use as template for tulle/nude insert. |
| 5) Now that you have cut the original F piece into two pieces, you will need to add 1.5cm or 5/8th of an inch seam allowance. |
| 6) When you unfold the pieces and sew them together, this should be the result. To alter the SF pieces, just fold/cut/add seam allowance in straight line at waist. But please- alter pieces and sew together BEFORE joining SF and F pieces together! |
| I'm afraid I have to disclaim any faults in pattern design. I will admit now, that all of the above sketches are purely theoretical. Whilst I have done much adaptation in the past, I haven't exactly done this before- but it still should work. If not, please let me know, and I'll come up with another way of doing it. Email me at [email protected] (yes, this is just an address for this website), or if you wish to send spam mail, or forwards, please send somewhere else! :D Now you really are ready for the panties. Click here! Click here to return to the main page |