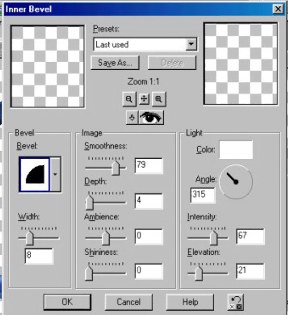
Effects ~ 3D Effects ~ Inner Bevel and use the following settings
Using your magic wand click on the inside of the oval. Now go to
Selections ~ Modify ~ Expand. Expand by 2 pixels. Now go to
Selections ~ Promote to Layer
Now to to Effecs ~ 3D Effects ~ Inner Bevel. Use the same settings as before.
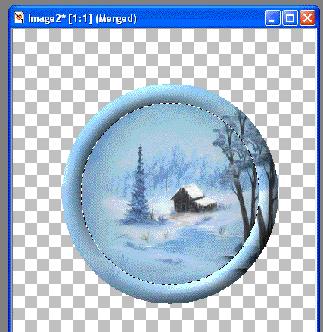
Okay, now we are ready to put our image in the frame. Open the same image you used before.
Right click on the top blue bar and click copy, go back to your frame image and click on the
top blue bar and choose, Paste into Selection.
Now go to Effects ~ Plug in Filters ~ Eyecandy 4000 ~ Gradient Glow.
Use the following settings.
Under the color tab use Black Halo.
Glow width - 12.04
Soft Corners - 66
Overal Opacity - 60
Do not check the Draw only outside selection box.
Now go to selections~ select none. We are now going to add a drop shadow.
Go to Effects ~ 3D Effects ~ Drop shadow. Use the following settings.
Vertical - 1
Horizontal - 1
Opacity - 98
Blur - 7.4
Color - Black
Add the drop shadow a second time only change the vertical and Horizontal to -1.
We are finished. I added my Name!
HOPE YOU ENJOYED THIS TUTORIAL, PLEASE CHECK
BACK FOR MORE SOON.
