|
|
|
|
|
|
|
|
|
|
|
|
|
Gone Fishing..... |
|
|
|
As of July 2002 - not too many photo's directly related to fishing. Will just have to do something about that sad state of affairs. |
|
|
|
 |
|
 |
|
|
|
|
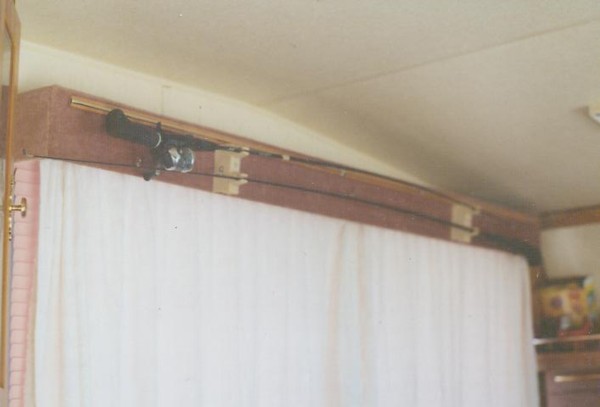
In the lounge (upstairs) area of the 5th wheel trailer. There are window valances on both sides - and they make for a great fishing rod hanging area. These two measure about 5� 6� each. Bought several plastic �four rod� holders and cut them in halves to make things fit. There�s not enough room for the 7 foot (one piece) rod - it hangs below the shelving over the lounge couch. I�m not overly fond of two piece rods.
|
|
|
|
|
|
|
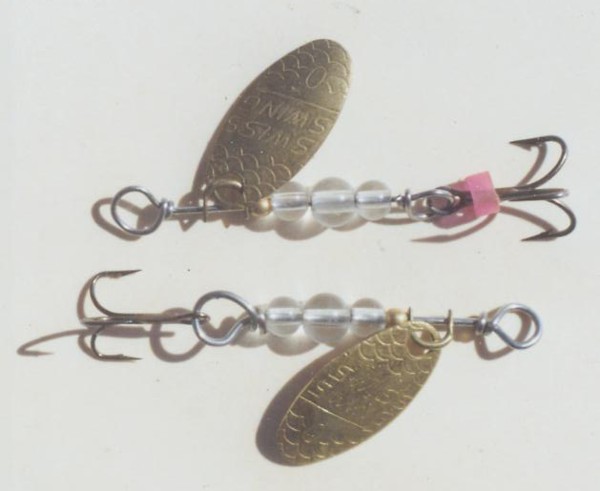
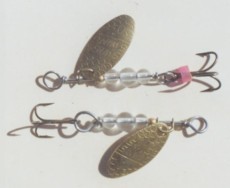
Commercial �in-line� spinners cost about two dollars each. In the early days I lost a bunch of them by fishing where the fish were - in areas of snags and other cover. I needed to cut costs. Discovered that there are several businesses who sell lure components. I was hooked on �building my own�. These spinners are designed to be used in clear shallow creeks, and work very well for me. To give you an idea of size - the clear plastic beads are 3 and 4 mm in diameter. Cost of materials per lure in 1999: 29 cents.
|
|
|
|
|
 |
|
|
|
|
|
|
 |
|
|
|
|
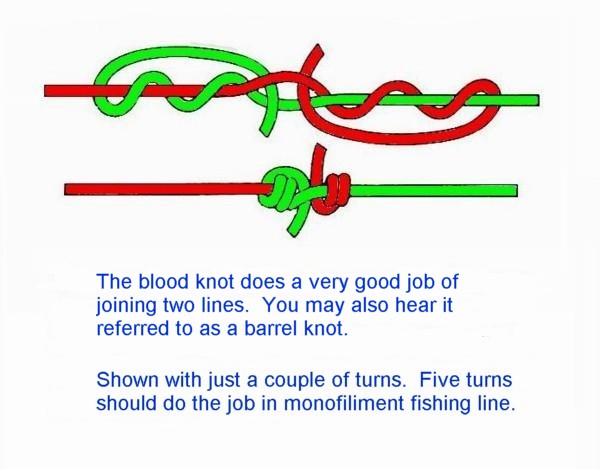
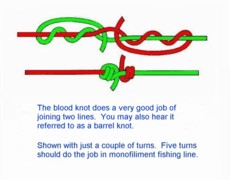
The rod I used most in 2002 was just 30 inches long. Four pound main line on a small closed face spinning reel. I don�t use snap swivels on the lures - even the smallest snap increases the apparent size of the lure by almost 50%. Line �twist� is a problem with the spinner tied directly to the main line. Also, when one is making two or three casts a minute for several hours, line does tend to wear rapidly. Rather than replace all the line on the reel, I strip back till I get to �good� line, then use a blood knot to attach a replacement �working� piece. It saves a few pennies. Hence the home-made jig for tying blood knots.
|
|
|
|
|
|
|
Made with scrap materials and white glue! The main line is clipped in �A�, goes under �E�, and is held at �D�. The replacement line is clipped in �B�, goes over �E� and is wrapped five times around the main line before being held in �C�. Take the end from �D� and wrap it five times around the replacement line. The free end is then passed through the gap between the lines at �E�. The end from �C� is now passed through the �E� gap in the opposite direction. Moisten, then start pulling the knot tight. Clip the ends. It works for me�..
|
|
|
|