|
|
|
|
|
|
|
|
|
|
|
|
|
|
|
|
|
|
|
Some modifications we've made..... |
|
|
|
No consumer product is perfect for everyone as it leaves the factory. We have added some items, and modified others. The following is a sampling. |
|
|
|
 |
|
 |
|
|
|
|
|
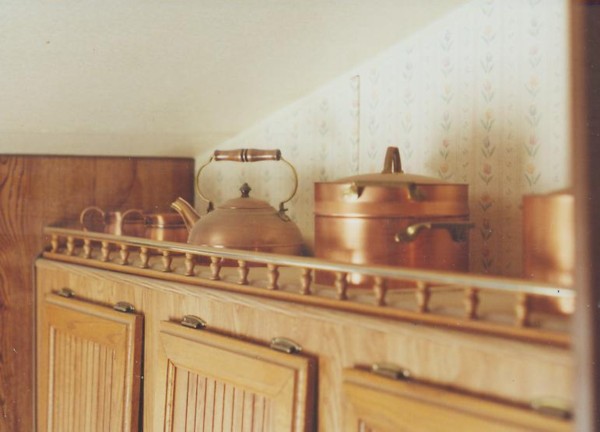
Carole eyed the open shelf above the kitchen cabinets and thought it needed something 'decorative'. She settled on some copper and stainless pans and the water (tea) kettle. No way we were going to take these down and put them back up for every move. Three quarter inch foam board was the answer. One piece large enough to cover the entire shelf, and cut-outs for each of the 'displayed' items. "That white foam looks 'tacky'". It was covered with 'contact' paper. Doesn't work too well on foam, but does cover the stark white. |
|
|
|
|
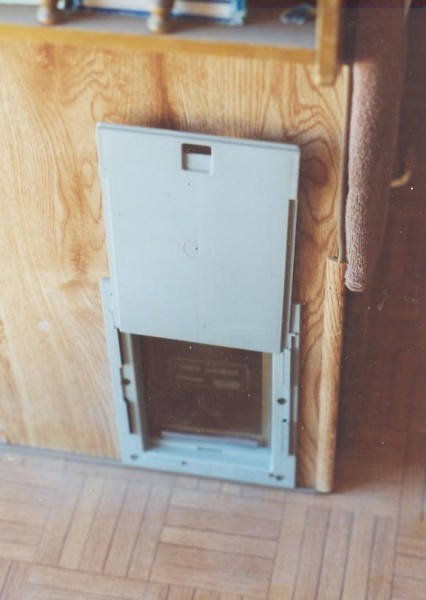
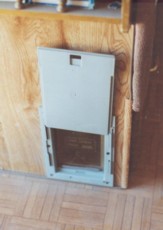
The space under the forward dinette seat can be accessed through the seat, or a drop down door on the inside end, or from outside the trailer. We left the inside and outside doors open to allow our cat to go in and out. Till I stubbed my toe on the inside door once too often. The solution was a 'cat door' in the forward wall of that space. It works like a charm. |
|
|
|
|
|
|
 |
|
|
|
 |
|
|
|
|
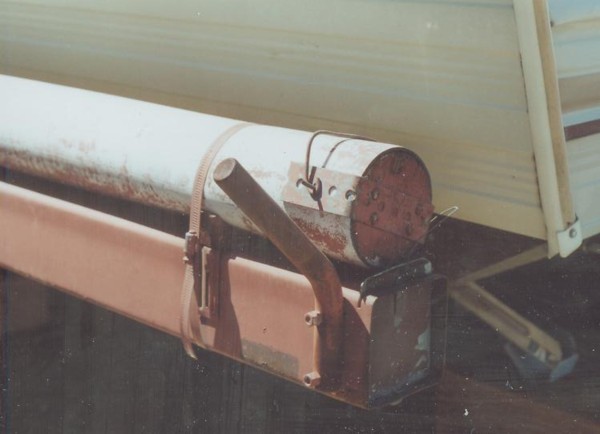
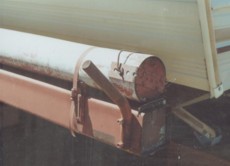
The regular bumper houses the drain hose. Above that - a 4 inch ABS (plastic) drain pipe/tube. Held in place with hose clamps - using two in tandem for the length. Wooden plugs fit in the ends. This tube carries all the metal poles for the awning extension. The bent rod - with a duplicate at the other end - receives the angled 'uprights' of our clothes line. The uprights are the remains of a damaged folding clothes line - already drilled for the lines. The top 'spreader' is made of PVC water pipe. |
|
|
|
|
|
|
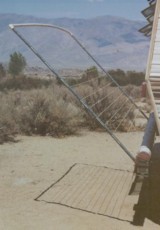
At last! In 2002 at Tuttle Creek Campground (just west of Lone Pine, CA. A free c/g operated by the Bureau of Land Management), I finally thought to take a photo of just the clothes line. It sure beats having to pay for machine drying after doing the laundry.
|
|
|
|
 |
|
 |
|
|
|
|
|
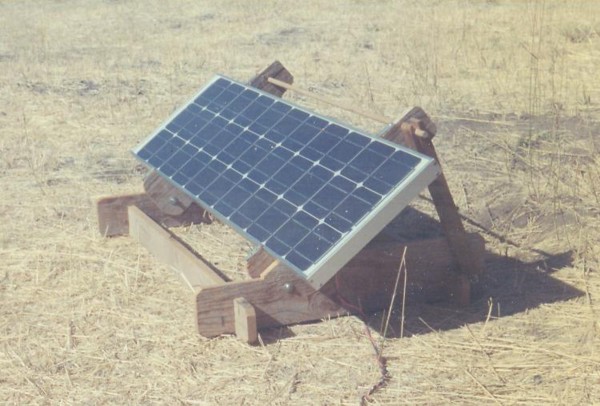
The original: a place-on-the-ground adjustable-angle wood frame panel holder. (Phew!) It could be moved to catch the best light during the day when camped in or near trees. Later: attached two metal legs to set the angle, and just placed it on the ground.
We were in Quartzsite - in a rather rocky area - when it blew over and cracked the glass. Ouch! A pain in the wallet.
Even after being broken, the panel still produced power. It lost an estimated 15% of it's rated output. |
|
|
|
|
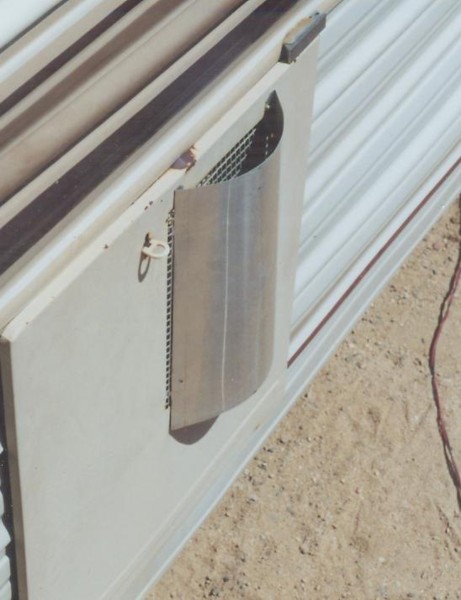
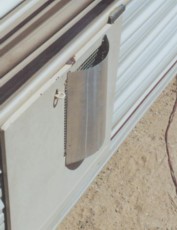
We've all heard it - "The water heater pilot's blown out." This idea came from "10 Minute Tech." in 'Trailer Life' magazine. A sheet of aluminum, with tabs on the sides to fit through the vent holes in the door - the tabs being bent to hold the cover in place. The metal bows out about two inches - allowing plenty of combustion air to reach the burner. What can I say --- it works. |
|
|
|
|
|
|
 |
|
|
 |
|
|
|
|
|
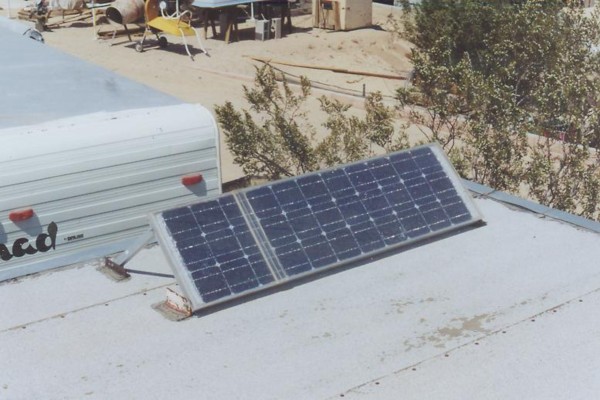
In 2001, California had a "power crunch" with the threat of "rolling blackouts". I used Lexan to cover the face of the panel - held in place with silicone caulk. Didn't have a single piece large enough, hence the seam. Added a controller, a battery, and some wiring.
Inside the cabin: 2 scanners, a multi-band radio, a B&W TV, and an overhead light - all on 12 vdc. For us - economical - as the only thing I didn't already have on hand was the caulk. |
|
|
|
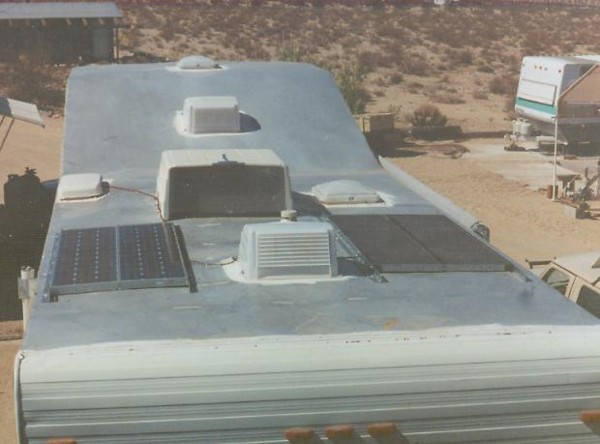
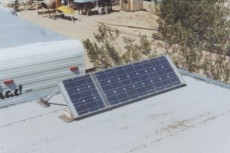
The October 2002 set-up for the PV panels. Two 35W panels to Port and two 22W units to Starboard. Installed two days before we left to go on vacation. I managed to introduce an intermittent short circuit to the metal roof. That took a while to find and correct.
The next step is to modify the mounts so that the panels can be tilted to various angles to gain the maximum amount of sunlight at any camp site and with the trailer facing in any direction. Fun!
|
|
|
|