 Building an
Atari 2600 Indy 500 Controller
Aquí en español.
 In this page I show how I built a
controller to play with the Atari 2600
Indy 500 game. This game can’t be played with the standard controller, but
only with its own special one. The working of such a controller was a mistery
for a long time, until I saw the diagram on a WEB site, and I finally was able
to start the design of an alternative controller. I show the entire project’s
development in this page.
In this page I show how I built a
controller to play with the Atari 2600
Indy 500 game. This game can’t be played with the standard controller, but
only with its own special one. The working of such a controller was a mistery
for a long time, until I saw the diagram on a WEB site, and I finally was able
to start the design of an alternative controller. I show the entire project’s
development in this page.
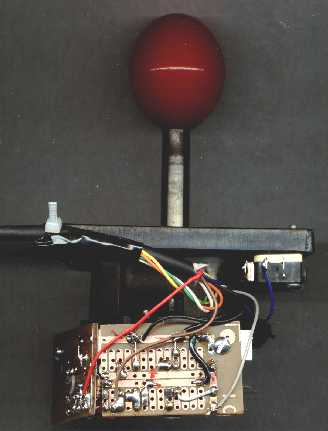
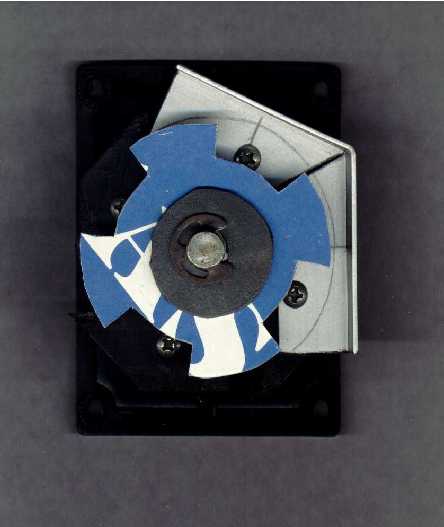
To the right you can see
two pictures of the controller, front side and back side. I used an old Wico
stick with fixed shaft in a way that only the shaft can rotate. At the right
extreme you can see the acelerator microswitch, and below you see one of the boards
that supports a slot optocoupler.
Now it’s clear it’s an
optical system, in which I used two slot optocouplers, activated by a toothed
cardboard disk.
Well, the important thing
is it works, and how! I can play the Indy 500 at last, after years of being in
possession of the cartridge.
 And, of course, it’s Made in
Chile.
And, of course, it’s Made in
Chile.
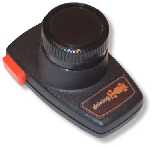
Here you see a game
screenshot, and an original’s controller:
How
does it work?
The working’s mistery was
unveiled when I saw the following diagram at internet:
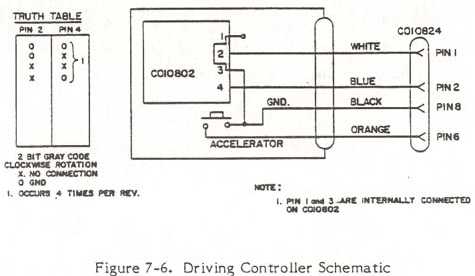
You can infer that it’s
enough by applying 2 bit Gray code to the Atari connector pines 1 and 2, a code
that is repeated 4 times per revolution. Then, there’s the option of using some
mechanical rotational system that generates such a code. Thanks to my
experienceness in arcade steering wheel optical systems, I could easily see the required system.
Mechanism
Design.
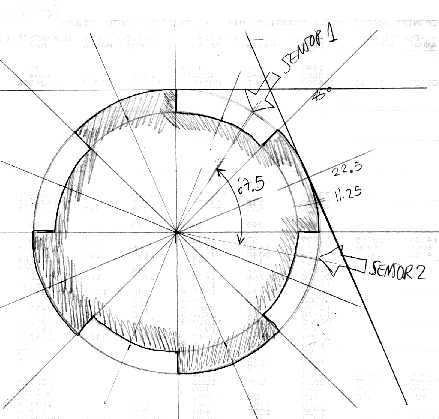
The Gray code here
requested can be generated by using a toothed disk that goes through two slot
optocouplers. In this case I used the H21A2. Here is the datasheet. The disk must have four tooths and
the optocouplers must be separated 67.5 grades, according the following scheme:
Next, I used a old Wico
stick to which I fastened the shaft in a way that only could be rotated.
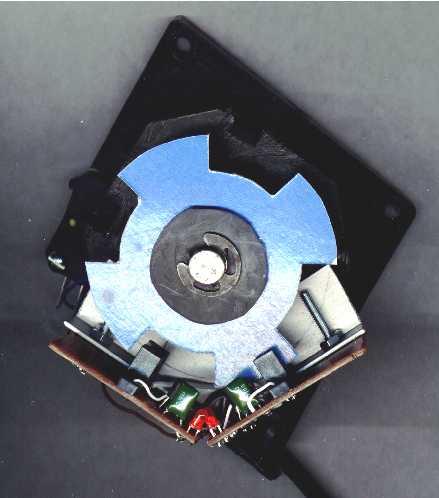
It’s enough by rivetting two washers at
each stick extreme. I cut the switches supports and I screwed an aluminium
angle with a 67.6 grades bend, in a way that the optocouplers stay in the right
position (see photo).You can see a preliminary design cardboard disk.
You gotta be witty in order
to hold the disk, by inserting washes or tiny plastic tubes in a way that it
stays firmly, but it can rotate. Notice that just under the E-ring there
is a rubber washer, that allows the disk
to rotate along with the shaft.
This is some kind of raw,
but take into account it’s only a prototype.
The
electronic part.
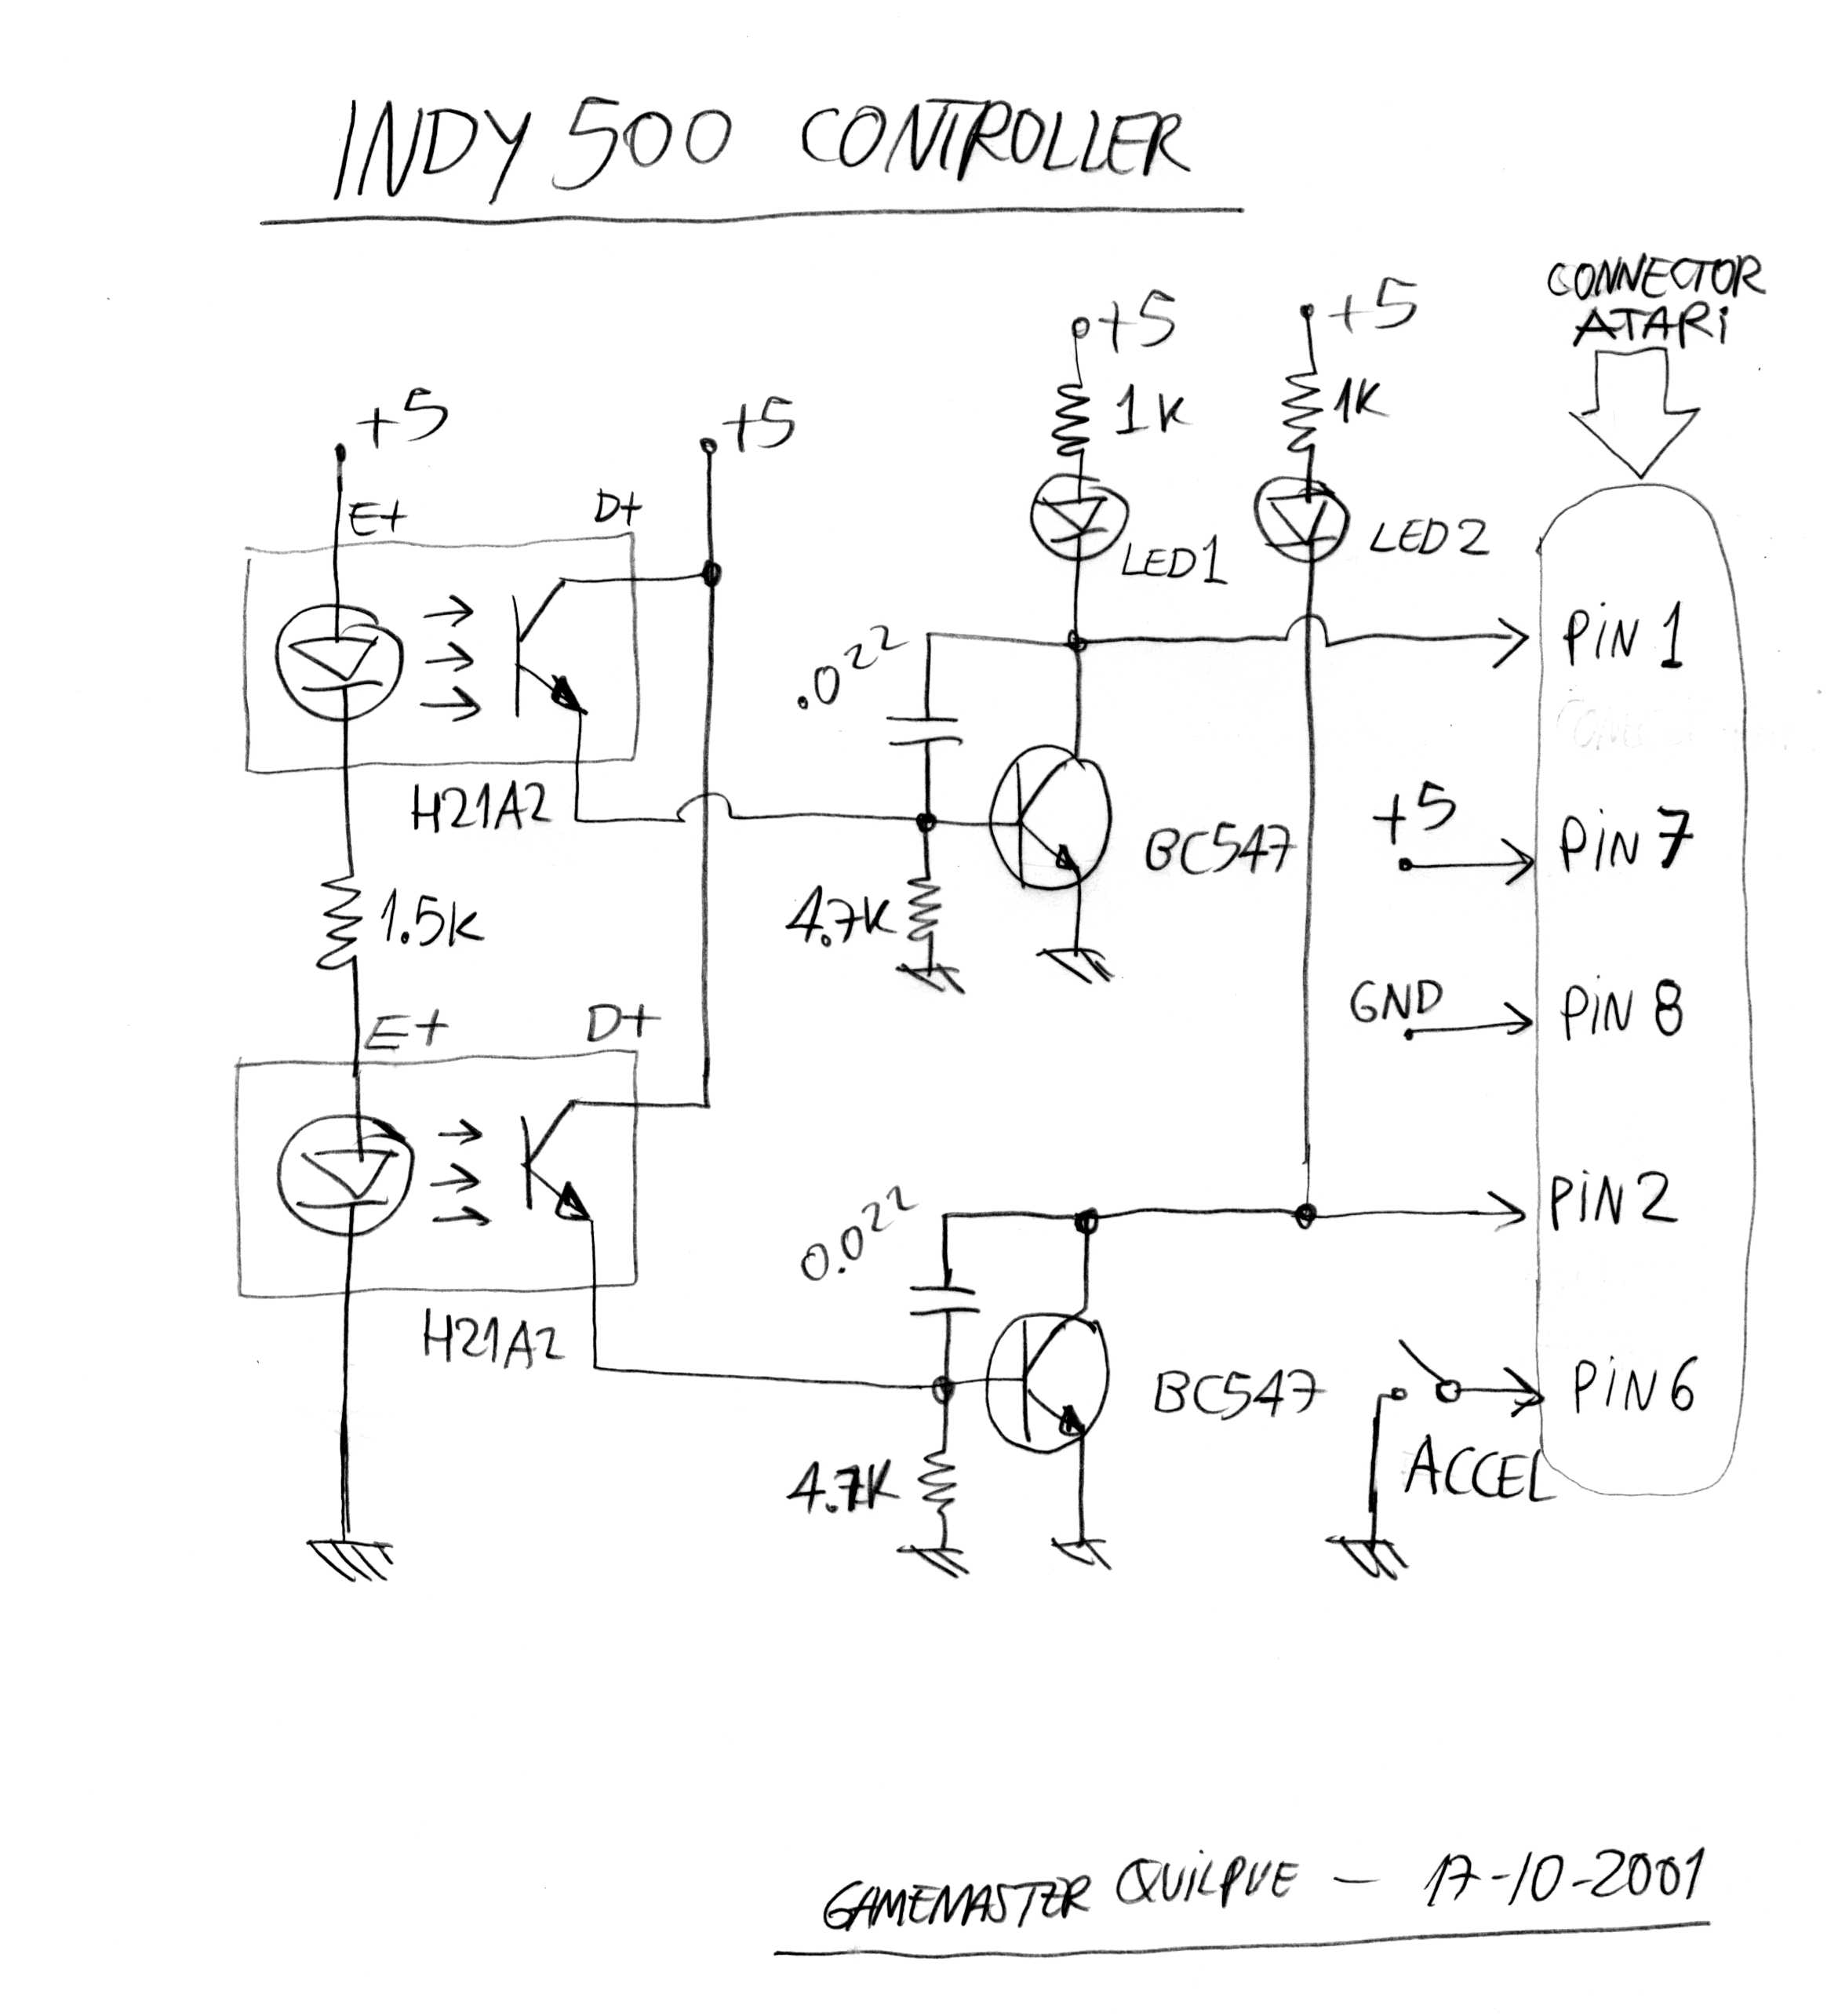 Next, I designed the main
circuit, using standard designs for these optical systems.
Next, I designed the main
circuit, using standard designs for these optical systems.
Parts List:
BC547 x 2
LED x 2
H21A2 x 2
R 1K x 2
R 4.7K x 2
C 0.022 uF x 2
Connector 9 pin
Cable 6 hilos
Appropriate print board x 2
Notice the circuit was assembled
on two boards, one for each optocoupler, in a way they can be positionated in
the right angle. I also installed a microswitch for accelerating (see below
photo at the right). The final assembling look can be appreciated in the
following photos:
Once the assembling is done,
the LEDs turn on and off can be summarized with the following table:
|
Word Nº |
Pin 1 Atari |
Pin 2 Atari |
|
1 |
0 |
0 |
|
2 |
0 |
1 |
|
3 |
1 |
1 |
|
4 |
1 |
0 |
|
5 |
0 |
0 |
|
6 |
0 |
1 |
|
7 |
1 |
1 |
|
8 |
1 |
0 |
|
9 |
0 |
0 |
|
10 |
0 |
1 |
|
11 |
1 |
1 |
|
12 |
1 |
0 |
|
13 |
0 |
0 |
|
14 |
0 |
1 |
|
15 |
1 |
1 |
|
16 |
1 |
0 |
A nice Gray code.
The final prototype working
is perfect. Very easy to drive, soft and precise. It’s amazing given the level of
the technology at the times this game was conceived. Compared to some
“marvellous” today’s driving games of
PSX, N64, DC, etc. (some of which are non-playable), this controller
design is a master work.
I haven’t tested this
controller in an emulator, though if it works in the original machine, it
should work in an emulator too.
If someone decides to build
this controller, please write me and comment his results.
Some sites where I got the
necessary information for this project (there isn’t almost even):
http://members.aol.com/~Atari7800games3/drivingschematic.jpg
My thankfulness to
Khryssun, for asking for it, and to Mitch for publishing it.
Comments, critics,
congratulations, disqualifications or whatever message to [email protected]
You can visit my other
pages:
http://es.geocities.com/gamemasterquilpue/myownataricart.htm
http://www.ericzone.50megs.com
Quilpué, 19/10/2001
