 |
|
|
|
|
|
|
|
|
|
|
|
|
|
|
|
|
|
|
|
|
|
|
|
|
|
|
|
|
|
|
|
|
|
|
|
|
|
|
|
|
|
|
|
|
|
SeaLand Traveler Lite Toilet Installation |
|
|
|
 |
|
|
|
 |
|
Project - replace existing plastic toilet with a porcelain RV toilet. |
|
|
|
|
 |
|
|
|
|
|
|
1. Turn off water source to RV
2. Remove existing Aqua Magic IV toilet by disconnecting PEX water connection.
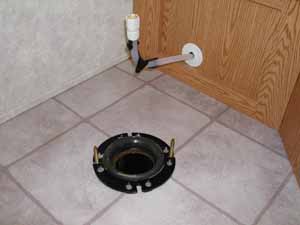
3. Remove nuts securing toilet and lift toilet from flange. |
|
|
|
|
|
|
|
|
|
 |
|
|
|
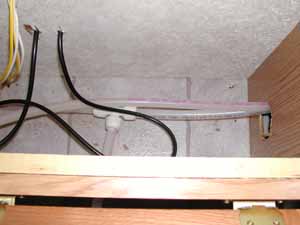
Note: The old PEX water connection tubing was not long enough to reach the new toilet connection, so, I had to replace with a longer section of PEX tubing purchased at my local RV dealer. I was able to reuse the existing connectors. I had to open the bottom of the cabinet behind the toilet to replace the PEX tubing. |
|
|
|
|
|
 |
|
|
|
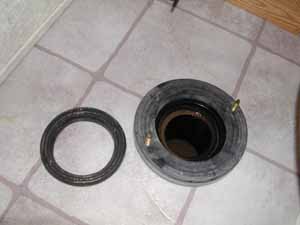
4. Remove the old rubber seal from the toilet flange. Install new seal.
Picture: Old seal removed and new seal installed on flange.
Picture: Hardware supplied with new toilet. |
|
|
|
|
 |
|
|
|
|
|
|
|
|
 |
|
|
|
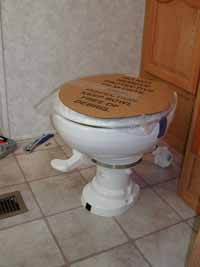
5. Place new toilet on to flange and over the brass bolts.
6. Tighten toilet to flange using supplied nuts.
Note: I reused the existing nuts and bolts since they were in new condition. |
|
|
|
|
 |
|
|
|
|
|
|
|
|
 |
|
|
|
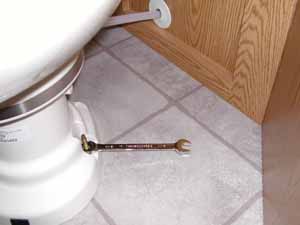
7. Reconnect water supply using PEX tubing and connectors.
8. Turn on water supply and check for leaks.
Note: The PEX connctors only need to be finger tightened.
Note: Complete installation instructions are included with the new toilet. |
|
|
|
|
 |
|
|
|
|
|
|
|
|
 |
|
|
|
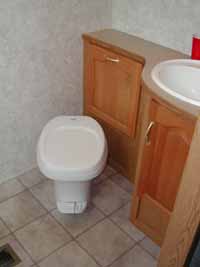
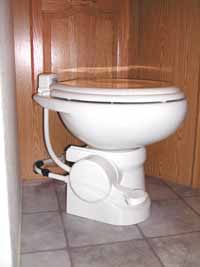
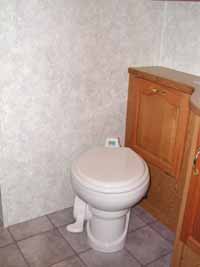
New porcelain toilet is ready for use. |
|
|
|
|
|
|
|
|
|
 |
|
|
|

|
|