1) A power switch with LED was added to cut power to camera & monitor when not in use
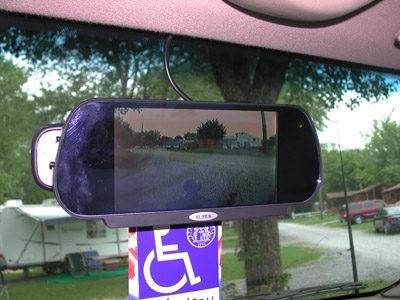
2) To stop vibration, the factory mirror is removed and the LCD monitor is afixed to a mirror mount purchased at a salvage yard

| Rear View Camera | |||||||||||||||||||||||||||||||||||||||||||||||||
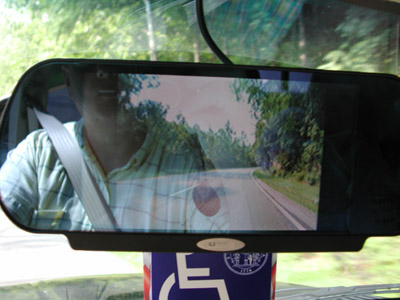
| Several months ago I installed a VR3 backup camera system with a 2.5" LCD screen. After only a few months, the monitor failed. I decided to upgrade the backup camera system with a new LCD screen that is inside a rearview mirror. A new camera was included and was added to the rear of the coach. The license plate camera that came with the original backup camera system is still in use on the truck. A remote control allows you to switch between the two cameras. Here are a few installation pictures. | |||||||||||||||||||||||||||||||||||||||||||||||||
|
|||||||||||||||||||||||||||||||||||||||||||||||||
|
|||||||||||||||||||||||||||||||||||||||||||||||||
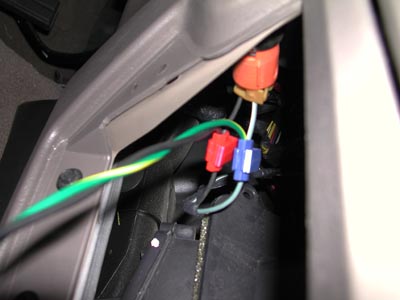
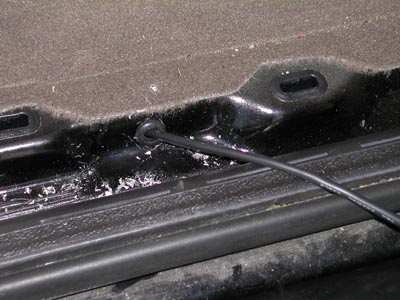
| Wires run in wire trough under door sills. Rubber gromets used to protect wires. | |||||||||||||||||||||||||||||||||||||||||||||||||
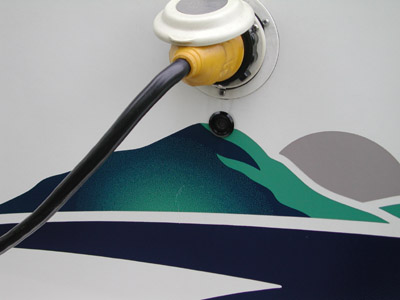
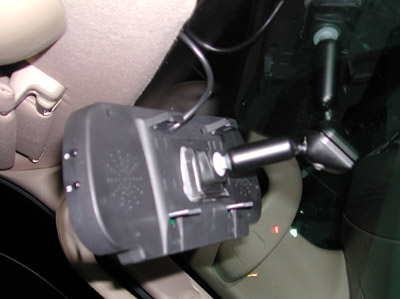
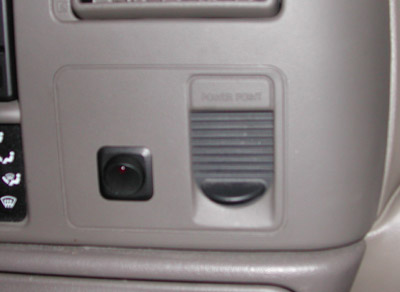
| 12 volts from power port wire under dash | |||||||||||||||||||||||||||||||||||||||||||||||||
|
|||||||||||||||||||||||||||||||||||||||||||||||||
|
|||||||||||||||||||||||||||||||||||||||||||||||||
| View from license plate camera - note the hitch ball is visible for easy hook-up | |||||||||||||||||||||||||||||||||||||||||||||||||
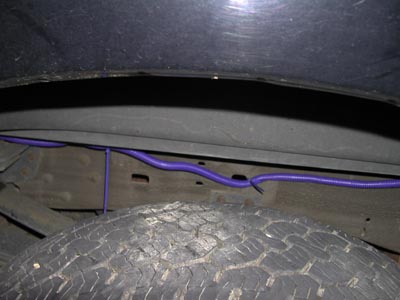
| Wires are run through conduit under truck bed and tied to frame using wire ties. | |||||||||||||||||||||||||||||||||||||||||||||||||
|
|||||||||||||||||||||||||||||||||||||||||||||||||
|
|||||||||||||||||||||||||||||||||||||||||||||||||
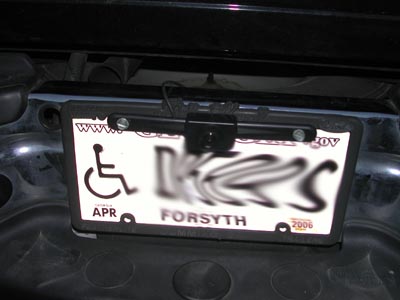
| License plate camera on truck | The camera is installed in the fiberglass just below the power connection on the back of the coach. 12 volt power was obtained from the running light circuit on the trailer. Running lights are used day and night while towing. | ||||||||||||||||||||||||||||||||||||||||||||||||
|
|||||||||||||||||||||||||||||||||||||||||||||||||
|
|||||||||||||||||||||||||||||||||||||||||||||||||
| View from coach camera while on the road. I can clearly see when I have cleared a vehicle behind me when overtaking. | |||||||||||||||||||||||||||||||||||||||||||||||||
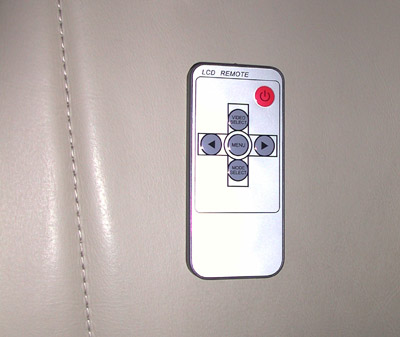
| Remote Control | |||||||||||||||||||||||||||||||||||||||||||||||||
| Update 8-21-2007: Pictures Below 1) A power switch with LED was added to cut power to camera & monitor when not in use 2) To stop vibration, the factory mirror is removed and the LCD monitor is afixed to a mirror mount purchased at a salvage yard |
|||||||||||||||||||||||||||||||||||||||||||||||||
|
|||||||||||||||||||||||||||||||||||||||||||||||||
|
|||||||||||||||||||||||||||||||||||||||||||||||||
| Switch | |||||||||||||||||||||||||||||||||||||||||||||||||
| Salvaged Mirror Mount | |||||||||||||||||||||||||||||||||||||||||||||||||
|
|
|||||||||||||||||||||||||||||||||||||||||||||||||